

Wednesday, June 29, 2011
A Creative Birthday Card!
Monday, June 27, 2011
Fireworks!

Stay Crafty!
Friday, June 24, 2011
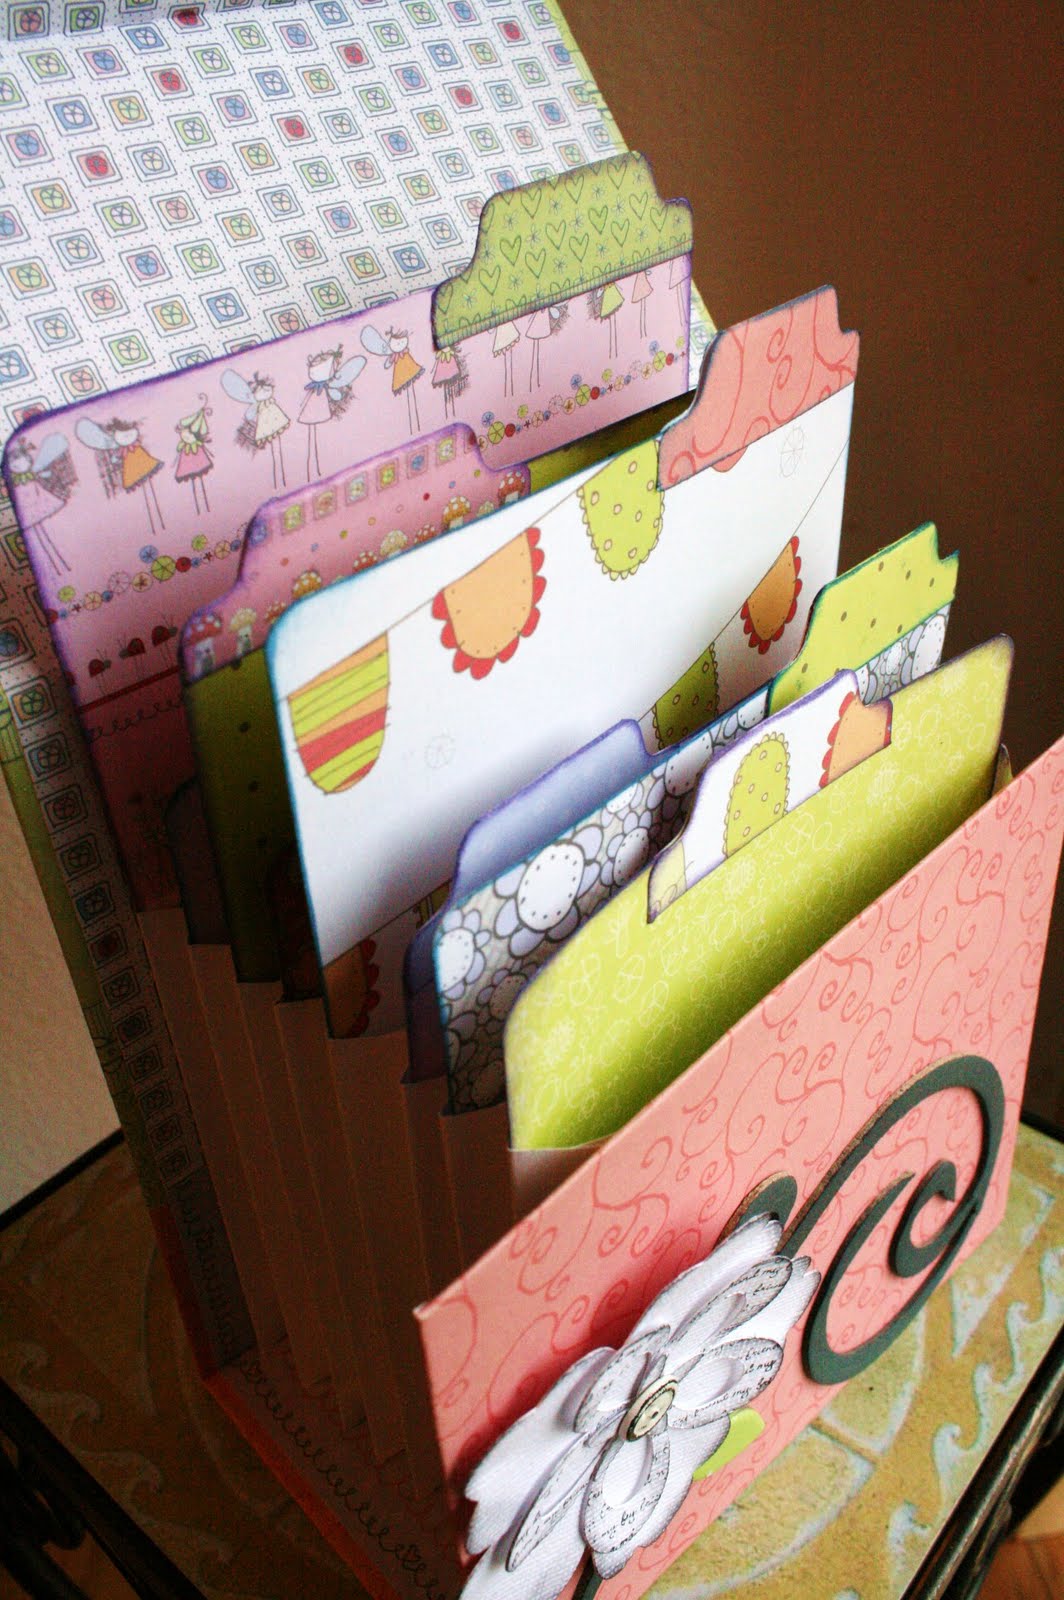
An Explosion Album for the 4th of July!


What do you think? I made another one in a birthday theme with some different features. I will post that later. If you are interested, I will post a tutorial!
Stay crafty, my friends!!!
Wednesday, June 22, 2011
Box Art Mini Album with my June Counterfeit Kit
I was surfing around on 2 Peas in a Bucket and I came across the most wonderful little project. It was created by aidaville and you can see her project here. I followed the links to her blog, Antique Chik, and you can visit it here. She doesn't have a tutorial. But, I was so intrigued that I looked at it and I gave it my best shot. Here is my interpretation of her amazing box, she calls "Box Art".
 I used scraps from my June Counterfeit Kit and a gift box that held a gift card that I got for Christmas.
 I added the Tim Holtz door knob, Creative Imaginations word stickers, hinges for the back, and the pink pearl bling.
 Everything else is from my June Kit.
 When you open the box, you can do a little "shadow box" scene...
 Then I added a little accordion fold mini album tied with a little bow. I think this will make a cute gift!


Monday, June 20, 2011
Weaved Paper Bow


Friday, June 17, 2011
Home Sweet Home Album


Stay Crafty, My Friends!
Monday, June 13, 2011
Photo box

I found another great class by Marion Smith for Prima on Ustream
On the link you will find a full tutorial on how to make this great project. For mine I used Heidi Swapp's Sparkle stack, adding flowers made with the Cricut and American Crafts. The chipboard swirls are from Maya Roads embellished with a little glimmer mist!

Marion used Kraft envelopes for her pockets and I used cd envelopes. The cards were created with double sided papers from the line and I punched tabs with the scraps! The cards are now ready for notes, journaling or photos.
Overall this project was pretty easy to do, but I would recommend watching her video first, taking notes on measurements etc. then complete project. Have fun!
Saturday, June 11, 2011
A Sweet Life Mini Album
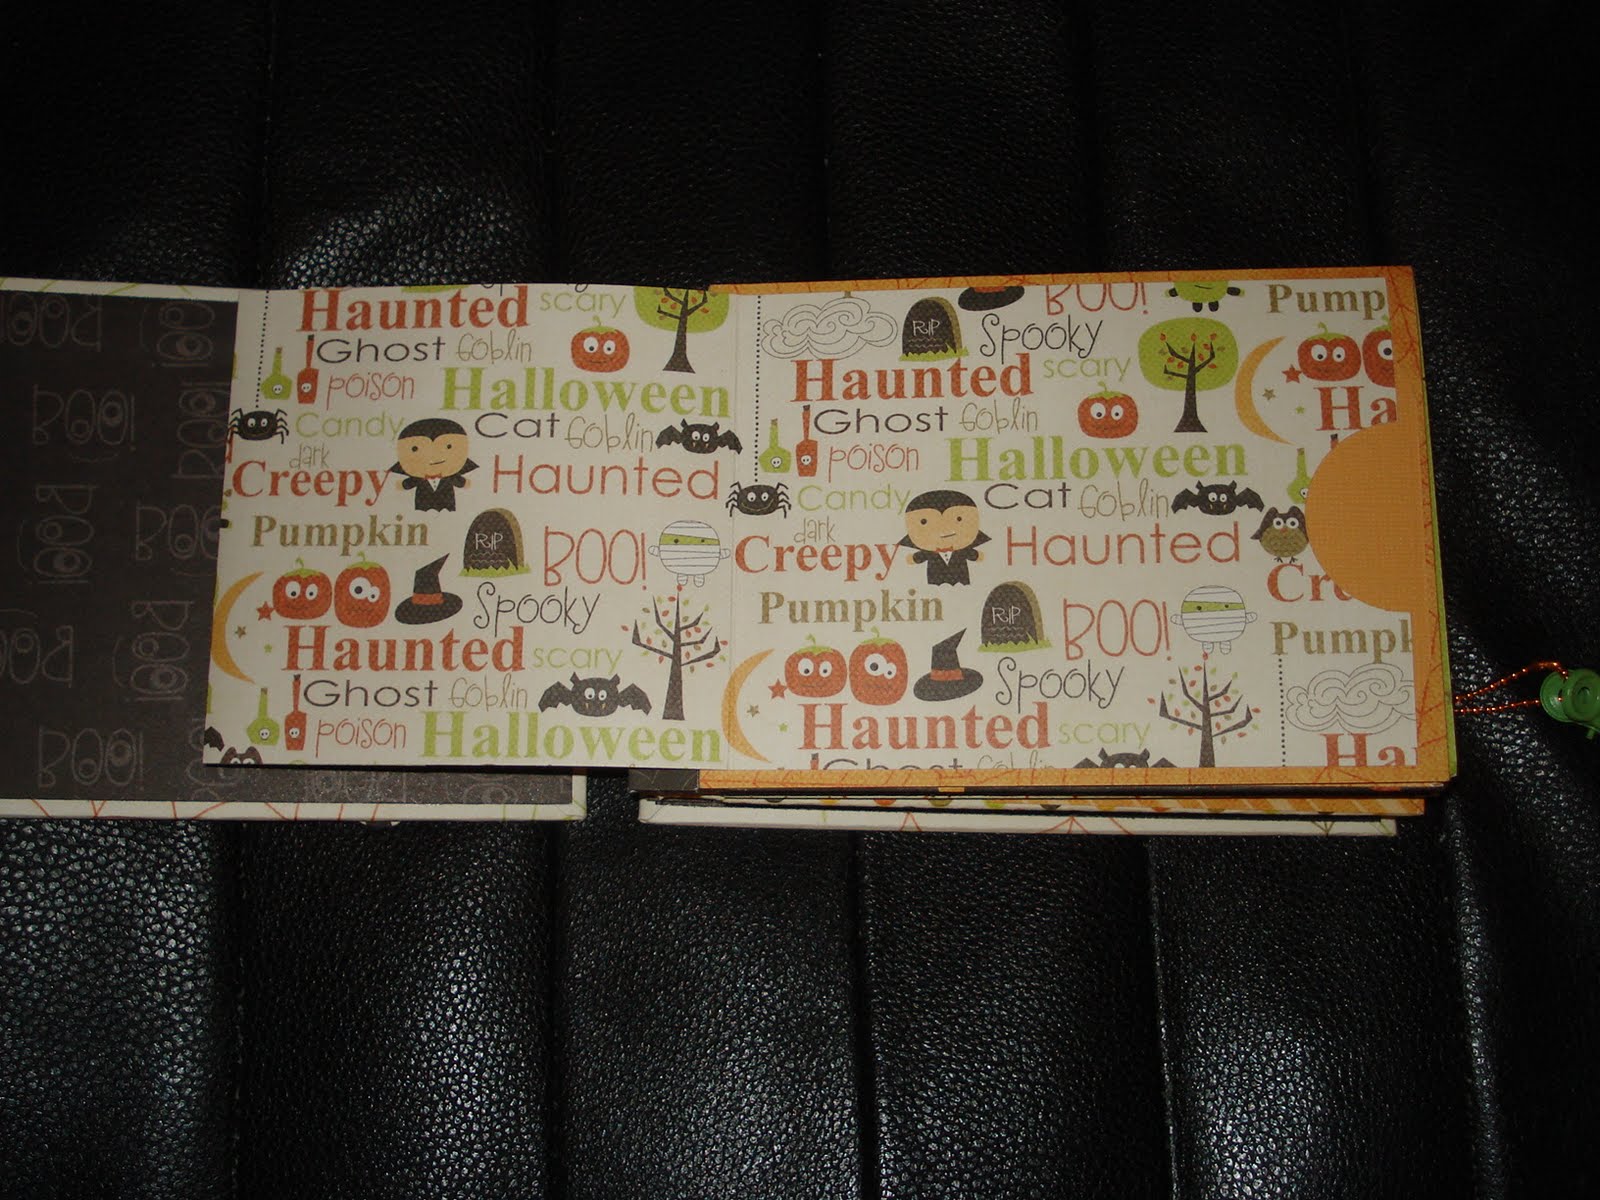
Here is my first project using my June Counterfeit Kit! I made this mini album based off of a video that I saw here on You Tube. She based it off of Elsa from Just a Few Designs. Elsa has a video here you can check out. I made Elsa's version in a Halloween theme right after she made it. It is the coolest fold, she called it the "One Page Binding Mini Album"...


 Her mini is very cool and each page is made from one 12x12 paper that is cut and folded in such a way to create a cool base that you add things on to for more interaction.
 The following pictures show how many things one "page" has.
 Flap and pockets and tags, OH MY!
 This is the first page turned...and the next page...
 And this shows the flaps opened again. I am going to use each page for each year of my Grandson's Halloween pictures...I can put his first 6 years in here!
Now, for klipngirl's version that I made using my counterfeit kit...
 I used my Tim Holtz die to make the letters and edged them with a glitter pen. How do you like the mirrored butterflies?
 OK...each page is adhered to a piece of black chipboard. The base pages are made from black cardstock. I used my papers from the kit to create all of the cool pockets and folds. There are tags everywhere.
 This part flips up...
 Then the next part of the page flips up. More pockets created. More tags for pictures and journaling.
 And it flips up again...
 I love this paper!
 So then you turn the page, and I put a picture mat on it, then for the next page, and another bunch of pockets and folds!
 I made three pages. total. I bound with simple binding rings.
So, What do you think?
Stay Crafty!!


Now, for klipngirl's version that I made using my counterfeit kit...


So, What do you think?
Stay Crafty!!
Subscribe to:
Posts (Atom)