WELCOME!!

We are so glad you are here! We love making and sharing our projects, and we are excited to have you visiting our site. Please leave us a comment and let us know what you think!

Jackie and Michelle

Followers

Wednesday, September 30, 2015

Halloween Apothecary Cabinet

 I made an apothecary cabinet for my Halloween Decorations this year.  I used a tray from Recollections, and lined it with paper by Moxie.  I inked all of the edges of the papers with distress ink by Tim Holtz.
 I used a glitter pen to highlight the spider web design in the paper, and another black glitter pen for the spiders on the paper.  I had some dimensional stickers by K and Company and Jolee's that I added in various spots in the trays.  The bottles are by 7 Gypsies, and I used labels by 7 Gypsies to label them.  I added them to the trays as well.
It's hard to see, but I also cut out some bottles from paper that was leftover, and used foam tape to make them stand out, and adhered them to various spots on the trays.

It turned out very cute, I think.  What do you think???

Stay spooky, my friends!

Saturday, September 26, 2015

It's Halloween Time!!!

OMG!!!! My favorite time of year is near and I am getting ready for it early!  I found out that my daughter and her family will be visiting and I have to get ready.  I can't wait, all of my kids and grandkids will be here in the same house for Halloween!!!  I'm so excited, can you tell?

 So speaking of time…I bought this pattern a couple of years ago, and never made it.  This year is the year.  I decided to tackle this project and I am glad I did!!!
 My dining room (now that I have one) is going to be all decked out, and this little beauty will be sitting in the corner of it.  I love how it turned out!!
 The top portion is the clock box and it really does work.  I LOVE THIS!!!  I think, yes, I really think that I need to make another one for Christmas…yes, I do.
 The mid section houses the pendulum.
 The bottom portion is the tombstone box, which houses a mini album.  The pattern for the mini album comes with the clock tutorial.  I made a closure with some grunge board and magnets.  I embossed them with silver and used Stickles to put in the "nail" holes.
Here is a picture of inside the box.  I decorated the clock with a few spiders, mice and a skeleton. I went into my stash and found the flowers.  As a matter of fact, I was able to raid my stash and I was able to make this only having to buy the clock to finish it.

Here is a list of the products I used:

Papers:  Recollections and Paper Accents
Bling, Mice, Spiders, skeleton:  Unknown
Sticker Die Cut:  Recollections
Knob:  7 Gypsies
Flowers:  Petaloo, Recollections
Stickles:  Ranger

Stay spooky my friends!!

Wednesday, September 23, 2015

A Birthday Card for My Nephew, Max

 Ok, so it's a box really, but it is for my nephew's birthday.  I made it using a file I got from Silhouette, and it worked out beautifully!
 It opens up and has a slot for a gift card to be put in.  I made a little banner in the lid to write a little message.
In the slot I put a coin envelope that I decorated, and later wrote another message on it.  I tucked in his birthday money, and put it in the box.  I tied it shut with a ribbon in a dark green that looked wonderful with this papers color scheme.

If you have a Silhouette this cut file was great.  I highly recommend it.

Stay crafty, my friends.

Saturday, September 19, 2015

August Planner Pages and a Wonderful Pen Find!!!

 Well, I know it's September, and I know I'm late, but here they are, my August pages.  I just wanted to share with you how I am altering my Create 365 Happy Planner and using it to suit my needs.  Above is the monthly planner, filled out.  I am trying to be better about writing down my work hours, so this seems to be a good spot for that.
 On the back of the calendar are the start of the planner's vertical planner pages.  I don't like that format.  It just doesn't work for me.  So, I used a little washi tape and covered the headings, I also used a bit of graph paper to cover the day headings.  I was thinking I would use this for some sort of something.  However, I didn't.  I haven't figured out what to use it for yet.
 The dashboard is cool, a look ahead to see what you need to get done to prepare for the next month as well.
 Again, I covered the weekly page with graph paper and washi.  Maybe I'll figure out what to do with it.
 My pages.  I did write a post and include a link for one of my wonderful readers to print out this format for your own use.  (Yes, I did figure out how to do it!!)  I used my usual stash of stickers to decorate the pages, along with MAMBI's number stickers that come with the expansion pack.
 Another week...
 And another...
 And another...
I really like my own format…so I just print it in the size that fits this planner format.  I do love the bigger pages…more room to write and decorate.

I did have some problems with the stickers that MAMBI sells.  I could NOT find a permanent marker that would not smudge on them.  I tried several kinds, and had given up that I could use these stickers in my planner without using scissors to them, but I tried yet another permanent marker and it WORKED!

I found these in the craft section at my local Fred Meyer.  I have no idea who else sells them, but they write on the MAMBI stickers beautifully and do not smudge at all!!  YAY!!  Yes, sometimes it is the little things…pens that write well and work like they are supposed to make me happy.

That's all for today…Stay organized, my friends!

Saturday, September 12, 2015

"Click" Album, Part 4, all Done!

 So, here it is, the finished album.  I am so excited about it.  I think it turned out super cute and I just love it.  I love the camera theme, and the colors are awesome.
 The end of the post I will supply a list of what I used for the project.

 I also wanted to add a link to the video I found, by My Creative Spirit, on how to cover rounded corners.  I have never done this before, and wanted to try it for this book.  It worked great!  I am going to have to do that some more.
 Here is the string envelope assembly opened.  I created a journaling card from the paper collection to add to it.  I did one for the back page envelope as well.

 This shows a large tag in the large belly band, and a small tag in the small belly band.  I decorated both sides of this small tag.  The larger ones are blank.

 This is the large tag in the page pocket, covered with patterned paper.
 The folded page opened.  On all of these I covered them with papers and added a small embellishment with stickers.
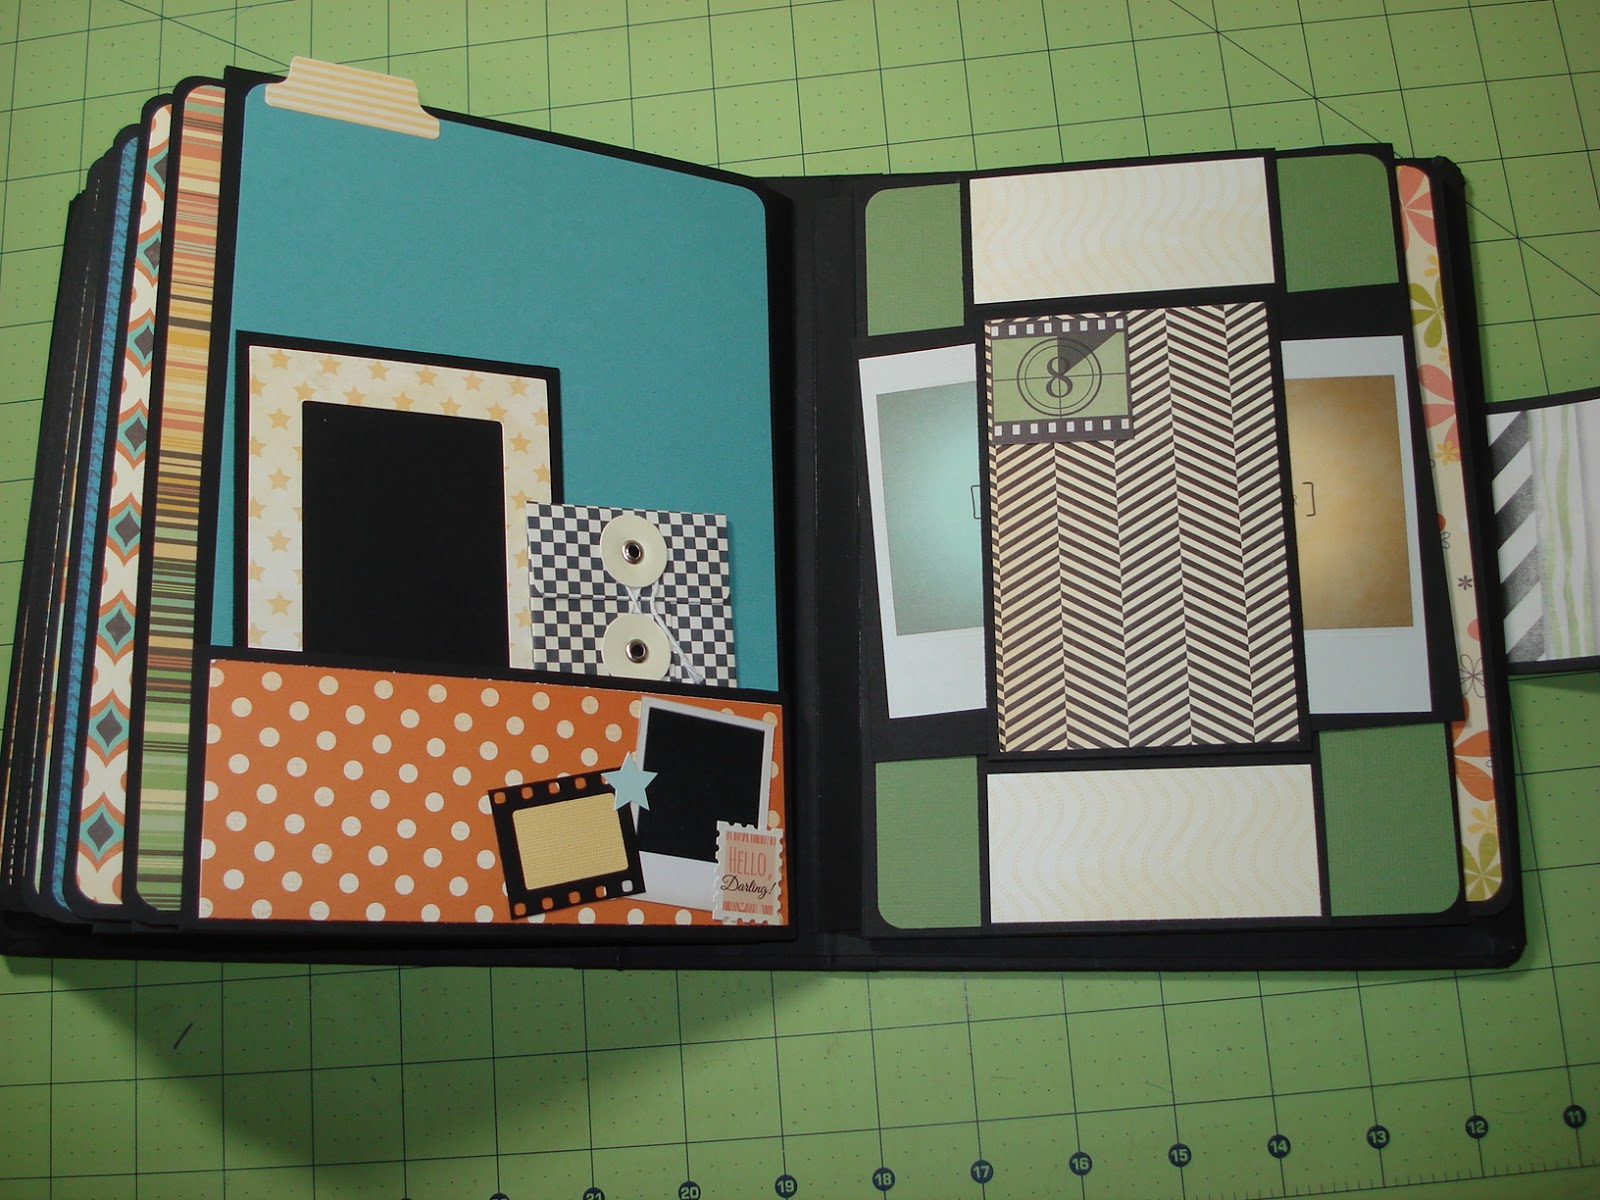
 The back of the page with its pocket on the left, and the next page on the right. I added a large card stock tag, and a smaller tag to this pocket.  Then I punched a filmstrip piece and glued it to create a smaller pocket on the pocket.

 The back of that page, and the next.  The paper collection had a collection of embellishments that included smaller string envelopes.  I used them throughout.    The mini polaroids are from a DCWV paper collection.  They fit perfectly with this collection.
 I used the filmstrip punch to create a border for this "My Favorites" cut out.

 I am going to try to do a video so that you can see all of the fun in this album.

 Don't you just love the colors?
The last of the 8 pages, and the back cover string envelope.

Here is the list of the supplies I used:

Papers:  "Memories Captured", Fancy Pants; DCWV; October Afternoon; Cosmo Cricket
Cardstock:  Bazzill and Paper Accents
String Envelope Closures:  Melissa Frances
Cards, Stickers:  Fancy Pants
Punch:  Fiskars
Brads:  Unknown
Magnets:  Basic Grey
Filmstrip:  Tim Holtz

Well, that's my album.  What do you think???  I really would love to hear your thoughts!

Stay crafty, my friends!!!

Wednesday, September 9, 2015

"Click" Album, Part 3, the "Double Belly Band Pocket Page"

Let's look at how I made my pages.
 You will need 2 pieces of 12x12" card stock for each page.  I used black, but used white to show you how I cut and made them.  The first piece, above, is cut as shown.
 The second piece is cut as shown above.  There is very little waste in this page assembly.
 First, we have to create the "page pocket".  It becomes a tube, with a folding piece on the front.  The left side of the tube is where you will bind to the Hidden Hinge Plus binding (by Kathy Orta), and this leaves the right open for a large pocket.  In the cutting of the first piece of card stock there is a large piece for a tag page for this pocket.
 The red dashed lines are score lines…all of the score lines for the tabs for attachments are 1/2".  Add your favorite adhesive to the tabs and then add the folded page with the fold to the right as shown, to the tabs.
 This shows the binding side with the page that will open to the right.  The folded page is the front of the pocket page.
 To the front of the folded page, we are going to add two belly bands.  Again, fold the tabs, add the adhesive, and attach as shown below.
 You will end up with a large belly band pocket and a smaller one in front of it.
 The colored card stock is to show you how  the pockets will look.
 Next, take the pocket for the back of the page pocket and two of the hinges made.  Attach the hinges to this piece.  This attaches to the back of the page pocket as seen below.
 The bottom of the pocket is either glued shut, or you can create another hinge (1x6", scored down the middle at 1/2") from some scrap card stock.
 Here is the finished product.  This shows the front of the page assembly, the blue card stock sticking out of the page pocket where the binding will be and the tag page sticking out of the other side.
 The first page opened to the right.
The back of the page pocket.

OK, now I am making 8 of the pages, and covering them with papers and decorating them and I'll be back to show you the finished product.  I am also going to try to make a video to show what it looks like as well.

Stay crafty, my friends.