WELCOME!!

We are so glad you are here! We love making and sharing our projects, and we are excited to have you visiting our site. Please leave us a comment and let us know what you think!

Jackie and Michelle

Followers

Saturday, October 26, 2013

Vampire Journal

I was surfing around on YouTube when I came across this video by The Paper Addiction.  She had a link from where she got the printouts for the project from How to Haunt Your House.  They are journals, as someone might have written while on the great Vampire hunt. One has pictures of Vampires being hunted and records of when they were "killed". When I saw it I just HAD TO MAKE IT!  It is a very cool prop for your Halloween decorations.  Here is my version of it.

 The covers are by 7 Gypsies, with some faux leather and suede paper that I got from JoAnn's for the binding.
 The site provides all of these printouts.  All you have to do is cut them out and paste them together.  I distressed the pages with Tim Holtz distress ink and also crumpled the pages to make them look worn and used.
They also had some maps that were part of this download.  I printed them on parchment paper to give the backs some more authenticity.  Then I distressed, rumpled and folded them.  One each lives within the pages of each book.
And this is how I displayed them on my table with the box "book" that I got from JoAnn's this year.  These will live in this book for storage.  Or maybe I'll just keep them out all year.  I just don't know!

Stay Scary, my friends!

Saturday, October 19, 2013

"Tonic" Halloween Album in a Box

 I wanted to share with you an album I made with the kit I purchased from "The Hen's Den." This is a link to their website, but I found this beauty at their booth at the CK convention last year.  I fell in love with it!  (Jeez, I wonder why?  HAHA!)  This is one of the coolest album kits I have ever seen.
 It's all enclosed with a box that you paint and cover with papers.  I added a few of my own stash pieces to it as well, and altered the pages a little bit for my own needs.  But, here it is.  It uses papers from Echo Park's Apothecary Emporium Halloween line.  I LOVE IT!
 The album is attached with a Tim Holtz binding ring piece.
 The inside cover.
 The pages were a little big, I had to cut them down a wee bit, but every box may be a little different, and so it goes.  I also decided to create pockets behind the mats and some of the page elements so that I could have more space for journaling and pictures.
 The pages are constructed as the kit instructed them to be done, except for my pockets.
 LOVE THIS!
 Behind the large panel is open for a pocket.

 I added some embellishments from 7 Gypsies, flowers (Petaloo, Bazzill, Recollections), bling (Recollections, Prima), brads from MME, spiders and glass dome sticker by Jolees, Stickles by Ranger, and distress ink by Tim Holtz.

 There is LOTS of room for pictures and journaling, and plenty of space in the box to house it all.


 This is the back page.
I love this glass dome sticker.  I also added the skull bead from my stash.

I hope you like it!  I loved putting this together.  Hop on over to "The Hen's Den" and check it out...and if you go to a CK Convention, check out their booth.  Amazing!

Stay Scary, my friends!!!

Tuesday, October 15, 2013

More Arc Planner Stuff for You

Hi all.  I wanted to show you my version of an Arc Steno Notebook.

THIS IS NOT MY IDEA.  I got it from here...And Now It's All This.  But, man-oh-man, what a cool idea.

 Sorry for the picture, it is a little bright, but you get the idea.  I created a steno book in Arc fashion and I LOVE IT!  The only problem for me is that I couldn't punch chipboard like I wanted to, and I wanted tabs.  What to do?!  So, I had some full sized 8 1/2" by 11" poly-dividers for my big Arc notebook that I haven't taken out of the package yet.  They were only $4!  They would work!
I printed off this page from the above site, cut them, punched them, and refashioned my dividers to suit my needs.  The back of the steno book is a divider with the tab cut off, so that I have three complete sections. DONE!  An Arc Steno Notebook!!!  I think this will be good for my project planning, doodling and sketching.  It will also fit in my project notebook when I am done (sideways but who cares?).  I think it will live on my bed stand, for those times when the ideas strike and I need to jot it down quick!

Then, I was wondering what to do with some scraps of paper I had, some really good quality paper that I just couldn't bear to get rid of.

 I made these note page dividers!  The tab does come out over the page so that I can write on it.  I have a stash of these DIY beauties now, YAY ME!
I did have to bend them a little to get them into the punch without punching a hole in the tab part, but it worked great!

What's in your planner?

Stay crafty, and organized, my friends!

Saturday, October 12, 2013

Arc Planner Goodness, and a Quick Tutorial


 Good morning.  This is my doggie, Ace, helping with this mornings tutorial and share.  I have recently ordered a few things from Levenger to use in my Arc notebook that I use for my planner.  OK, I also have a project Arc notebook, and a purse sized Arc notebook, and  a couple of others.  Yes, I'm hooked on Arc.  I love them.   But, they have a limited variety of planner/notebook inserts for their books.  I am hoping that more start to come out.  A lot of people make their inserts.  However, when I saw these I knew I needed them.
 They had a great variety of "Apps" for your planner.  They fit PERFECTLY in the Arc.  So, I am adding to my planner awesomeness with these List pages, the Time Map daily inserts, the Smart Tabs, and the Doodler pages.  The list pages come perforated, so you can put them in your planner, and tear out the one side to use when you go shopping.  I have a shopping/coupon book that this is going into.  The Time Map will come in handy for single busy days, as I am a weekly page person.  The Doodler page is just that, blocks of color to go crazy with for jotting or sketching ideas.  I love them!
 With my order I got some 2" and 1/4" discs.  They work perfectly with my Arc notebook covers, dividers, etc.  Arc doesn't carry bigger discs than 1 1/2", so I tried these, and they are awesome.  The 1/4" ones are PERFECT for small notepads to stick in your pocket or purse.  Because I spent enough money, I got their 1,2,3 punch for free.  This baby is going into my organizer bag that I have posted earlier!

So then, I bought one of the new Arc Notebooks with the awesome cover art pages.  Then, I had an idea.  Why waste the cover art when you can use it and see them all of the time as DIVIDERS!!!
 I took a piece of paper in the size of the cover pages.  8 3/4" tall by 6 5/16" wide.  Then I divided it into four sections on what will be the "tab" side.
 Four sections turn out to be 2 3/16" each.
 I used my envelope maker by We Are Memory Keepers, thinking about the  tutorial by Kathy at Paper Phenomenon that I have used here for my Craft Supply Inventory Book, I punched the top edge...
 ...then the first marking for the first tab...
 ...and I got this.
 Then I cut off the excess, which lines up at 3/8" by the ruler...
...And I got the tab.  The teal one is the first one, I just sliced off the edges accordingly to make the 2nd, 3rd, and 4th tabs!

I think this will be my Arc Bill Planning Notebook.  I need a new one for 2014.  I think this will work. I am so excited to be able to use all of the tabs!  It turned out quite lovely, and I think it will work beautifully!  

Stay crafty, and organized, my friends!

Wednesday, October 9, 2013

My first Halloween Mini Album of the Season

 I just wanted to do a quick share with you, on this halloween mini album that I made.  It is a simple card and envelope book, using a hidden hinge type binding by ozegran on YouTube.

 I used papers by DCWV, the Spooky Time Matstack, Midnight Spell, and Ghosts and Goblins.  The cardstock is unknown.

The metal embellishments are by Tim Holtz.  I mounted the cover "calendar" onto a wrapped piece of chipboard to give the cover a little more dimension.
 On the spine I used some of the papers and an embellishment by Jolees.
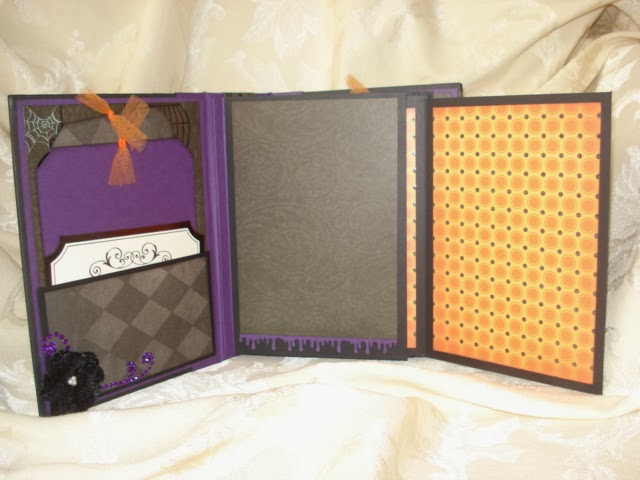
 The pages are constructed with envelopes, and the cards are decorated on all four "sides" then slipped into the envelopes with only one of the sides, creating a "flap/pullout" page.  I made a pocket on the inside cover using one envelope that I cut and adhered.  I filled the pockets with tags from the papers, carstock pieces, and tags from Recollections.  The netting on the tags is by Teresa Collins. I created a pocket by using a punched edge from Fiskars.
 This is the first flap page opened.  I decorated some of the pages on the bottom with Martha Stewart bloody drip punches.  I also used flowers and bling by Petaloo and Recollections.
 This sticker is by Creative Imaginations.

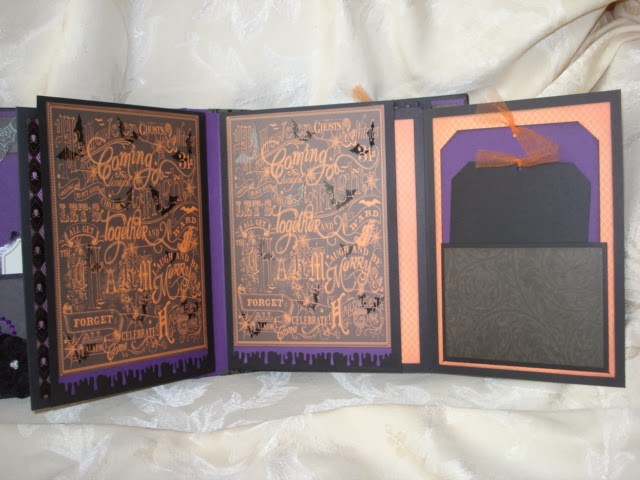
 The next set of pages.
 Some of the flap pages have pockets as well.


 I left it unembellished so that I can add full sized pictures.


The back page also has another pocket and some more tags.

All in all there are 5 pocket pages, with 5 flap pullout pages.  That makes a total of 30 pages in all, not including the front, back, and all of the tags.  Quite a nice size book to put lots of photos in.  I love it!

Check out ozegran's video on how she created another take on the hidden hinge/stacked binding, and try it for yourself.  I rather like it!

Stay crafty, my friends!!