Ok, so I know that this may be an "older" technique, but it is NEW to me and I LOVE IT!!! When I saw this, I was amazed, how simple and beautiful a simple fold can be. But, when I tried to find out how to do it, I couldn't! I saw lots of finished products, but no directions! So, I figured it out on my own, and now I am going to share with YOU!!!
First, make a pattern. You need to cut a circle 5" in diameter, and cut it in half. Use this as a template to cut your double sided paper.
Place your paper in a scoring device of choice, and score straight down, from the left side, at the 1 1/4" mark.
Turn your half circle over and fold on the score line.
Now, fold it back, meeting the cut edge with the folded edge.
Turn it over...
Take the cut edge and fold it down to meet the folded edge.
Turned back, edges inked, folds adhered down. TAAAAAA DAAAAA! It is about 3 3/4" tall after folding. You will notice that depending on the direction of the folds, with double sided papers you get a different look.
Here is the trick to this... You can use any size circle you want, just cut it in half to get the needed half circle for your tree. Measure the diameter, then divide by 4. This is the point where you want to make the first score! Fold as above, and you can use any size circle you want! This just makes me so happy!
I am doing this on my Christmas cards this year. I am glad I FINALLY FIGURED IT OUT! I hope you have fun making these.
Stay Jolly My Friends!
Wednesday, December 8, 2010
Monday, December 6, 2010
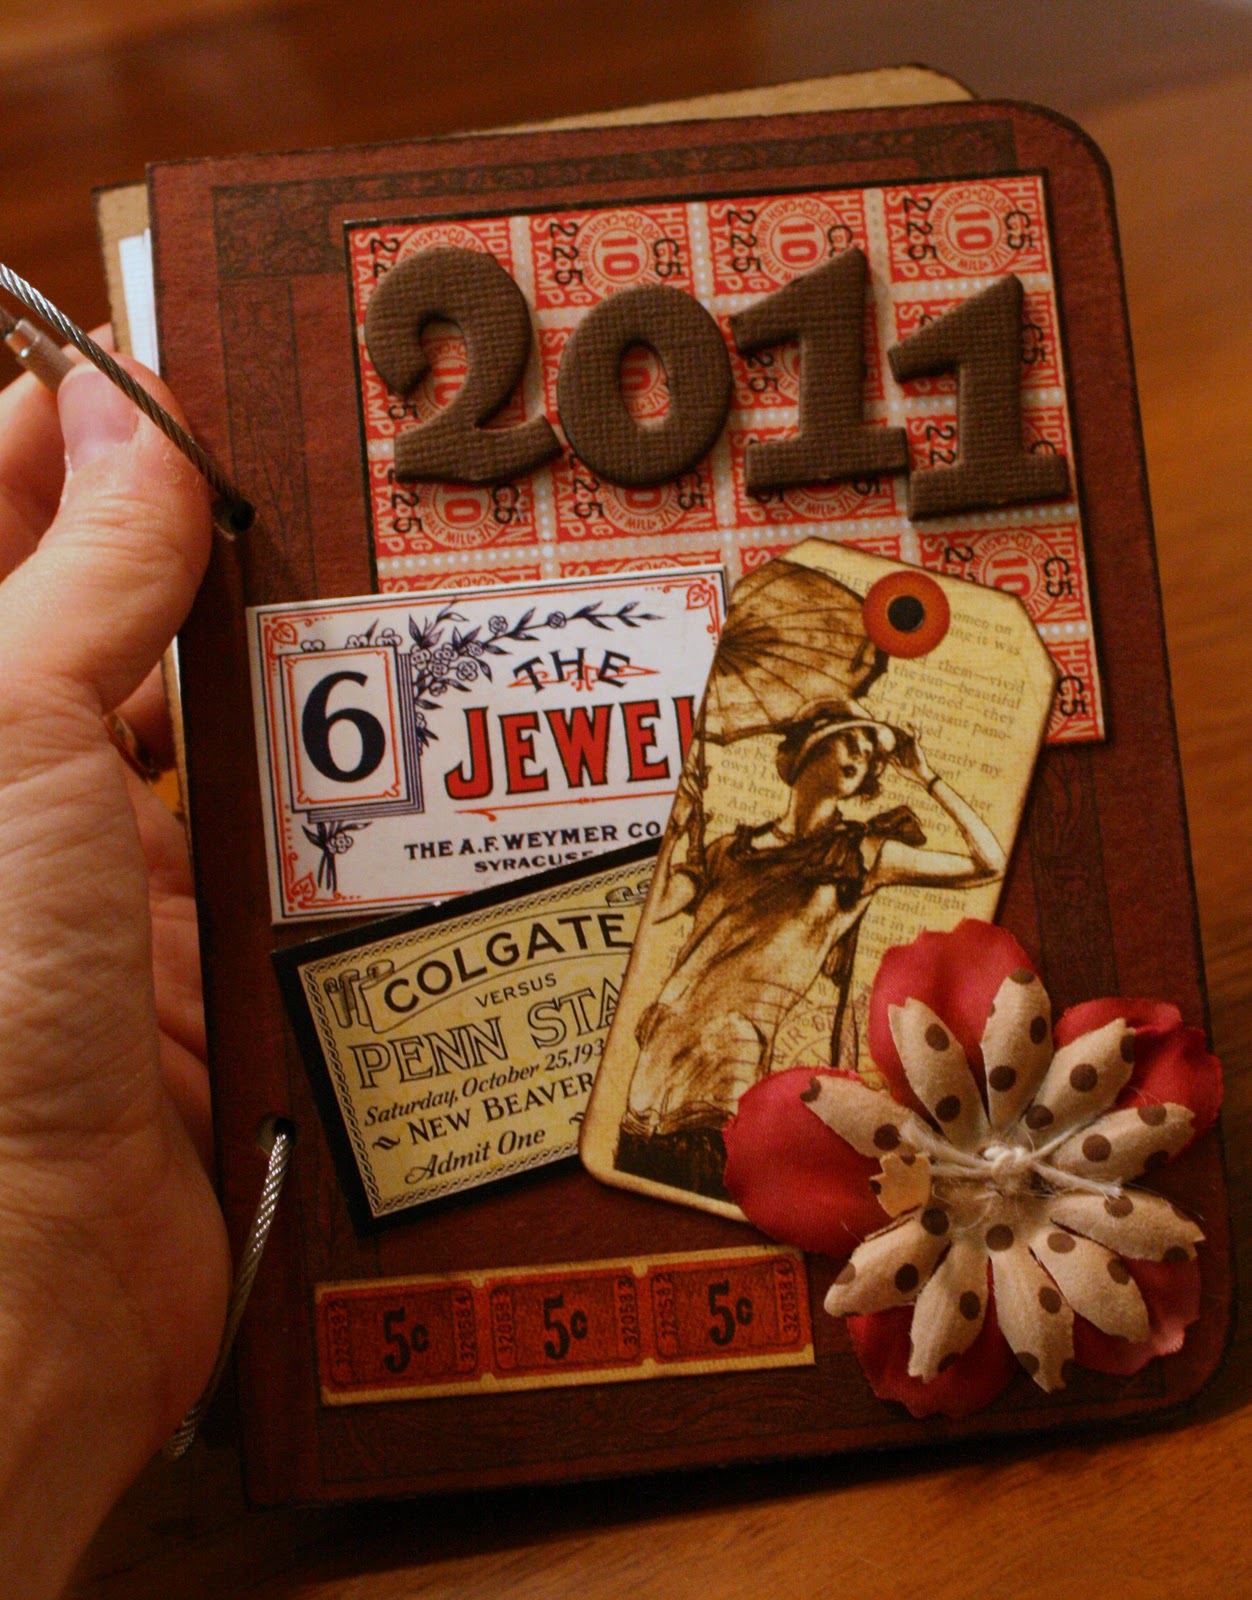
2011 Planner
I wanted to tell you about this great project I found over at Creativity Prompt called Make Your Own Planner, and you can find it here http://www.creativityprompt.com/new-workshop-make-your-own-planner-2011/?c=InPostAd
This the cover that I made for mine using Graphic45
She gives you lots of great extra bonus pages to print off for future projects, lists, to do's and weekly spreads. It is offered at a great price and would make a great Christmas gift because you can print as many as you want and design your own cover!
Friday, December 3, 2010
Advent Calendar
I decided to made an Advent calendar. I have never had one before. I saw this "beach chair" easel on sale at my local Fred Meyer, and I said to myself it would make a great base for my project. I used up tons of leftovers from MANY Christmas projects over the years...so I made this for the cost of the frame! I got the number printout from Creativity Prompt.
Just the side view... I made some of my tags bulky, but I didn't want them too bulky.
I just raided my stash and used everything, and every color combination for Christmas. I wanted something that was colorful and different.
I used buttons, stickers, ribbons, punched pieces, EVERYTHING.
I even used a doily that I used Glimmer Mist on.
I also got out the Stickles for this project. The next picture is going to be displayed on Christmas Day.
Thanks for looking!!!!
Just the side view... I made some of my tags bulky, but I didn't want them too bulky.
I just raided my stash and used everything, and every color combination for Christmas. I wanted something that was colorful and different.
I used buttons, stickers, ribbons, punched pieces, EVERYTHING.
I even used a doily that I used Glimmer Mist on.
Thanks for looking!!!!
Wednesday, December 1, 2010
Christmas Tree Mini Album
Happy December...It's Christmas Season. But, I am not in the malls shopping, I am in my craft room making cool Christmas projects. Here is one I just love!
I made this after seeing a post here, on Split Coast Stampers. She gave the link where she saw the idea, and where I found the tutorial here, on Scrapbook and Cards Today.
I made a rosette, sprayed with Tattered Angels Glimmer mist. I punched the butterfly and added Stickles for the body and antenna.
Here is what it looks like with all the "pages."
Page one and two: The sticker was matted, then I glued only the bottom, creating a pocket. The tags are stocking stickers that I matted with kraft cardstock for journaling spots.
Pages three and four: I decided to use the pockets created in the making of the book to house tags shaped like trees. I used the trunks as pull tabs...two uses in one! I left them plain to not add too much bulk to the book.
Pages five and six: I put a sticker on kraft cardstock, then adhered down the center and at the bottom to create a pocket on each side. The tags are also made from stickers matted on cardstock.
The back cover: I made a rolled flower, following the tutorial here, again on Scrapbook and Cards Today, but using paper instead of fabric. The leaves were hand cut and run through my crimper.
Happy Holidays!!! Stay jolly, my friends.
I made this after seeing a post here, on Split Coast Stampers. She gave the link where she saw the idea, and where I found the tutorial here, on Scrapbook and Cards Today.
I made a rosette, sprayed with Tattered Angels Glimmer mist. I punched the butterfly and added Stickles for the body and antenna.
Here is what it looks like with all the "pages."
Page one and two: The sticker was matted, then I glued only the bottom, creating a pocket. The tags are stocking stickers that I matted with kraft cardstock for journaling spots.
Pages three and four: I decided to use the pockets created in the making of the book to house tags shaped like trees. I used the trunks as pull tabs...two uses in one! I left them plain to not add too much bulk to the book.
Pages five and six: I put a sticker on kraft cardstock, then adhered down the center and at the bottom to create a pocket on each side. The tags are also made from stickers matted on cardstock.
Happy Holidays!!! Stay jolly, my friends.
Monday, November 29, 2010
Tissue Box Cover
I found this great tutorial by Diane Zechman for a Tissue Box Cover on Split coast stampers http://www.splitcoaststampers.com/resources/tutorials/tissueboxcover
She gives you great dimensions to fit a Kleenex brand box. I embossed mine using Christmas cuttlebug embossing folders and the scallop border punch from Fiskars. Another great gift!
Wednesday, November 24, 2010
New Home Mini Album.
My son, Neil, and my beautiful daughter-in-law, Sarah, just recently purchased their first home! I am going to give her this mini album as a little present. I sure hope she likes it!
I found the book in my stash of mini albums to make. I buy stuff with the idea that I am going to use it someday...and it came in handy, PERFECTLY, for this project.
The papers are from Melody Ross, called Artsy Urban. I am unsure where the book was from.
I cut strips of the papers, and used a Fiskars punch to create the scalloped roof. I tied a key, and a heart lock charm to the rings. The house numbers are stamped, and placed in a 7 Gypsies metal tag. The flowers are Tim Holtz, with added rhinestone centers. I put the chipboard sticker on the front, in the "door" spot, and added a black rhinestone for the door knob.
I placed black mats on the pages, and am giving Sarah templates and adhesive so she can cut and place her pictures.
This page has a pocket for two tags. I tied the buttons on with the string, and used a little fray check on the knot, so that they wouldn't become untied.
On the front, and the back, I used the Martha Steward fringe scissors to create grass with a scrap of green papers by 7 Gypsies.
Thanks for looking!!!
Also, to all of you, have a wonderful Thanksgiving!
I found the book in my stash of mini albums to make. I buy stuff with the idea that I am going to use it someday...and it came in handy, PERFECTLY, for this project.
The papers are from Melody Ross, called Artsy Urban. I am unsure where the book was from.
I cut strips of the papers, and used a Fiskars punch to create the scalloped roof. I tied a key, and a heart lock charm to the rings. The house numbers are stamped, and placed in a 7 Gypsies metal tag. The flowers are Tim Holtz, with added rhinestone centers. I put the chipboard sticker on the front, in the "door" spot, and added a black rhinestone for the door knob.
I placed black mats on the pages, and am giving Sarah templates and adhesive so she can cut and place her pictures.
This page has a pocket for two tags. I tied the buttons on with the string, and used a little fray check on the knot, so that they wouldn't become untied.
On the front, and the back, I used the Martha Steward fringe scissors to create grass with a scrap of green papers by 7 Gypsies.
Thanks for looking!!!
Also, to all of you, have a wonderful Thanksgiving!
Monday, November 22, 2010
Another Match Game
I loved this project so much, I just had to do another!
This time Boy themed. Here is the great blog I got the great idea from: http://kerraftycreations.blogspot.com/2010/10/when-husband-is-away-wife-will-create.html
I used a $2 photo case by Iris and was able to make 24 game pieces a little bigger, 2"x2" Easy Christmas gift!
This time Boy themed. Here is the great blog I got the great idea from: http://kerraftycreations.blogspot.com/2010/10/when-husband-is-away-wife-will-create.html
I used a $2 photo case by Iris and was able to make 24 game pieces a little bigger, 2"x2" Easy Christmas gift!
Saturday, November 20, 2010
We received a blog award!
What a nice surprise! Thanks to Jean, of Jean's Crafty Corner for the wonderful award!
Please go and check out her blog, she was some wonderful creations to share with us!
So, when you accept the award, you must:
1. Thank and link back to the person who awarded you this
2. Share 8 things about yourself
3. Pay it forward to 8 bloggers that you have recently discovered
4. Contact those bloggers and tell them about their awards
So, here it goes!
This is hard to do, narrowing it down to 8 bloggers, because there are many many many that we love to look at for creative inspiration, but these are some wonderful blogs that we want to share with you...
Thanks again for the award!!! I hope you all have fun checking out these blogs!
Please go and check out her blog, she was some wonderful creations to share with us!
So, when you accept the award, you must:
1. Thank and link back to the person who awarded you this
2. Share 8 things about yourself
3. Pay it forward to 8 bloggers that you have recently discovered
4. Contact those bloggers and tell them about their awards
So, here it goes!
This is hard to do, narrowing it down to 8 bloggers, because there are many many many that we love to look at for creative inspiration, but these are some wonderful blogs that we want to share with you...
Now, for 8 things about Jackie and Michelle...
1. We are both operating room nurses, and that is how we met.
2. Michelle has to dachshunds, Ace and Zeke.
3. We both love to cook.
4. Between the two of us, we have 6 kids (4 girls and 2 boys), and one grandson.
5. Our favorite drinks are Mojitos and Margaritas.
6. We both enjoy watching scary movies.
7. Jackie really loves to go fishing.
8. Michelle enjoys riding her Harley Davidson.
Thanks again for the award!!! I hope you all have fun checking out these blogs!
Wednesday, November 17, 2010
"Porcelain" Flowers!!!
I finally got a Melting Pot!!! Why did I not have one of these before? This is the coolest thing I have seen and used in a long time! Michael's had a 50% off coupon, I only paid $20 for the pot! I just have the one color of enamel so far. I didn't get the zpatula and the tweezers yet, but will. I used a bamboo skewer and a pair of regular tweezers for now, and they worked ok. I started to play with it just last night...I have seen a multitude of videos and tutorials on making flowers, so I decided to give it a go.
Here is a couple views of my experiment. Please excuse the cruddy camera...I really need to get a better one, but this gives you the gist of the results.
I used a variety of punches and my Sizzix rolled flower die to make the little roses. I think they all turned out super cool. I can't wait to really do some more experimentation with different colors of enamel. Now I just want to dip everything in the stuff!
Thanks for looking and stay crafty, my friends!
Monday, November 15, 2010
BFF 12x12
This weekend we enjoyed a mini vacation in Seattle at the CK Convention & created this great layout by Prima. I used one of my new favorite photos!
Happy Birthday to my BFF Michelle!!!!
Hope you enjoy your special day!!!
Happy Birthday to my BFF Michelle!!!!
Hope you enjoy your special day!!!
Wednesday, November 10, 2010
Me, the abridged verision
I wanted to introduce you to a class put on by Cathy Zielske for
www.bigpictureclasses.com This class seems to be one she puts on yearly due to it's great popularity!
The idea of the class is to journal your life according to the letters of the alphabet. For example for the letter A, I picked the topics Avocados & Allergies. It was very hard to narrow my topics down for some letters. Click on the picture below to read journal.
After I had journaled through different aspects of my life, I realized this is such a great summary of my life so far to hand down to my kids. Many of these topics are things I wouldn't have necessarily ever mentioned to them. You would be amazed at the things that pop into your head once you get started organizing them to the alphabet! Another one of these great classes should be offered soon! You could start gathering your topics now!
Monday, November 8, 2010
Box Book for Christmas
So, after I made the Halloween Box Book, I saw these boxes in my kitchen cupboard, and decided that the little pouches could live in a container of another variety...
I used up some leftover papers I had from another project. It is really hard to see, but there is a cutout of a couple riding in a sleigh on the cover, there is a flower and a branch on the bottom.
Just a couple examples of these pages...
I left the tags in this book blank...I think it turned out really cute! What boxes could you use?
I used up some leftover papers I had from another project. It is really hard to see, but there is a cutout of a couple riding in a sleigh on the cover, there is a flower and a branch on the bottom.
Just a couple examples of these pages...
I left the tags in this book blank...I think it turned out really cute! What boxes could you use?
Friday, November 5, 2010
Match Game Mini Project
I found this great idea at Kerr-afty Creations How simple & fun! A perfect children's gift! I used the box a Ipod came in & covered it with double sided cardstock using Scor-tape around edges.
For the game pieces, I covered 1"x1.5" Bazzil Chips with coordinating card stock, only one side, & inked edges.
On the 24 Chips I stamped each pair with the same stamp for a total of 12 different images.
I am going to make a boy version next!
For the game pieces, I covered 1"x1.5" Bazzil Chips with coordinating card stock, only one side, & inked edges.
On the 24 Chips I stamped each pair with the same stamp for a total of 12 different images.
I am going to make a boy version next!
Wednesday, November 3, 2010
Daily (Kinda) Journal Project
...Continued
Finalizing October, can you believe it! Need to add the Halloween photos & then we can start on November! Are you keeping up?
Monday, November 1, 2010
I Love Candy, CD Pocket Book
I created this fun book using paper CD sleeves, card stock & pattern paper. I cut the card stock 2x the length of the envelopes twice & glued them together.
Embellished with pattern paper & Halloween goodies!I added a strip of adhesive only to the center of each envelope so they would accordian out.
Subscribe to:
Posts (Atom)