WELCOME!!

We are so glad you are here! We love making and sharing our projects, and we are excited to have you visiting our site. Please leave us a comment and let us know what you think!

Jackie and Michelle

Followers

Friday, February 11, 2011

Heart Box and Mini Album

I bought the Making Memories Je t'Adore embellishment kit and I couldn't resist using it that night.  I challenged myself to making a mini album and decorating the box using as much of the embelishments I could and using papers from my stash only!!!
 I traced the box and trimmed to make the book pages.  I just bound with a simple bookring and heart charm.
 I tried to incorporate more pockets by using ribbons to make spaces.  I punched other hearts to help the tags not fall out!  The tags on the right are actually adhered together to create a "bigger" tag of stacked hearts.
 I used up the Cupids I had from Jolee's that were left over from my Love Wrap Around Album because they are just too stinking cute!!!
 I made a larger heart tag for the right side of this page.
 Love these roses!!!
The back page.

Stay crafty my friends!

Wednesday, February 9, 2011

Tag Book Tutorial!

I was planning on doing this, but also had requests...so THANK YOU!!!!!  It makes Jackie and I happy when you like our work!!!

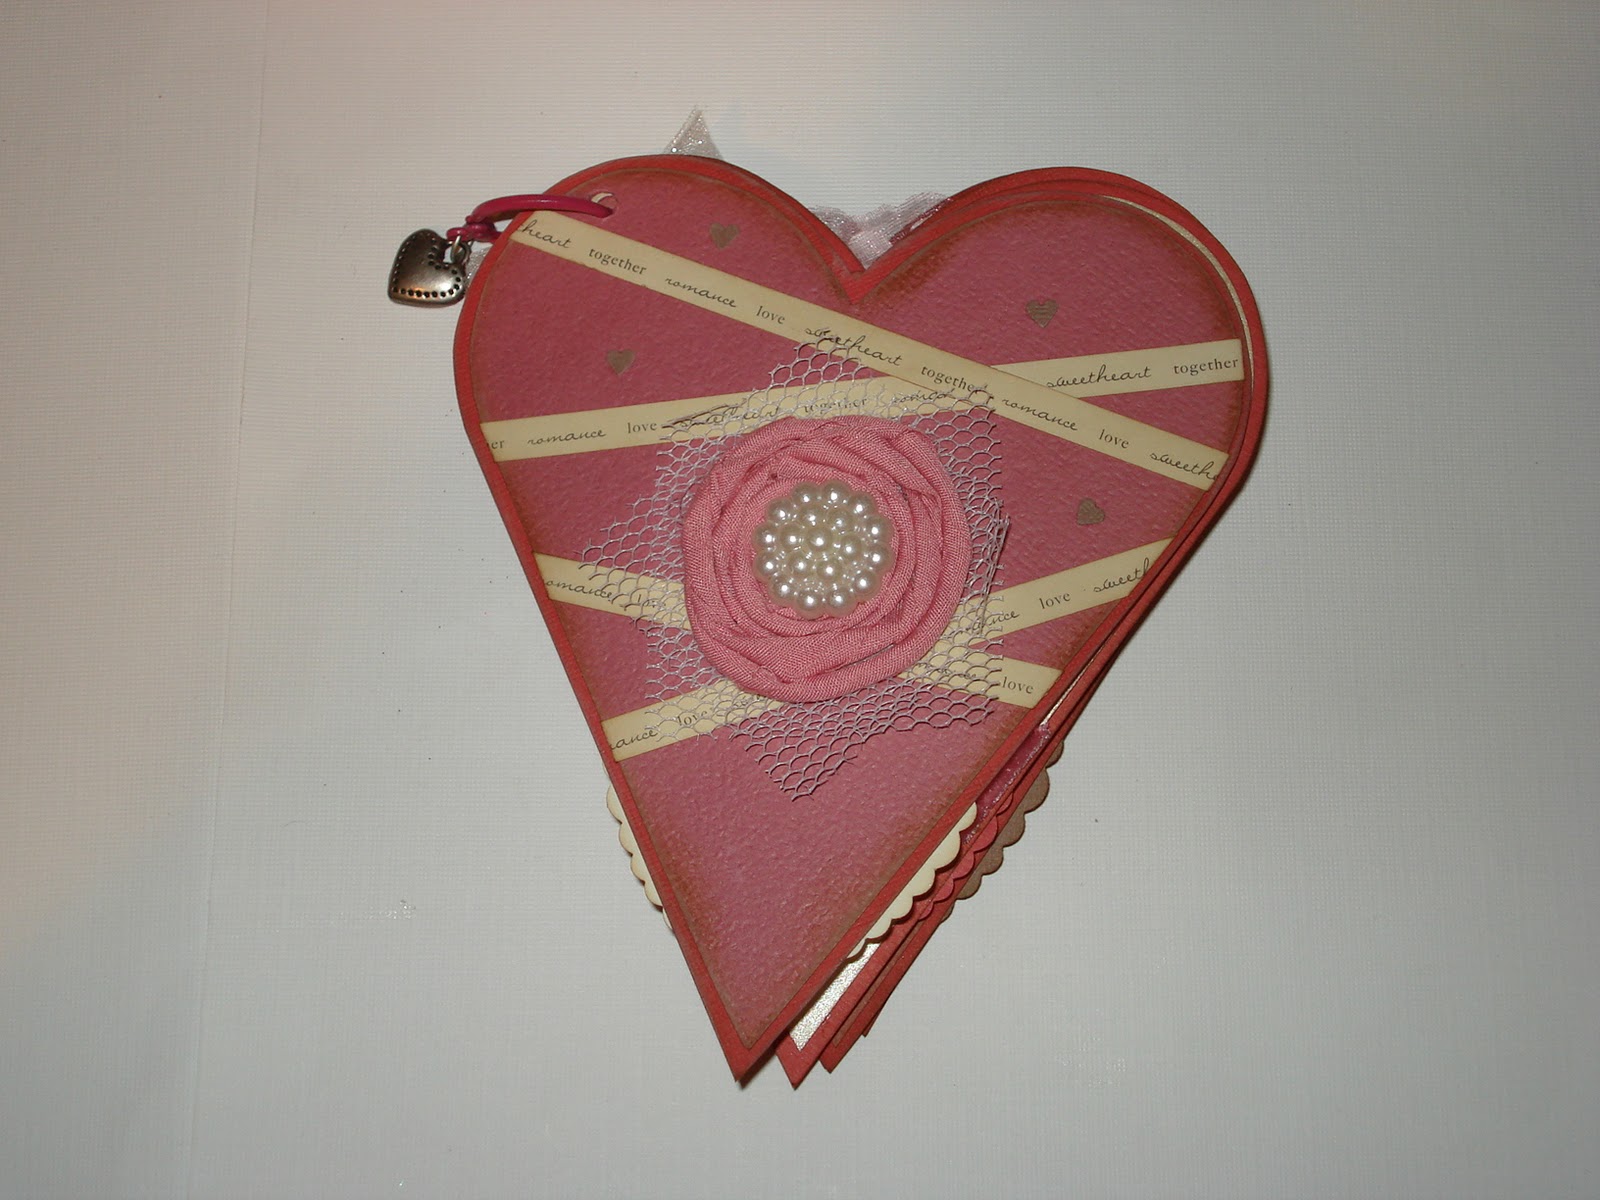
I made this book for my Counterfeit Kit Challenge...


It is just a meander style book, and I was planning on making it actually smaller, but I didn't follow the directions, thought I messed up, but then had the "AH HA!!"  It is 4x6" and I decided to make it into a tag shape!!!  It turned out better than I had anticipated!  There are a bazillion types of meander or maze books, this is just my take on it!  I did not invent the original idea, I just modified it!


Choose a 12x12 cardstock or a patterned paper that is double sided and doesn't have a directional pattern.  Score at 6", turn and score at 4" and 8".


Cut on the two red lines only!!!  Just two cuts!!


Fold the bottom right over...then just flip the paper OVER...


...and fold that section up...then just flip the paper OVER...


...and fold the left side over...REPEAT UNTIL IT'S ALL FOLDED.


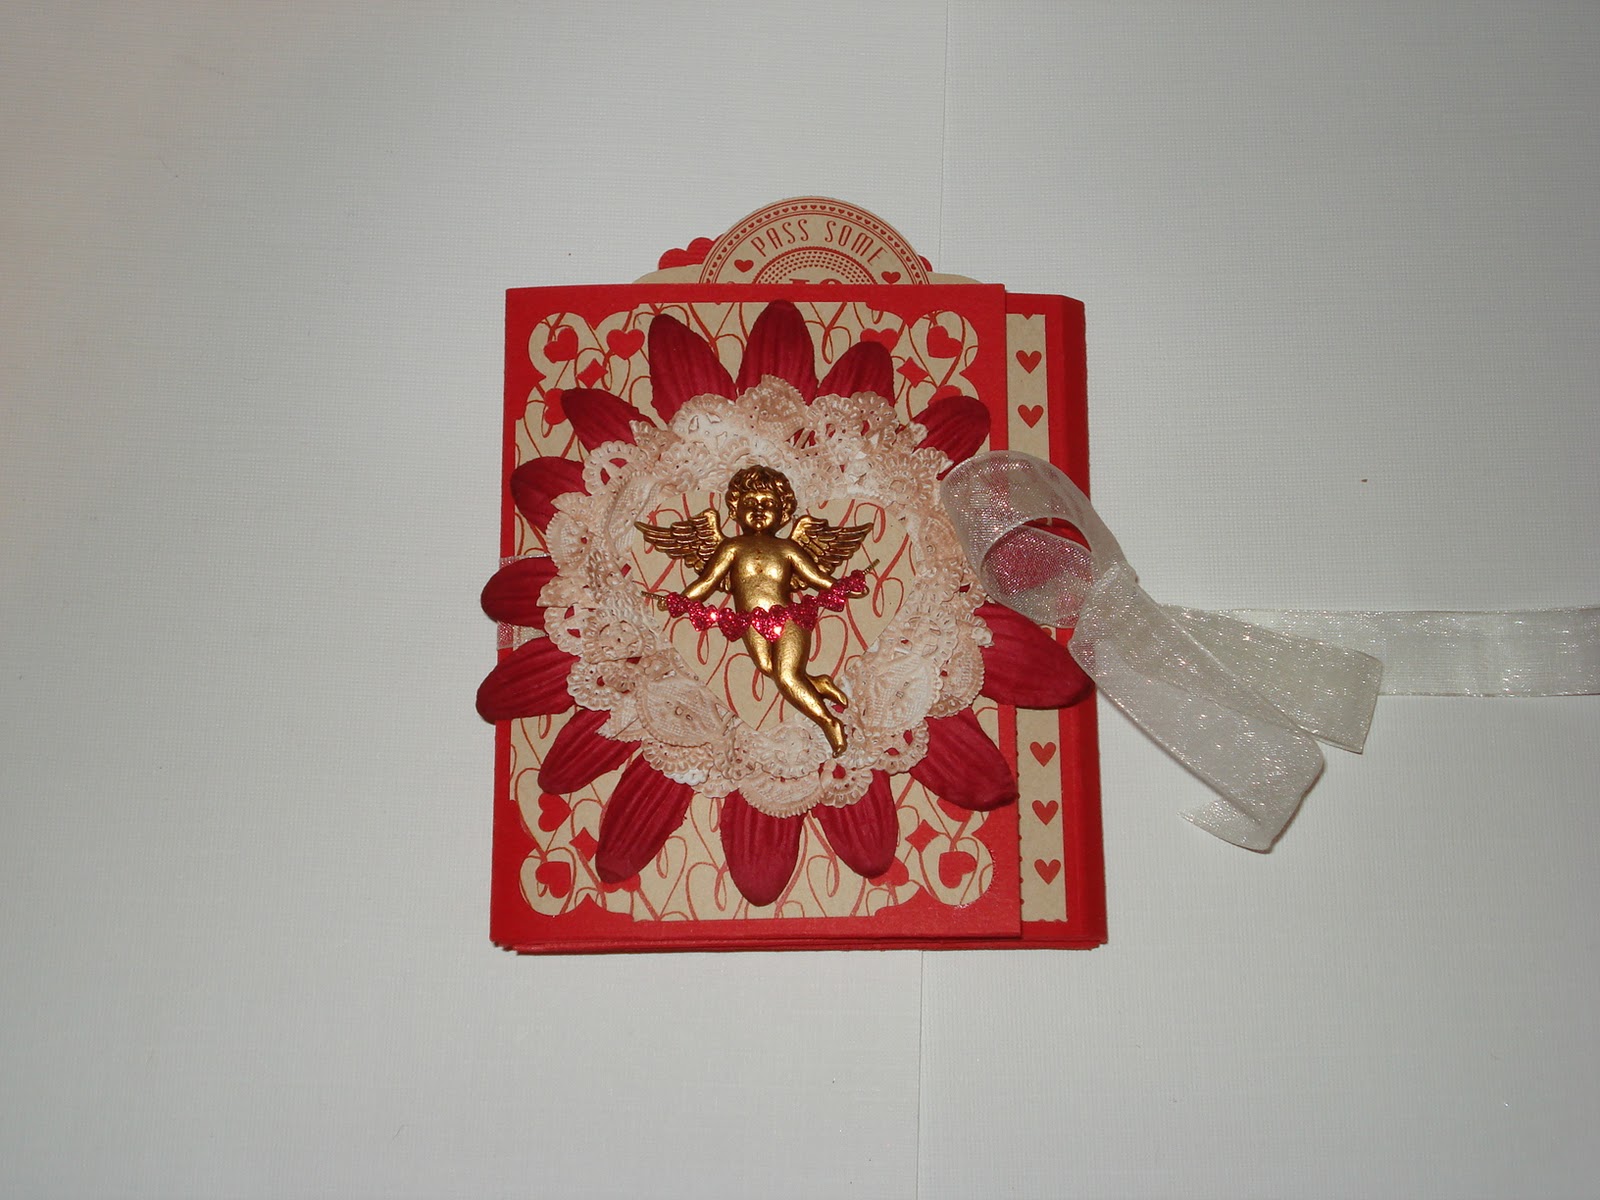
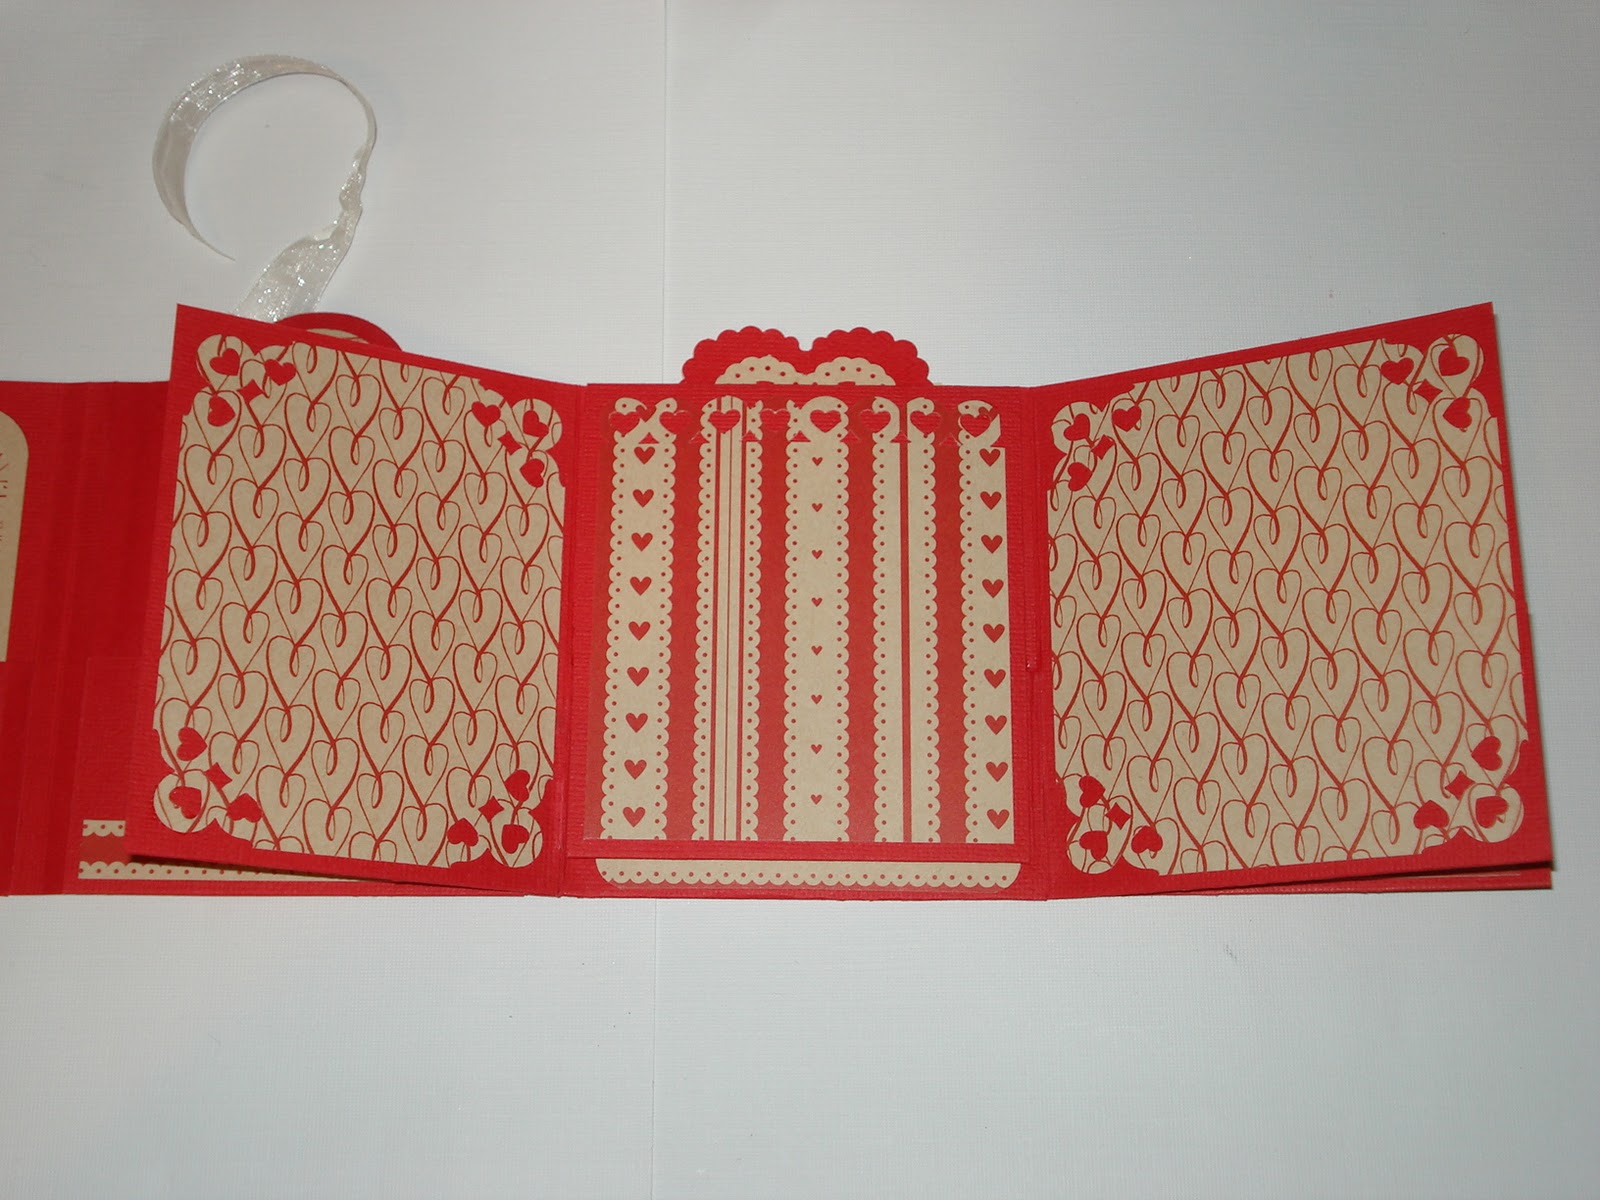
You will end up with this.  The front page is a single piece, then you will notice the folds give you two places for pockets...the first one I made into a pocket with a top opening, and the second I made into a side opening...then there is a back page.


I just glued the teal lines to create the pockets.


This is the side opening pocket.


All glued, showing the pages and pockets.  The book is now bound.  The left edges are glued or folded.


I then measured in 1" on the left corners and cut a triangle off to create the tag shape.  I used a craft knife to do this, because of the layers of cardstock.  I then used a paper hole drill to make the hole, because you can't have a tag without a hole in it!  It doesn't need a binder of any kind, so I looped a piece of ribbon and tied it loose so that the book would open.  Taa Daa!!!

I am thinking that if you wanted to make it with more pages, just make two or three of these, then attach the back page of the first, to the front page of the second, making another pocket, and then you would have more pages to your book.

I love the size, 4x6" is a great size for a mini!

Have a crafty day!

Tuesday, February 8, 2011

Counterfeit Kit Projects!

Ok, here goes projects #1 and #2.....


 Project #1..."So Happy Together"


This is actually the first 12x12 layout I have done in a while...like in over a year!  This is my husband and myself, on my 40th birthday, at a function that his band was playing at.  He is in a band that does classic rock songs. He plays guitar, harmonica and sings! I am not in the band, but I love to hear them play, and I make some of his shirts, like sparkly one that he is wearing!  It looks great under the stage lights!  This is one of my favorite pictures of he and I together! And this is how we usually are together, so happy and having fun!  He and I are truly a perfect match!

I used a strip of one of my papers that had music on the back.  There is a cardstock scallop sticker, and I adhered a strip of the garland because it is sparkly like his shirt!...I added the roses and the bling, and cut apart a couple of the ribbon hearts.  The picture was adhered so that I could use one of my 7 Gypsies tags for hidden journaling.

Project #2..."Remember"


I Love, Love, Love mini albums.  While I was making this one, I made a happy little mistake in the scoring, which resulted in a better mini!  I will do a tutorial on it soon!  It is made of one sheet of 12x12 cardstock that had 3 score lines and 2 cuts, a little glue, and I have a mini that is 4x6", with 8 pages and 2 pockets!  I used another tag, and one of my metal frames.  I punched the flower out of some of the paper, and used the button and my homemade bubble for the center.  I cut the mini to resemble a tag, so I punched a hole, threaded ribbon through it, and used three of my 7 Gypsies dangles.  The elastic ribbon serves as the closure.

First opening...I used journaling stickers on one side and room for pictures on the other.  The side pocket has a plain tag with ribbon matching the "binding" ribbon.


This paper is also what I used to punch the flower.  I put a little bling on the pages to tie it all in to the bling on the cover.  Another tag  in the pocket.


The next page.


The back page.  The elastic ribbon is under the paper, and just flips around the front of the mini!

I hope you like it!!!  Thanks for looking!

Monday, February 7, 2011

Friends Mini book converted from card kit

My BFF Michele gave me this great card kit Indian Summer by Basic Grey!  As you can see here I did a little tweeking!
 As you can see in the above pic these are the cards you can make!
 I added a sheet of MME paper for this page.
 The white rub-ons and the below chipboard came in the kit!
 Now the pinkish purple page was a card I glued on top and side to create a pocket!

The binding is another card I wrapped around it and weaved ribbon! Hope you like it!

Sunday, February 6, 2011

Counterfeit Kit Add On's...


I woke up this morning and made the add on kit for the Counterfeit Kit Challenge.  I am using bling from Basics and Recollections, the bookplates are OOOOLLLLDDD from K and Company.  The doileys and buttons are going to turn into flowers. The journaling cards are 7 Gypsies.  I didn't have any beaded ribbon, but I did have this bead garland that I am going to try to incorporate into the project.

OK, I think I have some crafting to do!

Saturday, February 5, 2011

Counterfeit Kit Challenge for February!!

Jackie and I found this cool site, Counterfeit Kit Challenge, you have to check out.  I found it too late to join in January, but thought I would play for February.  They challenge you to create your own kits, from your own stash, based on kits on sale currently.  The idea is to USE YOUR STUFF!  They will have tutorials and challenges through out the month based on the current kit being used.


Here are my papers, based on the kit they have for this month, which comes from Scraps of Darkness.   They are a variety of papers in my kit...DCWV, Teresa Collins, Creative Imaginations, Pink Paislee, and some I have no idea because they were buried in my stash!


I added four sheets of the red, cream (which is shimmery) and black.  The red and black are Bazzill, the cream, I am not sure about.


My addons:  The flowers are from Recollections...the gems are in substitute of the mini mirrors.  I have Tim Holtz, Celebrate It, and red heart ribbons.  I have two packages of black bling, one is leftovers from another project.  I had the Adornit stickers left over from a project.  (I usually buy two of everything, that's why it isn't used...I buy two incase I mess up!)  The stamps I am going to use are from Just Rite, the gold embellishments are from Jolee's.  The Bingo card is from My Mind's Eye.  I am going to make the bubbles with the Creative Imaginations stickers by using Diamond Glaze.  I also had half a package of 7 Gypsies Ruby Dangles that I am putting in the kit.

Now, I just have to figure out what to make!!  And please do go check out the site!

Friday, February 4, 2011

Love Wrap Around Mini Album

Elsa from Just A Few Paper Designs has come up with the cutest little mini album.  She did a UStream class on it that you can see here.  Here is what I did with her design.  I chose Bazzill cardstock, and papers from American Crafts.  The flower is Bazzill, the doily flower I handmade, and the Cupid is from Jolee's.
It wraps around itself, and creates pockets.  I used McGill punches for my heart tags, and the pocket tags are from Martha Stewart.
And...
And...
It opens another way inside the last wrap!
But wait, there's MORE!!!
AND MORE!!!!!!
There are also two more pockets created in the making that I punched finger tab pull spots for.
My tags:  The hearts are punched and layered, and adhered to eachother so that it made one tag with the two hearts on it.  Does that make sense?  The other tags for some of the pockets are just matted papers.  The two tags for the pockets with the finger pulls I punched out elements from the paper to create pulls.
The back of the album.  I LOVE THESE CUPIDS!!!

Thanks, Elsa!!!  Please go check out her blog!  She has awesome things to do and see!

Wednesday, February 2, 2011

Heart Pouch Envelope Mini Album

I was surfing the net and came upon this cute idea from here at Zakka Life...She makes them from recycled envelopes and uses them for little love notes or filling with treats.  I decided it could be a great base for a mini album for Valentines Day!

I used DCWV papers, a Bazzill flower with a punched flower and a ribbon flower center.  The punches on the cover were Martha Stewart.  The mini flowers are from Prima, I used Glimmer Mist to color them.  I used Tim Holtz distressing inks.  The ribbons and the heart charm, I have no idea where they came from, they were in my stash.  The pearls are from Queen and Co.

I used brochure envelopes, which gave me two hearts per envelope.  I sealed the envelopes, free handed the heart shape and started cutting.  I made 6 hearts for this album, using three envelopes.  I inked all the edges.  I made a second heart, a bit smaller, which served as a template for the cover papers and the tags that I put in the pockets. I made 6 of them.  The overall size of this mini is about 5" tall by 5 1/2" wide.
On the pages I used some pieces of the papers that had cute sayings, I fussy cut them out and adhered them so that they created a little mini pocket on the pages.  I used a McGill heart punch and punched mini tags for these.


I didn't want to  punch a binding hole into the pouches themselves, so I added little punched mini hearts and used those to provide the place for the holes.  I added eyelets and used a ball chain to bind it.  The ball chain is from Tim Holtz.

I hope you like it!  I love the colors of the papers.  It was super easy to create, and you can use any size envelope you want.

Happy Crafting!!