WELCOME!!

We are so glad you are here! We love making and sharing our projects, and we are excited to have you visiting our site. Please leave us a comment and let us know what you think!

Jackie and Michelle

Followers

Wednesday, August 10, 2011

And now for something completely different...


I thought I would share something that I came up with that you might enjoy as well.  I love to cook, and love to try new things.  We are trying to cut down on carbs a bit...but love potato salad!  I use a lot of cauliflower...I roast it, make hash with it, mash it, rice it, steam it, bake it with a mustard sauce, and make faux potato salad with it.  Make it with your favorite recipe for potato salad, just substitute steamed cauliflower florets instead of potatoes.  I used a mayonnaise base with dijon mustard.  I added green and red bell peppers, green onions, eggs and celery.  Season any way you wish.  The only thing to be aware of is to make sure your cauliflower is drained thoroughly and be easy on the wet ingredients as the cauliflower doesn't soak up the dressing like potatoes do.

ENJOY!!!

Have a nice meal, and stay crafty!!!

Monday, August 8, 2011

Another one!

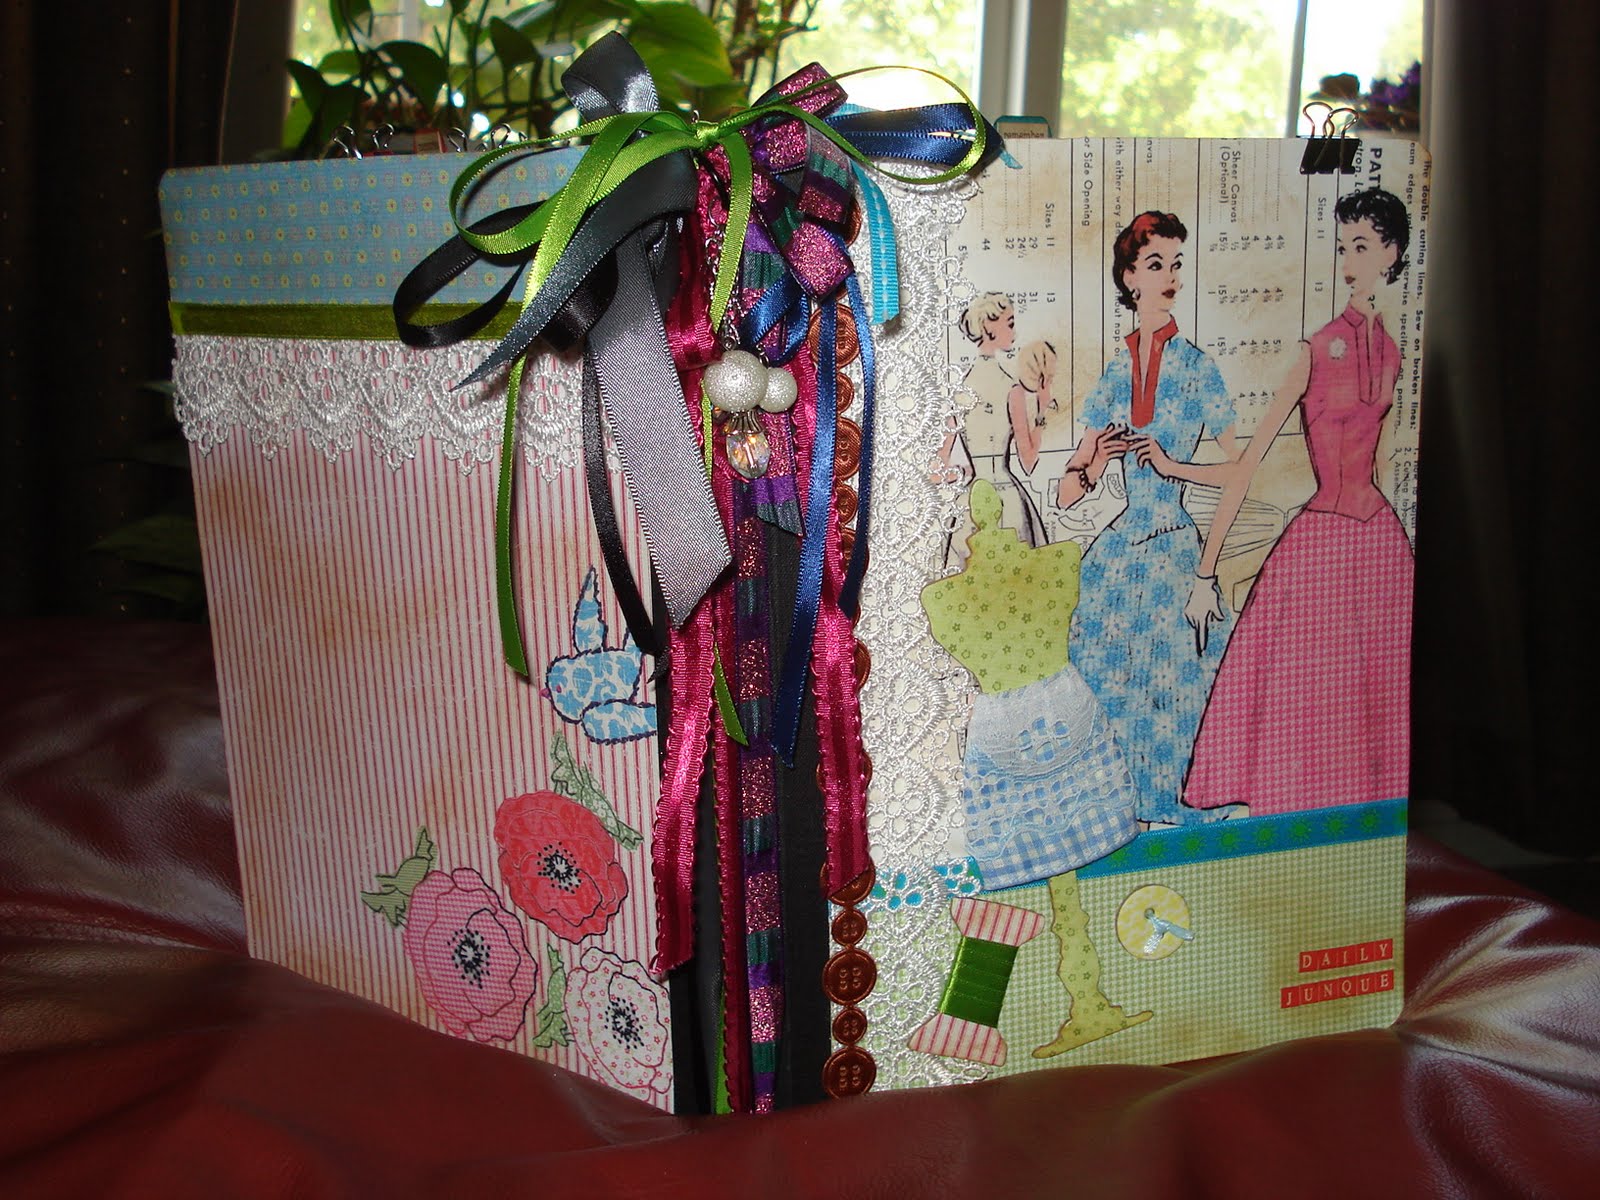
I think I am addicted.  I made a junk journal this time...
 This one is the product of seeing the You Tube videos by Tangie Baxter.  It is an altered composition book turned beautiful junk journal.
 I covered it with some papers that I got by GCD.  I used scrap ribbons to tie the "binding".  I also used my new Tim Holtz Sizzix die to cut out the dress form, thread spool and button.  I titled it "Daily Junque".
 I added a pocket in the front. It is half of a brochure envelope.   I distressed every single page.  I also used up a bunch of flourish stickers on a variety of the pages.
 I made a dent in my paper stash, the papers inside on the pages are from My Mind's Eye...Magnolia and Wild Asparagus.  I have had these in my stash forever!
 I added these paper clip flags from the office store, and the words are stickers from The Girls Paperie.  I also added a ton of mini binder clips.
 I had some journaling pages that were from Making Memories, I added them to some of the pages.
 I added three giant envelopes.

I added another pocket to the back page.

Now, to fill it with crafty things!!!!!!

Friday, August 5, 2011

Another DIY Smash Book

I have fallen in love with these!  If you go to our Creative Gallery site, I have done some stuff with these make-it-yourself smash books already.  The idea came from a challenge on the Counterfeit Kit Blog.  But while I was walking around in Craft Warehouse, I got another idea for a book.  This will make three of them that I have made.

 I got the clipboard from Craft Warehouse for $1!  I thought it would make a cool cover. I used up a bunch of ephemera that I have collected from Tim Holtz, and a line called Nostalgiques and Life's Journey that used to be sold at Michaels. I wanted it to appear to be a "working" clipboard, something that was actually in use with important papers and even a picture of a loved one in the upper left corner.  the binding idea came from Mouse Potato Designs. It is explained on her video, go check it out!
 I filled it with random papers, envelopes, etc.  I even had music paper from high school that I threw in here.
 Also some 7 Gypsies ephemera here.
 The sheet of wood is from a cigar box that a friend gave me, it was meant to go between the drawer layers in the box, I thought it would make the coolest page.

 More stuff...

 Bags and envelopes, pieces of file folders.
 A page from an old weekly time book I found at the craft store.
 A few scrapbook papers.

 Tags, junk mail envelopes.
 Acetate pages and a bag from the pharmacy.
Thanks for checking it out, have a crafty day!!!!!

Wednesday, August 3, 2011

A New File Folder Album

 I was sitting on the couch one night, listening to my husband's band practice in the garage and watching Gordon Ramsay do one of his shows and I decided to grab a bunch of file folders and make an album.  This one is not, and I mean not, a mini album.  It is a full sized file folder album.  I grabbed my paper cutter and went to town on this one.  I think I used 6 file folders in all.  I stamped the folders with a Tim Holtz flourish stamp with black Stazon, then I inked it with some of his distressing ink.  I inked all of the papers, stickers, diecuts and lace.
 I used papers from Glitz that I found at Craft Warehouse, and got online from Scrapace.  The lines are "Love Games", "Afternoon Muse", and "Laced with Grace."  I also used Prima flowers and bling, some lace that I had, and some ribbons from the "Lost and Found" paper line.
 This is the first part opened.  There is a tag under the paper on the left.  I used lots of flowers, bling, and journaling labels.
 The left side opens to reveal this punched paper that I put large 5x7" tags behind.  Then, shown here is a flap (with the children on it)...
 This is the flap lifted to show a pocket.  I put large tags in this pocket.
 This is the other side of the album opened, the two half flaps.  There is another full sized page.
 This page opens to two small flaps.  The upper one under "Holding Hands" has a round tag that comes out.
 Those two flaps opened.
 The first set of tags...front....
 and back.
 Here is one of the tags.
 The tags under the punched paper, front...
 ...and back.
 Front of the tags in the other pocket...
And the back.

Have a great day, and STAY CRAFTY!

Monday, August 1, 2011

Finally Finished!!!

I have been working on this for a long time. I started it, put it aside, worked on it, put it aside again.  This weekend...I finally got it done.   It is not my idea, but I did tweak it a bit.


I got the idea from a You Tube video I saw here.  She called it her "Love Mini Album Page", and she made it for a swap she was in.  I thought it was super cute, but small, at 4x4".  I sized it up a little bit, and created an entire book with that page tutorial.

The papers are DCWV, "Tradewinds", and I used some TPC stamps, for the title.  I added a few die cuts from Pink Paislee, and some Recollections leaves and button.  There is also a Tim Holtz memo pin on the cover.  The charms are various ones I had in my stash.


I made a simple ribbon closure.  The flowers I sprayed with two different sprays to achieve the color that is pretty close to the colors on the page.


So, there are four pages.  On the front of each page is a pocket with a tag.


Tag pulled out...


There is a flap that opens in front of the tag pocket.


This shows the first page turned...and the front of the second page.  The string wraps around the flower to hold the flap closed.


This is the flap opened.  There are two pockets here, with two tags.


Then the little booklet opens up for more area for pictures and journaling.


The next page...


And the next.


I am glad you stopped by to check it out!  Now, all I have to do is GO ON VACATION SO I CAN FILL IT UP WITH PICTURES!!!

Stay Crafty, My Friends!