WELCOME!!

We are so glad you are here! We love making and sharing our projects, and we are excited to have you visiting our site. Please leave us a comment and let us know what you think!

Jackie and Michelle

Followers

Wednesday, April 4, 2012

Almost finished!

My wonderful, awesome, sweet, incredible husband has finished  building my craft room for me!!!!!
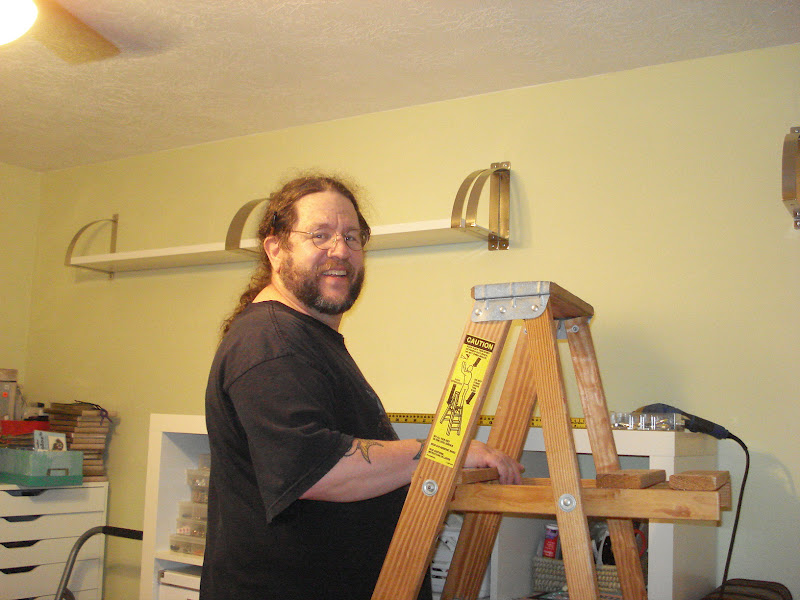
 Here he is, my HERO, putting up my shelves for me.  I got a set above my shelving unit.
I also got these cabinets over my long table.

These shelves over my closet door.  I love them!!!  I am really utilizing all of the space I can for all of my crafty goodies!

I am almost moved in.  Last night, whilst I was organizing my "Tim Holtz/7 Gypsies/Graphic 45/Etc." bin of embellishments and goodies, he came in an took some pictures.  Here they are!
 The drawers to the left of my desk hold my punches and scissors.  On top, I am making it my "book binding" station.  My Bind-it-All will live here.  The baskets on top are holding my O-Wires.  I am also putting my McGill paper punch and my book ring collection.
 My desk is still a work in progress.  In the future I am hoping to have my own computer.
 To the right of my desk. my drawers that hold all of my stamping and inks for stamping.  On top, my Cuttlebug Station.  The baskets are holding all of my embossing folders and my cutting  plates.  My Sizzix collection is living on the shelves.
 I got some pegboards and my Spellbinders dies are living here.  My shelves are, at least at this point, holding my books that I have made.  I finished putting some up after these pictures were takes...I NEED MORE SHELVES!!!  LOL!!!
 He took a picture of my collection (in the suitcase) of book rings and binder mechanisms.  I put this suitcase in my book binding station.  (Tee Hee, I am sooooooo loving this!)
Under my cabinet, is my "long table" where my Cricut (behind the bins/boxes) lives.  I put my papers underneath, but then decided that the space was perfect for my other machines.  I have my DreamKuts, my Your Story, and my two large Xyron machines.  They are perfectly visible and useable now!  The left drawer stores my cartridges for my Xyrons, and the right, all of my Cricut cutting mats and goodies.

I have learned some things.  I am a hoarder of craft supplies.  I am weeding out things, and deciding what stays, what goes, what gets donated.  I am trying to be realistic about what to keep, knowing what I really love to do, and what to toss, because I really will not ever do it or I will really not ever do it again. I have to purge and start with a fresh slate, and I have to be vigilant.  I have got to quit buying and acquiring just because I like something. Everything has to have a purpose...really, I can't believe how much stuff I had!  I am an amazing packer...you should have seen all of the variety of locations in my old space I had things stashed in...incredible!

Ok, today, Saturday and Sunday are the final organizing days.  I should be moved out of the old space and totally into the new space.  I am hoping to be showing you my new projects very soon!  Thanks for putting up with my giddiness, I am just too excited about having my own space!  I can't wait, because now I HAVE ROOM TO HAVE MY BFF, JACKIE, COME OVER TO SCRAP WITH ME!!!

Stay Crafty, My Friends!!!

Saturday, March 31, 2012

The organizing continues...

 This is the wall unit filled with some of my stuff.  I actually have a couple "spaces" still empty.  I am going to go to Ikea today, and one of the things I am going to get is the drawer inserts for some of the spaces.  I bought the cool wire baskets at our Fred Meyer's on clearance for $7!  They are perfectly sized and go with the room!  The first one holds all of my flowers, the second all of my Christmas themed stuff, and the third, all of my Halloween stuff.  I have more under my work table sorting my kits.  Then there is my sewing machine, behind it the tackle box I have had for over 20 years as my sewing notions chest.  My mom made me the machine cover, I love it!
 The right side of my desk, and I am still figuring it out.  It will be my Cuttlebug station, but it needs to be prettier!  Do you like my monkey?  My BFF Jackie gave that to me, and she loves to hang around.  LOL!  These drawers hold all of my stamps and all of my inks.  It is not filled, so I may do some rearranging and put some other goodies in here as well.  The carousel on my desk here will eventually live on my "work desk" but I am using it not to help sort things.
This is my long table.  It holds my Cricut, and will eventually also hold my book binding gear as well.  I bought the paper holders at Michael's for my cardstock.  The tower on the left of it is holding all of my paper stacks I have bought.  I had the wire shelves in my old room, but got the bins for it new for this room.  The Ikea run will also get me some cupboards for above this table that will hold all of my fabric.  Like I said, I am still sorting stuff and organizing.  Do you see the suitcase on the paper sorter?  I found these at Craft Warehouse...I am getting more!  They are huge and match my room!  I have my recipe/cookbook embellishments in this one.  There are two on my big shelving unit that hold my distressing inks/chalks, and my spray inks.

I still have to go through my fabric...which will go in the cabinets.  I have my yarn stash, which will go into the closet.  Then I have my beading supplies, that I think will get donated.  I haven't done beading in years!  But, as you can see, I am a hoarder of craft supplies and I will probably just figure out how to keep them!!!  One never knows when you are going to need them!

More pictures to come.  I am hoping to get it all in my room this weekend so I can finish a project I started.  I am dying to show you a variation on my last envelope album!!!  I have it half done, and then the room project started!  I can't finish anything right now!  I am trying really hard, I am having crafting withdrawals!!!

Stay crafty, my friends!

Wednesday, March 28, 2012

Ribbon Storage!

I had boxes and boxes of ribbon on spools and on clothes pins.  The boxes were a hodge podge of shoe boxes, file boxes, etc.  They were not very pretty, and I couldn't get to them easily to see what I had.  Well, those days are over!
 The space behind my door is the perfect place!  It is usually a wasted space, you can't put a lot between the door and the wall.  I bought a clothing hanger with 4 levels and 8 clips.  My over sized ribbon, special adhesive ribbons, etc go here.   Then...
I did a little DIY work and made some ribbon bobbins and used the Command hooks and...TAA DAA! My ribbons are organized, easy to get to, and PRETTY!  I have 4 more hooks on the bottom...and two more boxes to sort through.  But, when I am done, there will be no reason I can't find my ribbons!  I love this idea.  Originally, I saw the idea of Ribbon Rings online.  But, having a Gypsy and a Cricut, I created my own, and it works like a charm.  I did, however, use paper, so I chose the heaviest I could find in my stash.

I will have more pictures soon.  I am still getting sorted out!  I also sew and knit/crochet...I have  a TON of stuff to go through.

The plaque above my door...
He actually bought this for me!  My wonderful Sister-in-Law bought the one hanging on my door.  

Stay crafty, and organized, my friends!

Sunday, March 25, 2012

Furniture!

 I LOVE IKEA!!!  They have the perfect furniture for the most awesome craft room!
 I can't wait to get it all organized.
WOOOOOOO HOOOOOO!

Thursday, March 22, 2012

Getting closer...

 OK, bad picture, but you get the idea...the walls are painted!
 Excuse the vacuum cleaner in the floor...I love this color!
Ace is supervising the furniture building project.  Stay tuned!

Monday, March 19, 2012

Just to let you know...

I have been a bit sporadic in the posting lately, because I am getting a new craft room!!!  Woo Hoo!!
 Here I am, starting with the painting.  The color is Meadow Pear...doesn't that just sound serene?
 I found out that I do NOT like painting.  This is my first time doing it, and I am not having fun...but, I think it is going to be lovely!
Zeke and Ace are supervising the project.  They approve of the color I chose!

I will post more pics as  we get it done.  I am SOOOOOOOO excited.  Stay tuned!

Stay crafty, my friends!

Thursday, March 15, 2012

"Sweet Baby" Envelope Album

I made this album for a friend of mine who is expecting her first baby in April.
 I used large Bazzill envelopes for the base of the book.  I will have a mini tutorial at the end of the post showing how I prepared them.  I will also list all of the supplies used at the end of the post.
 This book has a total of 6 pockets.  Each pocket has one large tag, big enough for a 4x6" photo on each side, and a small tag for journaling.
 Here are the tags.
 It also has 4 large pages that a photo can be placed.
 Another set of pockets...
 ...and more pages.
 This book will have 12 photos (on tags) and 4 more on pages.  That's a pretty good sized "brag" book!
The supplies are:

Ribbon and large buttons:  Recollections
Bling:  Great Expectations
Envelopes:  Bazzill
Butterfly and chipboard letters:  Heidi Swapp
Ink:  Tim Holtz
Everything else:  The Girl's Paperie

This is how I prepared the envelopes.

 These envelopes are large enough for 5x7" cards.  I prepared them by cutting a slice (shown above) so that the envelope flap could fit inside of the envelope smoothly.  I then glued the flap down, INSIDE the envelope, creating the pocket.
If you didn't make the slice, the flap would have to go under those little pieces, and I didn't like the look of that.  Then I just covered the envelopes in papers, which gave the envelopes a little more "sturdiness".

For the front and back covers:  Before I adhered the flap inside of the envelope, I inserted a piece of chipboard (just a bit smaller than the envelope) to make them even more sturdy and durable.

I hope that made sense.

Stay Crafty, My Friends!

Tuesday, March 13, 2012

Are you kidding me?

Check this out...I woke up to SNOW!!!
 This is Herbert, the Gnome. Well, right now he is supposed to be a LEPRECHAUN!!!  It's MARCH!!

Here is my car!!!

We had some crazy weather here...This is definitely going in the Smash book!  

I will be showing you some of the pages very soon, I also have a new baby album in the works that I will be sharing.

Stay crafty, and WARM, My Friends!

Friday, March 9, 2012

My Newest Smash Book Project

Well, my Daily Junque Journal is getting full.
It has also evolved into more of an inspiration journal than a "Smash Book."  So, I decided to shift gears a bit.  I am going to finish this book up, using the clippings and printouts from magazines, the internet, etc, and keep this as an inspiration journal.  I am going to leave the personal things in here, though, as I don't want to rip those pages out!

I am going to start another "Smash Journal" and I am going to use a book I put together 2 years ago, and then set aside to wait for the perfect project.

 I bought this kit from Creating Keepsakes at a convention 2 years ago.  It is full of fun things.  The only thing I did different was to use bigger bookrings, when I decided to make it a "Smash Book".  I figure it is going to get big!
 It is a big book, the pages are 6x12".  It has a ton of them!  Some are cardstock, some are transparencies...
 There are envelopes...
 And chipboard pieces.
 There are tons of possibilities.
 I used a chipboard ribbon slide "Remember" and used ribbon and score tape to adhere it to the plastic cover.
 This is the first "entry."  My husband gave me these BEAUTIFUL flowers for Valentine's day!  I saved the cellophane paper from it, and the card.  I printed  a picture and put it on an envelope.
 I doodled one day at work, and the shopping bag has some stuff I saved from a girly shopping trip with my BFF.
I added a menu from the coolest burger place around here, and a bunch of tags from some clothes that I recently bought.

That's it for now.  What do you think?

Stay Crafty!!

Wednesday, March 7, 2012

60th Birthday Card

We have a coworker that recently had  her 60th birthday.  I could NOT let that go without a little ribbing about it.


This card was 50 inches long!!!  I hand cut the "candles" and punched the "flames."  The pages were attached with strips of cardstock to create the long accordion needed.  I had to create an envelope to put it in because it was soooo thick.  She loved it!

Monday, March 5, 2012

Menu Planner

 Okey Dokey, I came up with another recipe/meal planning idea that I think is kinda cool.  I made this planner out of 5x8" index cards, cutting them into three pieces, and used my bind-it-all to put it all together.  The papers are October Afternoon, and so are most of the embellishments.  I added the crochet flower from Colorbok, the charms are unknown, but the charm attacher is Tim Holtz.  The bling for the butterfly is from Recollections.
 We do a lot of low carb in our house, so I basically have the same categories on either side...but you could put anything you wanted...salads, starches, whatever.
 The back page has a mini pocket with these index cards.  I think what I will do is put the "traditional" menus here.  When my mom made ham hock and bean soup she always served it with fried potatoes, cornbread and pickled beets.  Those kinds of menus will be on these cards for the future generations to have.
 So I am putting my recipe name, where it is located, and the ingredients on these cards.  Then as I plan my dinners for the week, I can flip through, get the combos I want, and make a list for the grocery store if necessary.  How does this menu sound?
Or maybe this one?  I think this will be so handy once it is fully filled out.  I am adding our families favorite dishes to this book.  I also think it will get me out of a rut of combining the same things all of the time...except, of course, for those important traditional meals!

Stay crafty, and HUNGRY, my friends!

Friday, March 2, 2012

A Birthday Card for Madie

My niece is turning 17, and I thought I would use some of this GORGEOUS paper from Colorbok to make her this card.
 I had these 6x6" gatefold cards.  I used punch outs from the paper line for the banner on the envelope.  The butterfly is from my paper bag spray catching.  I used some bling for the butterfly.  The yellow flowers are Prima, I think, the crocheted one is from this papers line of embellishments.
I added the pocket on the inside for the money she is going to get.  SHHHH, don't tell her!

Stay crafty!!