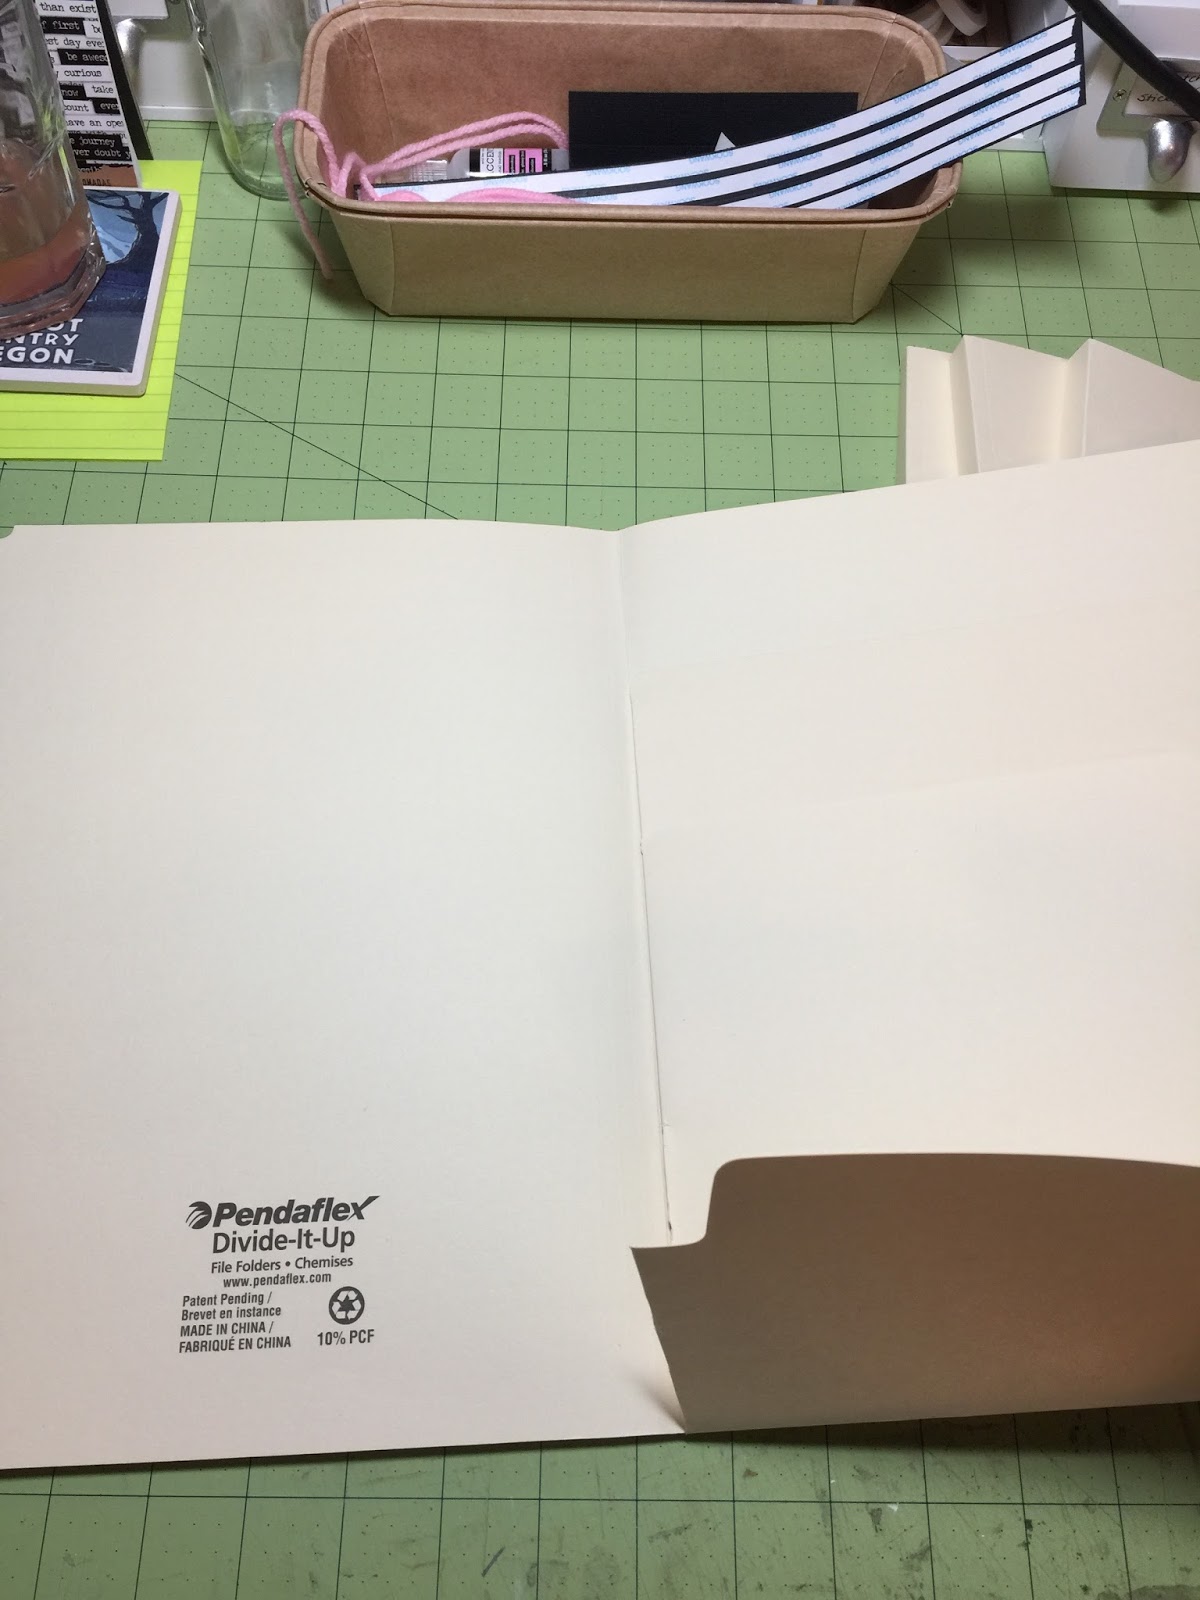
Welcome to part 2 of my Moments album. I wanted to show you the "bare bones" of the album. Next week I'll show you pictures of it all embellished!
I did a standard chipboard cover for the album. It is large! There are a ton of places to put things!
I used an old line of products by Basic Grey..."Fact and Fiction", "Clippings", "Capture", "Hey You", and "Hello". I tried to use just these products exclusively.
The cover on the left and the first folder on the right.
I covered the file folders completely, cutting around the tabs and natural finger pull spots on the folders.
On the right it shows the long pocket made with the first folder to attach it to the second.
This album was fun to put together. As you can see, I also used distress ink on everything as well.
These are the pages I created just by adding paper to the folder flaps...
...and the last piece that I left as a pocket.
Here are pages made...
And the last piece that was flipped to the back of the last file folder.
I sure hope this makes sense! It was a lot of just sitting there and experimenting. I didn't really plan this out, it just happened. I love it.
Next time we get to see it all decorated!
đŸ’–Michelle
Saturday, August 26, 2017
Wednesday, August 23, 2017
"Moments" File Folder Album, Part 1
Hi, and Happy Wednesday! Today I would like to start a three part series on my new album. I have actually been working on this for a long long time. I started designing it, then didn't like it, put it away, drug it back out, redesigned it, and here it is. I sure hope you like it.
Today I'll share my pictures and notes on how I made it. Saturday the post will show you my finished product. Then next Wednesday I will show you some awesome goodies I made with the leftovers.
This is another long post, so sit back and relax. Have fun, and please let me know what you think!
I used several of these folders, 4 to be exact. They are put together so that you can have pockets. That in and of itself is a cool way to start an album, but I, of course, had to take it to the extreme.
This is the first folder. I detached the inside divider...
...like so, then flipped the whole thing over...
...like so...
...then flipped the dividers up. They are now on the outside of the back of the file folder. This now becomes the inside of the first folder. These dividers were on the right side of the folder, now they are on the left. They are a little wonky, but it is explained on the next picture. On the new right side of the folder, I measured 5 1/4" from the 1/2" gusset (explained below) and used that piece to attach to folder #2, creating a side pocket and adhering the folders together. I'm sorry, I didn't get a picture of that, but Saturdays post will show all pages.
I had to do some twisting of the dividers to make them in the proper configuration.
But then this was the finished product. I should mention that I used the existing scores down the center of the folders to create 1/2" gussets. These are what attached the folders to the spine of my album.
This just shows the gusset of the album. I chose 1/2" but you could do it thinner if you wanted.
I didn't do a picture of the second folder. Please forgive me. The cut right side of the first folder attaches to the front of the 2nd folder, creating a long side pocket. I left the rest of the folder as is, creating the gusset (as I did on all folders.) The pockets I left, creating pockets for my album.
Folder #3...I cut off the left side at 5 1/4" from the 1/2" gusset, this attaches to the back of folder #2 to create a long pocket. I used the extra folder pieces for hinges. I detached the inner flaps of this folder. See below.
Everything detached from folder #3. I rearranged the flaps to create pages and a pocket.
I decided to use the two top flaps (after reconfiguring) to create pages. The smallest pocket was reattached to create a pocket on the right side of the page.
This will be shown in Saturdays post how I made the pages. It was super simple, I just added patterned paper to the page, going all the way down to the bottom of the album. The folder acted as a hinge to create the page.
This is folder #4. I cut off the left side 6" up from the bottom, taking top of the left side off. This is what attaches to the back of folder #3. On the right side, I cut side of the little pocket and flipped it over to the back of the folder creating a pocket on the back of the folder. I left the 2 flaps on the inside right.
This shows the pocket flipped to the back of the last folder.
After seeing how wide it would be and measuring I just made the cover to fit. This turned out 3" wide, giving a 1/2" gusset for all pages in front and in back.
Stay tuned for next week...My finished product!
đŸ’–Michelle
Today I'll share my pictures and notes on how I made it. Saturday the post will show you my finished product. Then next Wednesday I will show you some awesome goodies I made with the leftovers.
This is another long post, so sit back and relax. Have fun, and please let me know what you think!
I used several of these folders, 4 to be exact. They are put together so that you can have pockets. That in and of itself is a cool way to start an album, but I, of course, had to take it to the extreme.
This is the first folder. I detached the inside divider...
...like so, then flipped the whole thing over...
...like so...
...then flipped the dividers up. They are now on the outside of the back of the file folder. This now becomes the inside of the first folder. These dividers were on the right side of the folder, now they are on the left. They are a little wonky, but it is explained on the next picture. On the new right side of the folder, I measured 5 1/4" from the 1/2" gusset (explained below) and used that piece to attach to folder #2, creating a side pocket and adhering the folders together. I'm sorry, I didn't get a picture of that, but Saturdays post will show all pages.
I had to do some twisting of the dividers to make them in the proper configuration.
But then this was the finished product. I should mention that I used the existing scores down the center of the folders to create 1/2" gussets. These are what attached the folders to the spine of my album.
This just shows the gusset of the album. I chose 1/2" but you could do it thinner if you wanted.
I didn't do a picture of the second folder. Please forgive me. The cut right side of the first folder attaches to the front of the 2nd folder, creating a long side pocket. I left the rest of the folder as is, creating the gusset (as I did on all folders.) The pockets I left, creating pockets for my album.
Folder #3...I cut off the left side at 5 1/4" from the 1/2" gusset, this attaches to the back of folder #2 to create a long pocket. I used the extra folder pieces for hinges. I detached the inner flaps of this folder. See below.
Everything detached from folder #3. I rearranged the flaps to create pages and a pocket.
I decided to use the two top flaps (after reconfiguring) to create pages. The smallest pocket was reattached to create a pocket on the right side of the page.
This will be shown in Saturdays post how I made the pages. It was super simple, I just added patterned paper to the page, going all the way down to the bottom of the album. The folder acted as a hinge to create the page.
This is folder #4. I cut off the left side 6" up from the bottom, taking top of the left side off. This is what attaches to the back of folder #3. On the right side, I cut side of the little pocket and flipped it over to the back of the folder creating a pocket on the back of the folder. I left the 2 flaps on the inside right.
This shows the pocket flipped to the back of the last folder.
After seeing how wide it would be and measuring I just made the cover to fit. This turned out 3" wide, giving a 1/2" gusset for all pages in front and in back.
Stay tuned for next week...My finished product!
đŸ’–Michelle
Labels:
File Folder Album,
File Folder Tutorial,
mini album
Saturday, August 19, 2017
Folio in a Folio Album
Hi Everyone! I have a new project for you today! I have seen a lot of folio projects, but I haven't seen one like this...If you know of something similar, please let me know.
Grab a cup of tea, sit back and enjoy. This is a LONG POST! There is no real tutorial, but I'll describe stuff I did in this album. I sure hope you like it. At the end of the post I'll have a list of all of the products I used. It is made mostly of Tim Holtz products, but there is a few other things.
I made this because I had an idea and wanted to see if it would work, then I decided to see how many of the products in my stash I could use. I did NOT buy a single thing to make this. I don't know if that is a good thing or not! HAHA!
This is the back. I replaced the elastic with two loops of elastic. Once I filled this bad boy up it held the cover better.
Here's where the folio in the folio happened. I had a smaller one, adhered it on the inside cover of the bigger one, and taa daa!
Here is the cover of that folio. Cute little baby! I adhered magnets under the flap to keep it closed.
Opening the small folio...
...inside the folio. I filled it with a bunch of things.
I filled it with all sorts of cards and tags and ephemera. I even decorated a clipboard to put inside.
Here is the other side of the folio. It is basically like the other folios, except I made full sized pages.
I created a magnetic band closure for the first page, because I used the page mechanism from the small folio to create a cascade of pages, and I needed a way to contain it!
I just used kraft card stock to create pages and photo mats. All of the embellishments are adhered so that pictures can tuck underneath.
Please, enjoy the pictures... (and please excuse the pink sticky note that is peeking through. I wrote notes on it and forgot to remove it before I took the pictures!)
Some photo mats are adhered to create pockets for tags and other goodies.
I LOVED USING THE PHOTOS OF FOUND RELATIVES!
As you can see, I combined a ton of Tim Holtz Goodies. This is the last page of the waterfall page. (And I removed the sticky note!!!)
Some pages have long pockets on the sides where I tucked all sorts of goodies.
Some pages have smaller pockets on the bottom.
All of the pockets are filled with awesome goodies and places to write journaling and add pictures. I can already see my family in the vintage style frames.
Here is another fun page. On the left I created a booklet with envelopes, and on the right I created a triple page flip.
I adhered the envelopes with the flaps, made a finger pull spot, and filled the pockets with the goodies below.
The triple page flip. As a side note, I used the page mechanism that came with the large folio as the binding of the pages. I just adhered the mechanism to the back of the folio, then added kraft pages as I felt like it and decorated. For the triple flip, I just cut that particular piece of the mechanism into three pieces and layered the kraft mini pages to them. Super easy!
More pockets under the photo mats.
This is the back side of the page flip, and the back of the folio. With the mechanism I not only adhered the pages, but also used the widest part to create the pocket.
Here are the goodies inside the last pocket.
All folded up...
This was SO MUCH FUN TO MAKE!!! I just had an idea and started to create. It did take a while, but the results are amazing. I hope you try this project also! If you do, let me know what your imagination comes up with!
Here is a list of all of the products I used:
By Tim Holtz:
1 large and 1 small folio
Elastic loops
Paper lines Memoranda, Wallflower and Correspondence
Vintage Photo Distress Ink
Journaling Tickets
Pocket Cards
Glassine Pockets
Cabinet Card Frames
Mini Cabinet Card Frames
Photo Booth Cards
Mini Paper Clips
Index Clips
Found Relatives Cards
Paper String
Flash Cards
Gem Clips
Film Strip Ribbon
File Tabs
Botanical Layers
Collector Layers
Game Spinner Pieces
Ephemera Pack Thrift Shop
Watch Cameo
Other Stuff:
Jellybean Kraft Tags
Jenni Bowlin Printed Tags
Paper Accents Kraft Postcards
Large Brown Tags (Given to me by my Sassy Sister Elsa! Thank you!)
Bazille Kraft Cardstock
Basic Grey Magnetic Disks
Score Tape
Scotch Liquid Glue
PHEW!!!!!
Have a wonderfully crafty day!!
MichelleđŸ’–
Subscribe to:
Posts (Atom)