WELCOME!!

We are so glad you are here! We love making and sharing our projects, and we are excited to have you visiting our site. Please leave us a comment and let us know what you think!

Jackie and Michelle

Followers

Tuesday, February 23, 2021

"Lucky Star" Tag Album Tutorial

 My third tutorial using the Blue Fern Studio's "Lucky Star" paper collection is available on YouTube! This is a design team project for Country Craft Creations. Please visit the store, you will love it.

I made this fantastic tag album with a chipboard cover, pocket pages and a ton of tags. I used up every bit of the paper I could to make this, and decorated it with flowers, ribbons, rhinestones and fussy cutting. I hope you like it! The video starts with a walk through and then goes into how to make it.

I do not have a cutting guide for this project but below is a cut list for the project. Thanks for watching and I hope you enjoy the tutorial. I will be back soon with more projects!!! Chipboard (I used one sheet of 12 x 12): 2 - 4 1/2 x 8 1/2 1 - 2 1/2 x 4 1/2 Cardstock to cover chipboard (main color, 2 sheets of 12 x 12): 2 - 6 1/2 x 10 1/2 1 - 5 1/2 x 6 1/2 1 - 5 1/2 x 4 3/8 Pocket pages (Cardstock in main color, 4 sheets of 12 x 12): 4 - 6 7/8 x 9 (I use the leftovers from these sheets to create tags for the pockets...see below). Photo mats to go on the pocket pages are 2 each of 4 different contrasting colors, all 6 1/8 x 4 1/8 (I used leftover pieces of my design team package, you can use a single contrasting color of cardstock, you will need 8 photomats in all, 2 sheets of 12 x 12.) Patterned papers used to make large tags for pockets are 4 at 4 x 8". These were left over from my first project. You can see this tutorial here. https://www.youtube.com/watch?v=YvtWY2YFheM Cardstock tags, 4 at 3 1/2 x 7 (these were cut from leftovers from the pocket pages). I covered these with pieces of patterned papers and cardstock left over to create different areas for photos...please see this in the video for examples. Behind each photomat (except for the first one...you'll see in the video what I mean) I put 3 x 4 pieces of cardstock and cut aparts. I used 16 in all. Eight were 3 x 4 cutaparts and 8 were plain cardstock pieces. You will need Seambinding, flowers, bling, etc. as desired. I used Art Glitter Glue and Score Tape as well.


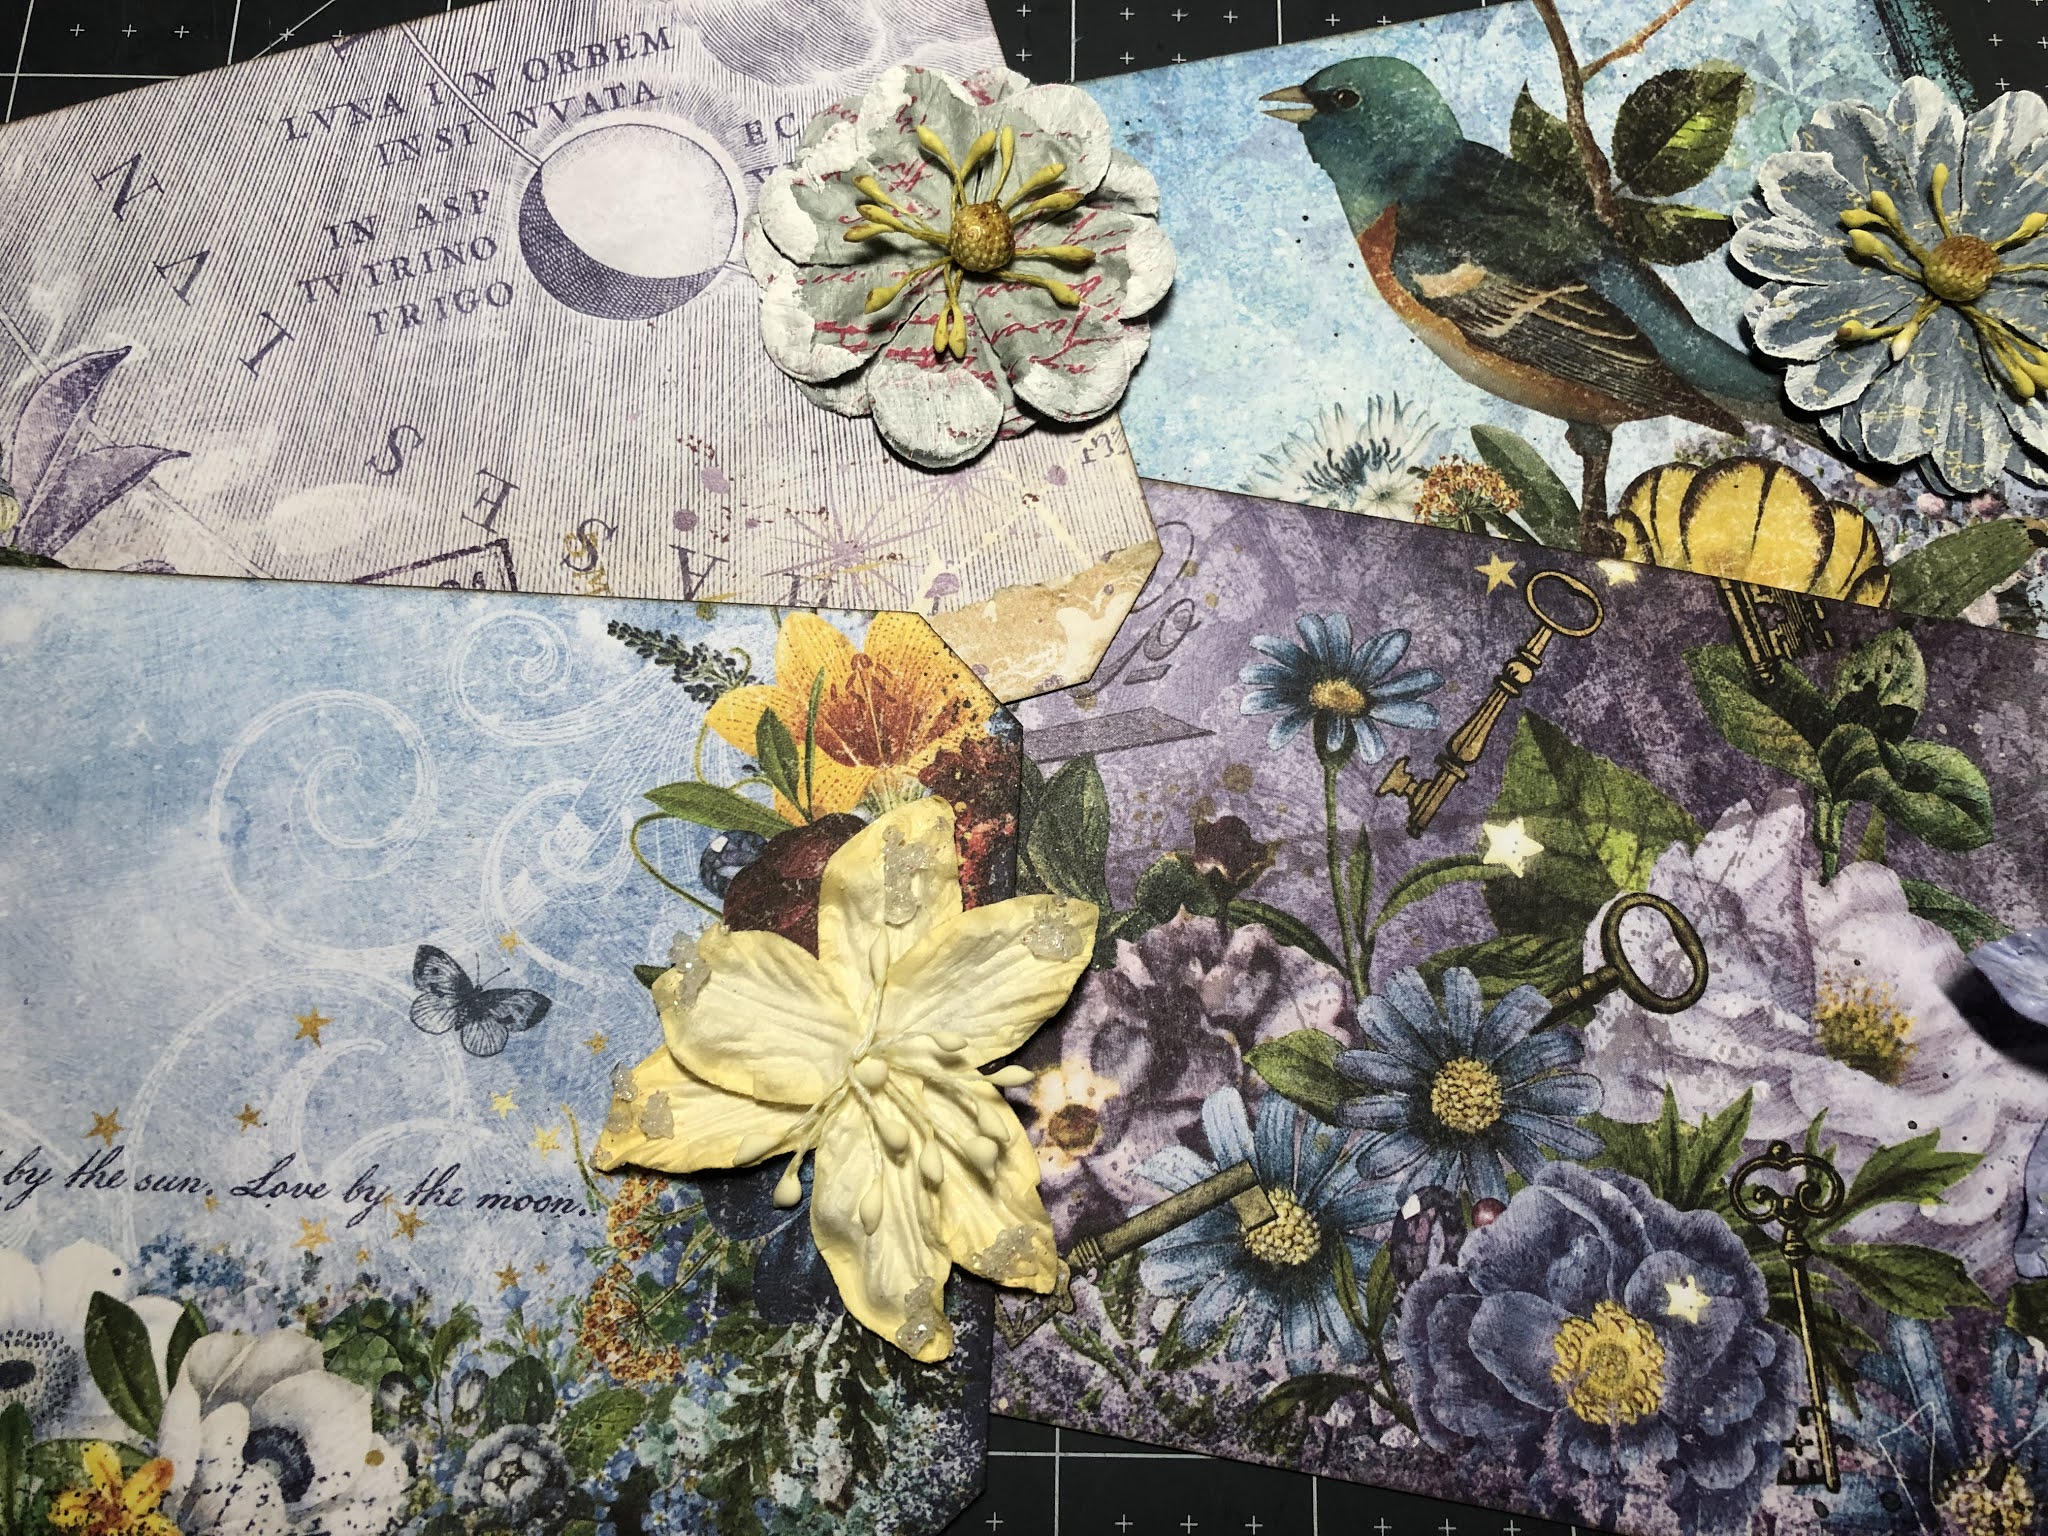
Monday, February 22, 2021


Y'all have to check this video out!  Tamra, owner of Country Craft Creations, has ventured into making her own designs for paper collections!!!

I absolutely love the papers, they are beautiful in every way.  

The collections are:

Country Bunny

Forever Ireland

What's Cookin?

You will absolutely love love love the designs and the quality of the papers.  There are more designs to come.  Best of all, MADE IN THE USA!!!  

Check out the video and then check out Country Craft Creations.  You will want all of them!!  I can't wait to start creating with them!

CONGRATULATIONS, TAMRA!!!  WELL DONE!!!

Stay crafty,

Michelle

Sunday, February 14, 2021

Coming soon!

 Here’s a little sneak peek of my upcoming design team project for Country Craft Creations using Blue Fern Studios paper collection.  You’re going to love it!


Visit Country Craft Creations at countrycraftcreations.com and check out this collection, and some NEW PAPERS by Tamra herself!  You will love, love, LOVE this online shop!  

Stay crafty, my friends!

Wednesday, February 10, 2021

 Good morning...I have my 2nd design team project for Country Craft Creations using the gorgeous "Lucky Star" collection by Blue Fern Studios. It is gorgeous paper, and the cut-aparts inspired this layout. This video is more of a share/walk through, but I will talk you through my whole process, including some tips on conserving paper if you are running a little low. I love how this layout looks, and I hope you do too!


Please visit Country Craft Creations for your supplies for this and other projects. You will not be disappointed!!!

Have a great day and stay crafty!

Michelle

Thursday, February 4, 2021

Explosion Board Gift Boxes Tutorial

 Hi Everyone! I'm back with another tutorial using the Explosion Box Scoreboard from We are Memory Keepers.  

This is a design team project for Country Craft Creations, featuring this wonderful scoreboard. The board will be available in the store, Country Craft Creations soon...please keep checking the site, it is on the way again (It sold out the first round!!!)  


I have created some different types of gift boxes for you today, ranging from an 8 x 8 x 2" box to a "pizza style" gift box with inside dividers. There are several different ideas in this video, please check it all out. I am currently working on two more videos with even more ideas to create even more things with this scoreboard. I am OBSESSED! The patterned paper was from my stash, and I used up scraps as well! I hope you enjoy the video, have fun and let me know if you have any questions!

Stay Crafty,

Michelle


Wednesday, February 3, 2021

My "Wish Album" Tutorial is available!


Hey everyone!!!  The tutorial for my "Wish Album" is available.  Click the video above to check it out!

I am using the "Lucky Star" collection from Blue Fern Studios...it is GORGEOUS!!!

This is a design team project for Country Craft Creations, and I think you will love it.  It is simple and easy and only requires 3 sheets of cardstock and 5 sheets of patterned paper.  

Have an amazing day and remember to stay crafty!!!

Michelle

Tuesday, February 2, 2021

“Wish” Album Walk Through Video


The video is available for my design team project for Country Craft Creations!  (Please check out the store at countrycraftcreations.com you won’t be disappointed!).

It’s using Blue Fern Studios “Lucky Star” papers and they are beautiful!  The tutorial is coming soon!  I hope you enjoy the video!  

Monday, February 1, 2021

A sneak peek!

This is my first design team project for Country Craft Creations using Blue Fern Studios “Lucky Star” paper collection and it is exquisite!  
A walk through and tutorial are coming soon!  Please go to Country Craft Creations  and get your papers!  You will love this collection!!

Have a great day and stay crafty!

Michelle


Sunday, January 24, 2021

Squash Album Explosion Box Tutorial

 I did another tutorial on an idea I had using the explosion board. (There are more to come also!!). I'll show you how to put together this album and box in this tutorial, I hope you enjoy!!


I am using Echo Park's "Remember the Magic" papers along with Artisan cardstock from Country Craft Creations. It uses the We Are Memory Keepers Explosion Box Scoreboard, also available through Country Craft Creations. This is a super fun and easy project and will be such a cute gift for someone!

Thanks for watching,

Michelle


Saturday, January 23, 2021

Camp Happy Bear Explosion Box Tutorial

 Happy Saturday!

I just uploaded a tutorial for you. This is a design team project for Country Craft Creations, and I think you will love it!  It is a start to finish tutorial on making an explosion box using the Explosion Board from We Are Memory Keepers.  I am also using the "Camp Happy Bear" papers from Photo Play that I purchased from Country Craft Creations.  Please check the store out...they have everything!


Enjoy the video and have a great weekend!!!

Michelle


Wednesday, January 20, 2021

 I just did a design team haul...y'all are going to want these papers, just saying!!!


I was given Blue Fern's "Lucky Star" to play with this month...it is STUNNING!!!

Head on over to YouTube by clicking the video above and check it out...then RUN to Country Craft Creations and get your papers today!!!


Wednesday, January 13, 2021

What to do with your Explosion Box Scoreboard!

 The video is up and running and you will LOVE THIS SCORE BOARD!!!  You can do so many things with it and I have come up with more ideas...so more tutorials to come!!!


This scoreboard is amazing and is available at Country Craft Creations.  Check it out!

Below is a quick Cheat Sheet for you to use to start creating with your board.  I have the measurements that came with the board, and my own measurements that I figured out for the board.

These measurements are on the instruction page that comes with the board.  They are for making the EXPLOSION BOX PAGES and for making actual BOXES.


Box Size

Paper Size in Inches

Finished Box Size in Inches

XXS

6x6

2

XS

7x7

2.33

S

8x8

2.66

M

9x9

3

L

10x10

3.33

XL

11x11

3.66

XXL

12x12

4


These are the measurements for the LIDS that correspond to the boxes.


Lid Size

Paper Size in Inches

Finished Lid Size in Inches

XXS

4 1/2 x 4 1/2

2.25

XS

4 7/8 x 4 7/8

2.58

S

5 1/4 x 5 1/4

2.91

M

5 1/2 x 5 1/2

3.25

L

5 7/8 X 5 7/8

3.58

XL

6 1/4 X 6 1/4

3.91

XXL

6 1/2 x 6 1/2

4.25


If you want to make an explosion box and use all 7 sizes of boxes and lids, you will need 9 sheets of 12x12 cardstock to cut out all of the pieces needed.


If you want to create a DIAGONAL PAGE inside the XXL outer box, you will be able to create a box with only one other page, and you will use the Small Box size (without the lid) or the XS Box size (with the lid).


Here are the measurements for the papers needed to make the SQUASH CARDS using the scoreboard.


Squash Card Size

Paper Size in Inches

Finished Card Size

XXS

4x4

2

XS

4 5/8 x 4 5/8

2.33

S

5 1/4 x 5 1/4

2.66

M

6x6

3

L

6 5/8 x 6 5/8

3.33

XL

7 1/4 x 7 1/4

3.66

XXL

8x8

4


The measurements to make a GATEFOLD CARD are below.  You will need to decide the length of your card.  These measurements are for the total width of the card and the scoring of the sides.


Score Line

Length of Cardstock Needed in Inches

Total Width of Card, Gatefolds Folded, in Inches

Lid

4 1/2

2 1/4

XXS

8

4

XS

9 1/4

4 5/8

S

10 1/2

5 1/4

M

12

6


BOX ALBUM:

For my example of the album I made, inspired by Tamra, you will need the following:


Cardstock, 2 at 6 x 12, score on the board at the XXL mark on each end

Cardstock, 2 at 6 1/2 x 6 1/2, to create two XXL lids


Any other patterned paper, embellishments, inserts you want to make.  In the video I show you how I put them together.


GIFT CARD INSERT:

In the video I made a medium box with an XS lid. This will have a little bit more of a gap for your gift card.  If you want a tighter fit for your gift card, make a medium box with a small lid for the insert. 


You will I go over how to cut it in the video.     


FOR MY GIFT BOXES OF DIFFERENT SIZES:


Finished Box Dimensions

Cardstock Size Needed in Inches

Score on:

Lid Paper size,  score on the LID score line

8 x 8 x 2 

12 x 12

XXS

10 3/8 x 10 3/8

6 x 6 x 3

12 x 12

M

8 3/8 x 8 3/8


I have tried to make sure that this is as accurate as possible.  If you have any questions please let me know.  As I come up with other things to do with this scoreboard, I will let you know and create more additions to these cheat sheets.  


Have fun creating,

Michelle


Monday, January 11, 2021

A must have scoreboard!


Hi!  I got this new scoreboard, and you need it! It is by We Are Memory Keepers, an Explosion Box board. But it does way more than that!  I’m working on a tutorial as part of my design team for Country Craft Creations and I’ll show you how to use it and all kinds of things you can do with it!  I have come up with several different ideas you’ll love. And the projects are so fun!  It is in the shop and you can get yours here at Country Craft Creations.   I’ll be back soon with a tutorial!  Have a great day!

Wednesday, January 6, 2021

Simple Vintage Ancestry Scrap Project Tutorial

I have a share/tutorial for you today. I used scraps, just the scraps, of patterned paper from my design team package (Simple Stories, "Simple Vintage Ancestry") to make a couple of different projects. I made a tag album, some cards and some patchwork papers. I will talk you through everything, and in the video's description I have links to some of my videos mentioned, and to other designers who helped inspire what I created. Thanks for watching!


Sunday, December 27, 2020

The Final Walk Through for my Simple Vintage Ancestry Album!


Well, here it is, the final video in my series for my Simple Vintage Ancestry Album. This video is the conclusion, and will be a walk through of the final decorations that I did to complete the album. This is my design team project for Country Craft Creations using Simple Stories, "Simple Vintage Ancestry" paper collection. It is amazing!!! I love, love, LOVE this paper collection and you will too. Please visit Country Craft Creations at http://countrycraftcreations.com for your supplies. You will love all of the selection they have and the customer service is the best ever! There are three videos in this series before this one on the construction. Each video has a detailed list of the materials and cutting list needed for this album. #1, the cover construction https://www.youtube.com/watch?v=K3BtI2hNxD8&t=26s #2, the page construction https://www.youtube.com/watch?v=IreFZoJwNos&t=23s #3, adding pages to the cover and making the genealogy booklet https://www.youtube.com/watch?v=UouxSPCM1vI&t=146s

Thanks for watching and stay crafty!

Saturday, December 26, 2020

Simple Vintage Ancestry Tutorial #3 is available!!!


 The tutorial for my design team project, Tutorial #3 is available on my YouTube Channel here.

This tutorial focuses on putting the pages in the album and on making the genealogy booklets you can see in the pocket in the picture above.

I hope you like it as much as I do.  Please visit Country Craft Creations for your supplies for this project.  They can be located here!

Thursday, December 24, 2020

Simple Vintage Ancestry Album, Tutorial #2 is available!!

 Here is the second in my series for this design team project for Country Craft Creations.


This tutorial focuses on making the pages for the album.

Enjoy and have a very Merry Christmas!

Michelle

Wednesday, December 23, 2020

Simple Vintage Ancestry Album, Tutorial #1, is available!!!


Hello and Merry Christmas! I have a wonderful tutorial for you today. It is actually the first in 4 videos that I will have in this series. I am presenting my December design team project for Country Craft Creations! I am using Simple Stories, "Simple Vintage Ancestry" paper collection and it is AMAZING! I am totally in love with this project and I can not wait to share it with you! It is a huge album and it will require quite a bit of supplies, but it is soooooo worth it. The idea for this album is for an album that you can document a couple family genealogy and then pass it down to your children for a heritage keepsake. Please visit Country Craft Creations for your supplies!!!


This video is the first in a series. I have pictures in the beginning and end of the finished piece. During this video we will do a walkthrough of the prototype of the album we are going to make together! I rarely do this type of tutorial, but we are going to go through everything step by step. We will also go over the supplies I received in the design team package and the supplies I purchased to add to it. I will also make the cover of the album. The cover is a wrap around cover that I think you will like. The other videos showing the page construction and how to make the family chart will come soon, within a couple of days. I am working hard on the editing.

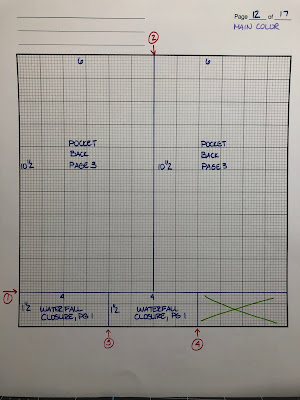
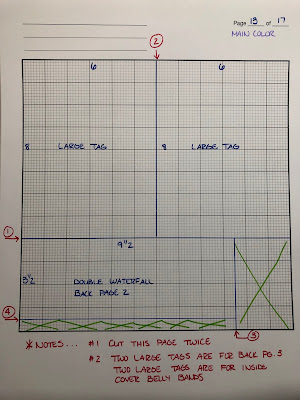
Below is a supply list. I will also have a cutting guide. The cutting guide is useful to show you how to cut your card stock so that you can make the most out of it with little waste.

Thanks for stopping by and for your support. Have a wonderful Holiday Season!! SUPPLIES USED: Chipboard, 2 at 12x12 Score Tape Sheets, 4 Large Magnets x 6 Patterned paper, Simple Stories, “Simple Vintage Ancestry”, 24 sheets of 12x12” (this includes the cut apart sheets for adding to the pockets in the album), 7 sheets of 6x8”, and 7 sheets of the 12x12 solid color papers that coordinate with this paper line Cardstock: Artisan, 12x12, 21 sheets of Black and 5 sheets of Brown Seam binding, about 6 yards Scoretape, 1/4”; and Art Glitter Glue Distress ink for the papers if desired Miscellaneous die cuts, stickers, flowers, etc. for decoration of the album. CUTTING LIST: (Scoring and patterned paper cuts will be given during the videos) Chipboard: 1 at 8 x 10 1 at 7 7/8 x 10 2 at 2 3/4 x 10 1 at 1 3/8 x 10 All cardstock below is to be cut in the main color, I used Black. The brown cardstock was used for mats and for the genealogy booklet we will make. Cardstock to cover the chipboard: 2 at 5 3/4 x 10 2 at 10 x 12 1 at 4 3/8 x 12 1 at 9 7/8 x 5 3/4 1 at 9 7/8 x 2 PAGES: Note that we are making two sets of pages, one group for each side of the album. Also, the pages will be scored at 3/8” for the tab that binds it to the album. Page 1: 2 at 6 7/8 x 8 1/2 Page 2: 2 at 7 3/8 x 9 Page 3: 2 at 7 7/8 x 9 1/2 Page 1 Front: Stacked Waterfall 2 at 10 x 6 1/4 2 at 9 x 6 1/4 Water fall closure, 2 at 4 x 1 1/2 Page 1 Back: Gatefold 4 at 8 1/2 x 3 3/4 2 at 8 1/2 x 3 1/4 Page 2 Front: 4 at 8 1/2 x 6 (Main Flaps) 2 at 6 1/4 x 4 1/4 (Flip up A) 2 at 6 3/4 x 4 1/4 (Flip up B) 4 at 4 3/4 x 6 1/4 (Top Flap add on pieces) 4 at 6 x 2 1/2 (Bottom flap pocket pieces) Page 2 Back: 2 at 3 1/2 x 8 (Pocket) Double Waterfall: 4 at 9 1/2 x 3 1/2 Page 3 Front: 4 at 9 1/2 x 5 3/4 Page 3 Back: 2 at 10 1/2 x 6 1/2 Inside Back Cover Belly Bands: Cut these and score at 1/2” on each end. In the video I didn’t cut the inside back band at 8 3/4 and had to adjust. These measurements are correct. 1 at 2 x 8 7/8 (Inside Front) 1 at 8 3/4 (Inside Back)