WELCOME!!

We are so glad you are here! We love making and sharing our projects, and we are excited to have you visiting our site. Please leave us a comment and let us know what you think!

Jackie and Michelle

Followers

Wednesday, December 23, 2020

Simple Vintage Ancestry Album, Tutorial #1, is available!!!


Hello and Merry Christmas! I have a wonderful tutorial for you today. It is actually the first in 4 videos that I will have in this series. I am presenting my December design team project for Country Craft Creations! I am using Simple Stories, "Simple Vintage Ancestry" paper collection and it is AMAZING! I am totally in love with this project and I can not wait to share it with you! It is a huge album and it will require quite a bit of supplies, but it is soooooo worth it. The idea for this album is for an album that you can document a couple family genealogy and then pass it down to your children for a heritage keepsake. Please visit Country Craft Creations for your supplies!!!


This video is the first in a series. I have pictures in the beginning and end of the finished piece. During this video we will do a walkthrough of the prototype of the album we are going to make together! I rarely do this type of tutorial, but we are going to go through everything step by step. We will also go over the supplies I received in the design team package and the supplies I purchased to add to it. I will also make the cover of the album. The cover is a wrap around cover that I think you will like. The other videos showing the page construction and how to make the family chart will come soon, within a couple of days. I am working hard on the editing.

Below is a supply list. I will also have a cutting guide. The cutting guide is useful to show you how to cut your card stock so that you can make the most out of it with little waste.

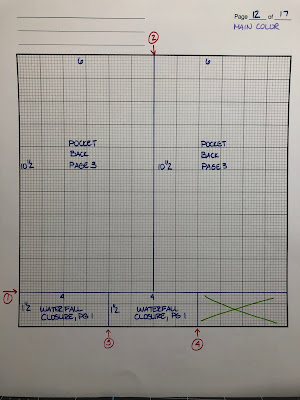
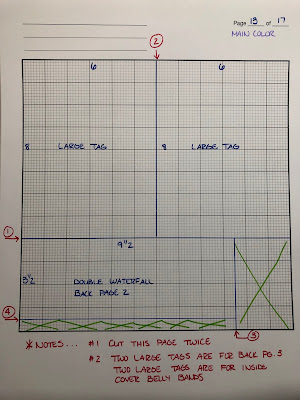
Thanks for stopping by and for your support. Have a wonderful Holiday Season!! SUPPLIES USED: Chipboard, 2 at 12x12 Score Tape Sheets, 4 Large Magnets x 6 Patterned paper, Simple Stories, “Simple Vintage Ancestry”, 24 sheets of 12x12” (this includes the cut apart sheets for adding to the pockets in the album), 7 sheets of 6x8”, and 7 sheets of the 12x12 solid color papers that coordinate with this paper line Cardstock: Artisan, 12x12, 21 sheets of Black and 5 sheets of Brown Seam binding, about 6 yards Scoretape, 1/4”; and Art Glitter Glue Distress ink for the papers if desired Miscellaneous die cuts, stickers, flowers, etc. for decoration of the album. CUTTING LIST: (Scoring and patterned paper cuts will be given during the videos) Chipboard: 1 at 8 x 10 1 at 7 7/8 x 10 2 at 2 3/4 x 10 1 at 1 3/8 x 10 All cardstock below is to be cut in the main color, I used Black. The brown cardstock was used for mats and for the genealogy booklet we will make. Cardstock to cover the chipboard: 2 at 5 3/4 x 10 2 at 10 x 12 1 at 4 3/8 x 12 1 at 9 7/8 x 5 3/4 1 at 9 7/8 x 2 PAGES: Note that we are making two sets of pages, one group for each side of the album. Also, the pages will be scored at 3/8” for the tab that binds it to the album. Page 1: 2 at 6 7/8 x 8 1/2 Page 2: 2 at 7 3/8 x 9 Page 3: 2 at 7 7/8 x 9 1/2 Page 1 Front: Stacked Waterfall 2 at 10 x 6 1/4 2 at 9 x 6 1/4 Water fall closure, 2 at 4 x 1 1/2 Page 1 Back: Gatefold 4 at 8 1/2 x 3 3/4 2 at 8 1/2 x 3 1/4 Page 2 Front: 4 at 8 1/2 x 6 (Main Flaps) 2 at 6 1/4 x 4 1/4 (Flip up A) 2 at 6 3/4 x 4 1/4 (Flip up B) 4 at 4 3/4 x 6 1/4 (Top Flap add on pieces) 4 at 6 x 2 1/2 (Bottom flap pocket pieces) Page 2 Back: 2 at 3 1/2 x 8 (Pocket) Double Waterfall: 4 at 9 1/2 x 3 1/2 Page 3 Front: 4 at 9 1/2 x 5 3/4 Page 3 Back: 2 at 10 1/2 x 6 1/2 Inside Back Cover Belly Bands: Cut these and score at 1/2” on each end. In the video I didn’t cut the inside back band at 8 3/4 and had to adjust. These measurements are correct. 1 at 2 x 8 7/8 (Inside Front) 1 at 8 3/4 (Inside Back)


Saturday, December 19, 2020

Coming soon!

 I am working on getting things ready to start my newest design team tutorial for Country Craft Creations.

I was given the gorgeous collection “Simple Vintage Ancestry” by Simple stories. It is amazing! 


It will be a big project and I plan on doing this tutorial in 3 parts starting on Monday. I think you are going to love this project. Please check out Country Craft Creations at countrycraftcreations.com for your shopping needs. There is also a wonderful scrapbook community “Scrapbookers of Country Craft Creations” on Facebook!  Come join us!! 

Take care and I will see you soon. Stay crafty, my friends!!

Michelle

Monday, November 23, 2020

Hello Christmas Card Keeper Tutorial

 Hello!  Are you like me and do you love Christmas Cards?  I love to send them, and I love to receive them.  For years I have made my Christmas cards, and every year I keep the cards I receive.   I created this project to store my received cards for this year.  Click here to check out my latest tutorial!


I am doing this as a bonus design team project for Country Craft Creations.  I am involved in an upcoming virtual retreat called "Journey to the North Pole."  I had leftover papers from the project I designed for that, and created this project.  I am using Carta Bella's "Hello Christmas" paper collection, and it is ADORABLE!  Please visit Country Craft Creations if you haven't already and check out this store.  It is amazing!  

This year I have created a Christmas Card Keeper.  It's not really a mini album, it is more of a storage binder.  It will fit all sizes of cards and photo cards and letters.  It has a variety of pockets and a fun type of page that is has a string binding integrated into it.


I think you will like this project and the tutorial is available on YouTube.  I have the supply list below for you. 


Supplies/Cut List: Chipboard: 2 at 7 1/2 x 9 1/2 and 1 at 2 1/2 x 9 1/2 Cardstock for covering chipboard: 2 at 9 1/2 x 11 1/2, one at 5 1/2 x 11 1/2, and one at 5 1/2 x 9 3/8 Inside Cover Pocket: 2 at 8 3/8 x 12 (this is cardstock or patterned paper and will be described in the tutorial) Pages (Cardstock): 2 at 12 x 12 and 2 at 7 1/2 x 9 Several yards of bakers twine of choice Ribbon for closure, approximately 2 feet Ribbon or Washi Tape for the cover, approximately 2 feet (this is also explained in the tutorial) Patterned papers: I used approximately 8 sheets total for the project made in the tutorial. This included 4 x 6 cutaparts. Score tape (sheets and 1/4" roll), Art Glitter Glue

Sunday, November 1, 2020


Hello!


I made this album over the course of the weekend and I just love how it turned out!  I have a video slideshow for it.  There is not a tutorial for it, but it is super easy and I just wanted to share it with you,  

I just used my papers and filled the sleeves, then used the scraps to make other pages and elements. Thank you so much for watching. It turned out super cute and I think what I will do is use it for multiple years of Christmas fun. I'll add tabs do separate the years.  
I used a Miscellaneous Me! binder and page sleeves. I had a full paper collection (an OLD one) by Simple Stories, and scraps from another of their collections and combined them to create the album. The cardstock is Bazzill, from my stash. All of the stickers, enamel dots and chipboard stickers are from Simple Stories. I added Petaloo flowers and Eyelet Outlet bling. I also used miscellaneous ribbons and twine, and large tags from my stash. The notebook that I added in the album is, I think, Teresa Collins. I didn't have the packaging.

Thanks for watching! Have a great day!!

Michelle

Monday, October 26, 2020

Hello Autumn Place Setting Decor Tutorial

Welcome to my blog and to my third design team project for Country Craft Creations using Carta Bella's "Hello Autumn" paper collection!!! This is a super fun and fast project! I didn't have a lot of leftovers in the design team package, so I utilized what I had and made these. I was able to use SCRAPS of patterned paper and only 1 1/2 sheets of brown Artisan cardstock (not including the leaves...I will talk about other options in the video). There are so many options with this project, I know you will love it.


For each box, I used: Cardstock, 1 at 6 x 6 Patterned paper, out of a 6 x 6 square you can get the needed pieces, 4 squares of one design for the outside, 5 of a second design for the inside, all of them are 1 7/8 x 1 7/8. I used scraps of leftover cardstock from my stash to make the leaves...but you can use other things, I mention options in the video. I also used for each box: 1 yard of twine, 1 button, 2 flowers, 3 small leaves One sheet of Artisan cardstock and one sheet of patterned paper will make 4 boxes total. Decorations and embellishments are totally up to you! Please visit Country Craft Creations
and get your supplies! Thanks for watching and have fun with the project!

Friday, October 23, 2020

Hello Autumn Folio Tutorial

Hello everyone.  I have my tutorial uploaded on YouTube to show you how to make this awesome folio.  Please check it out, I think you will like it. 
This is my second design team project for Country Craft Creations using Carta Bella's "Hello Autumn" paper collection. Please visit Country Craft Creations for all of your supplies. You won't be disappointed!
Along with the paper collection, I used Artisan cardstock, seam binding, and Art Glitter Glue, all from Country Craft Creations. In total I used 8 sheets of Ivory cardstock, 2 sheets of brown cardstock, and 11-12 sheets of patterned paper which included the cutapart cards. The album is 7 1/2 " wide and 8 1/2" tall, with a 1 1/2" spine.  

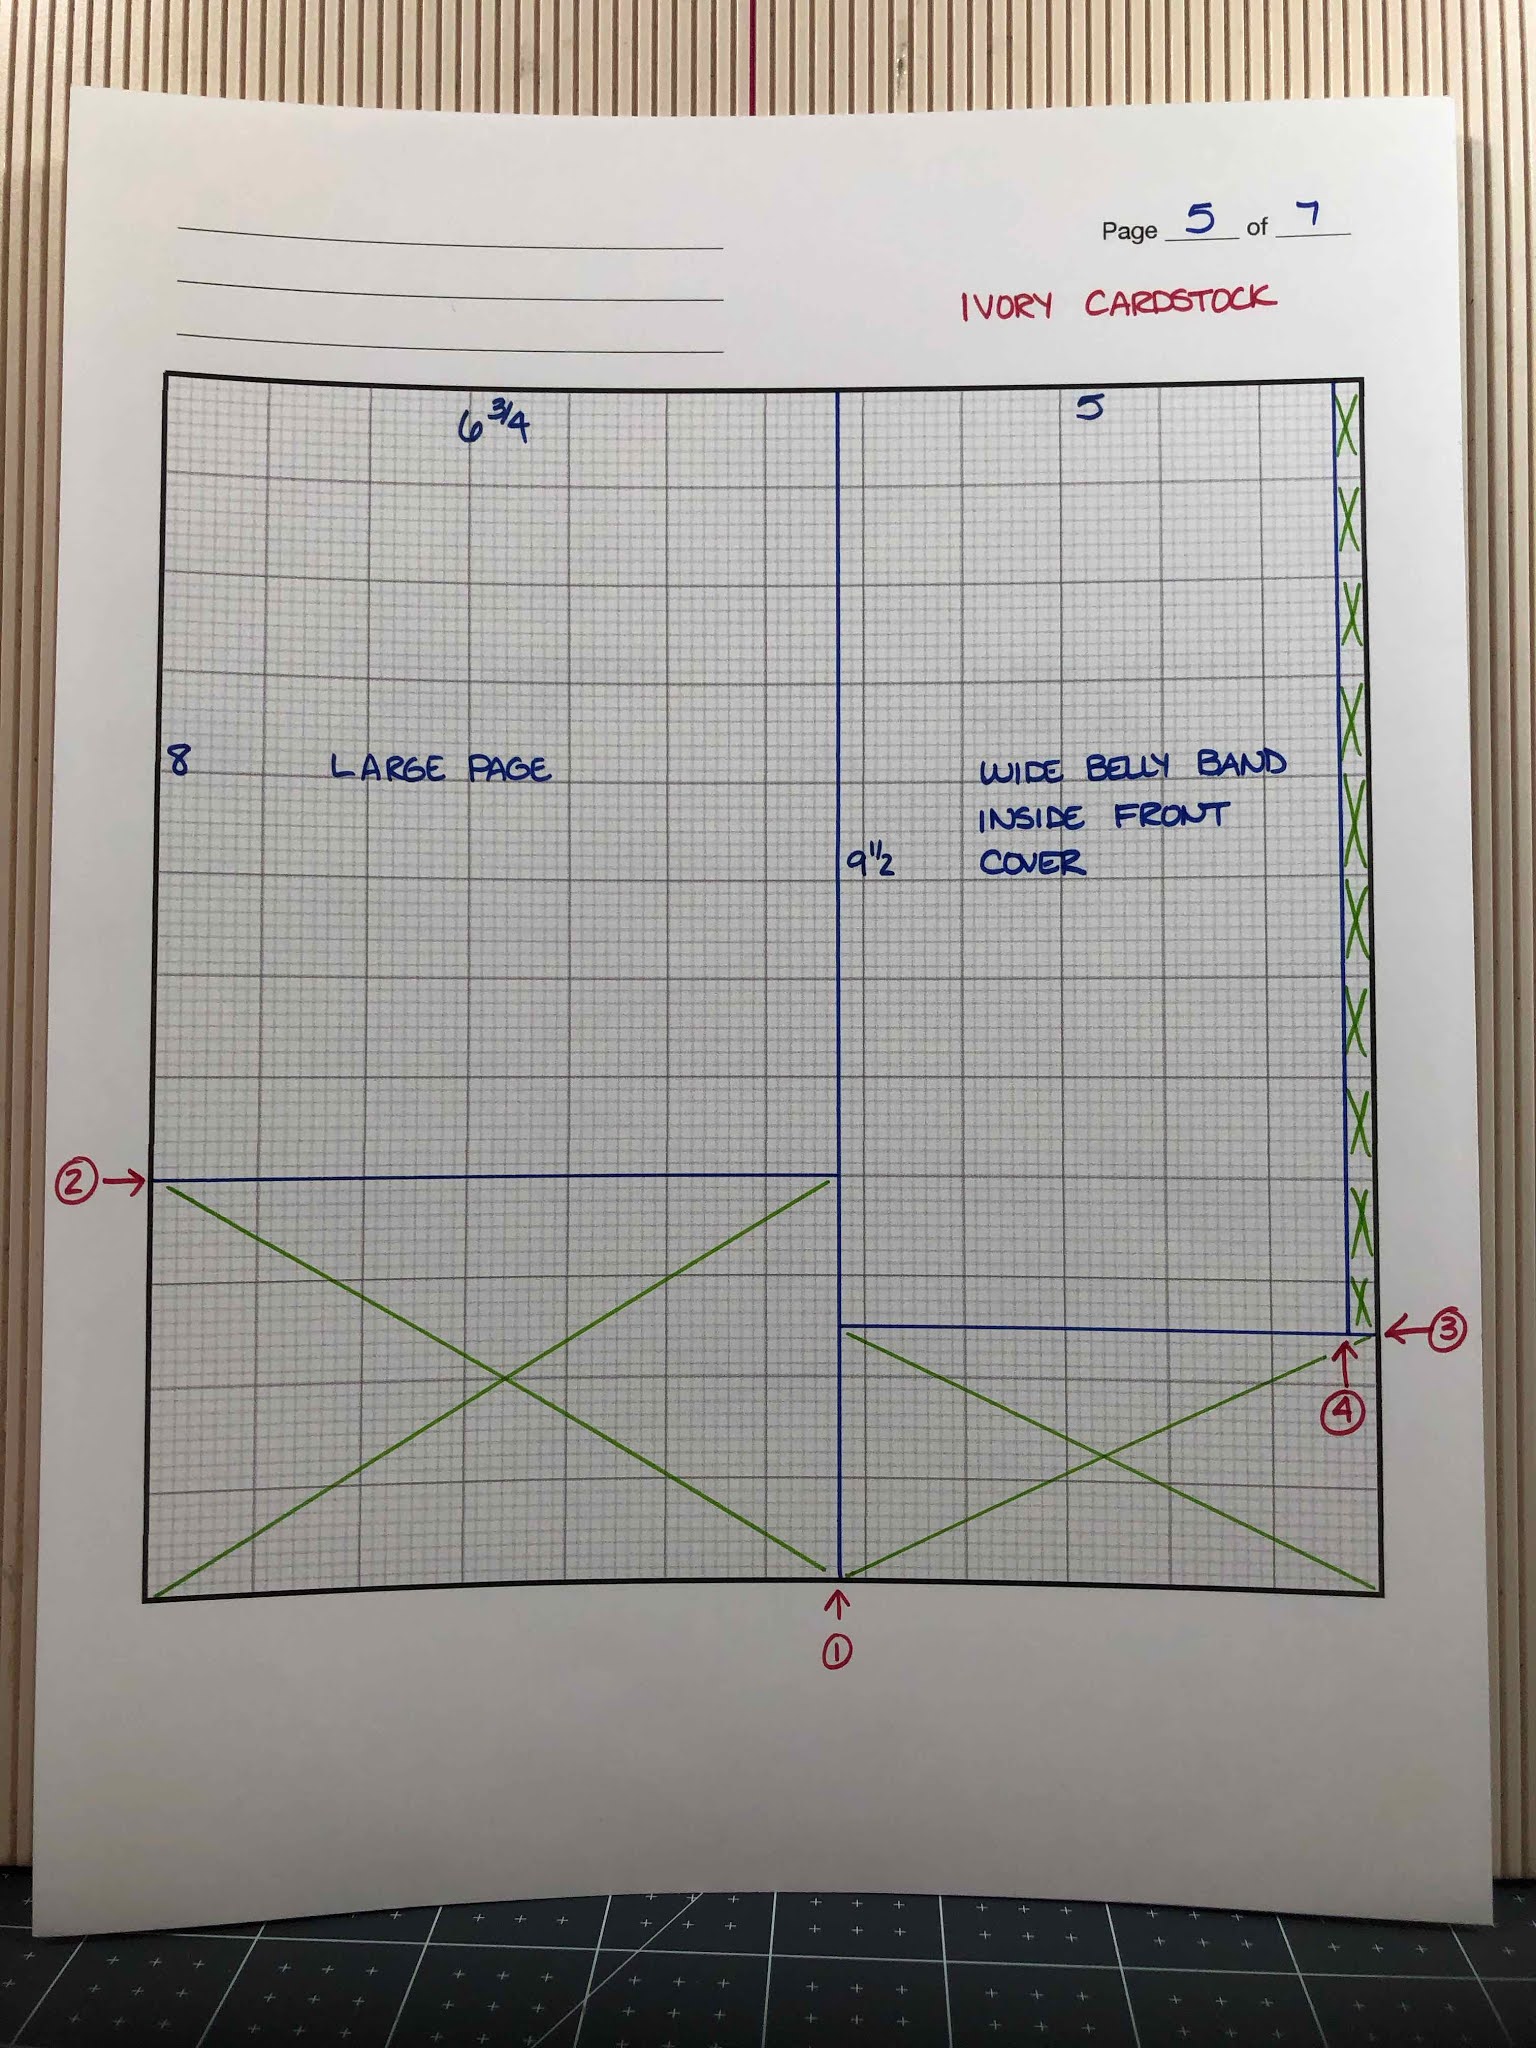
Below is the cutting list and the cutting guide for this project. Thanks for checking it out, I hope you enjoy the tutorial.

Cutting List: Cover: 2 at 8 1/2 x 9 Inside Front Cover: 2 at 3 1/4 x 9 (Trifold A) 2 at 4 1/4 x 3 1/4 (Trifold B) 1 at 5 x 9 1/2 (Wide Belly Band) Base Page: 1 at 12 x 11 Page Add Ons: Mini Pocket Page A: 2 at 6 1/4 x 5 5/8 Mini Pocket Page B: 2 at 7 1/4 x 4 3/4 Large Page: 2 at 6 3/4 x 8 Inside Back Cover: Small Waterfall Pocket A: 1 at 5 x 6 1/4 Small Waterfall Pocket B: 1 at 4 3/4 x 7 1/4 Large Waterfall Pocket A: 1 at 6 1/4 x 5 5/8 Large Waterfall Pocket B: 1 at 5 1/2 x 7 1/4 Closure: 1 at 1 1/2 x 7 1/4


Wednesday, October 21, 2020

"Hello Autumn Folio" Walk Through Video

 This is my current project for the Country Craft Creations design team...I bring to you my "Hello Autumn Folio".   I am using Carta Bella's "Hello Autumn" paper collection and it is GORGEOUS!!  


Please check out the video and go to Country Craft Creations for your supplies.  I will be back soon with the tutorial.

Have a wonderfully crafty day!

Michelle

Wednesday, October 7, 2020

Hello Autumn Holiday Planner! The Tutorial is LIVE!

Hello!  The tutorial for my design team project using Carta Bella's "Hello Autumn" is live!  I think you are going to love this paper collection, and I think the project is great too!  I design for Country Craft Creations, and you can get your supplies for this project at their web site.  Visit Country Craft Creations, I know you won't be disappointed!


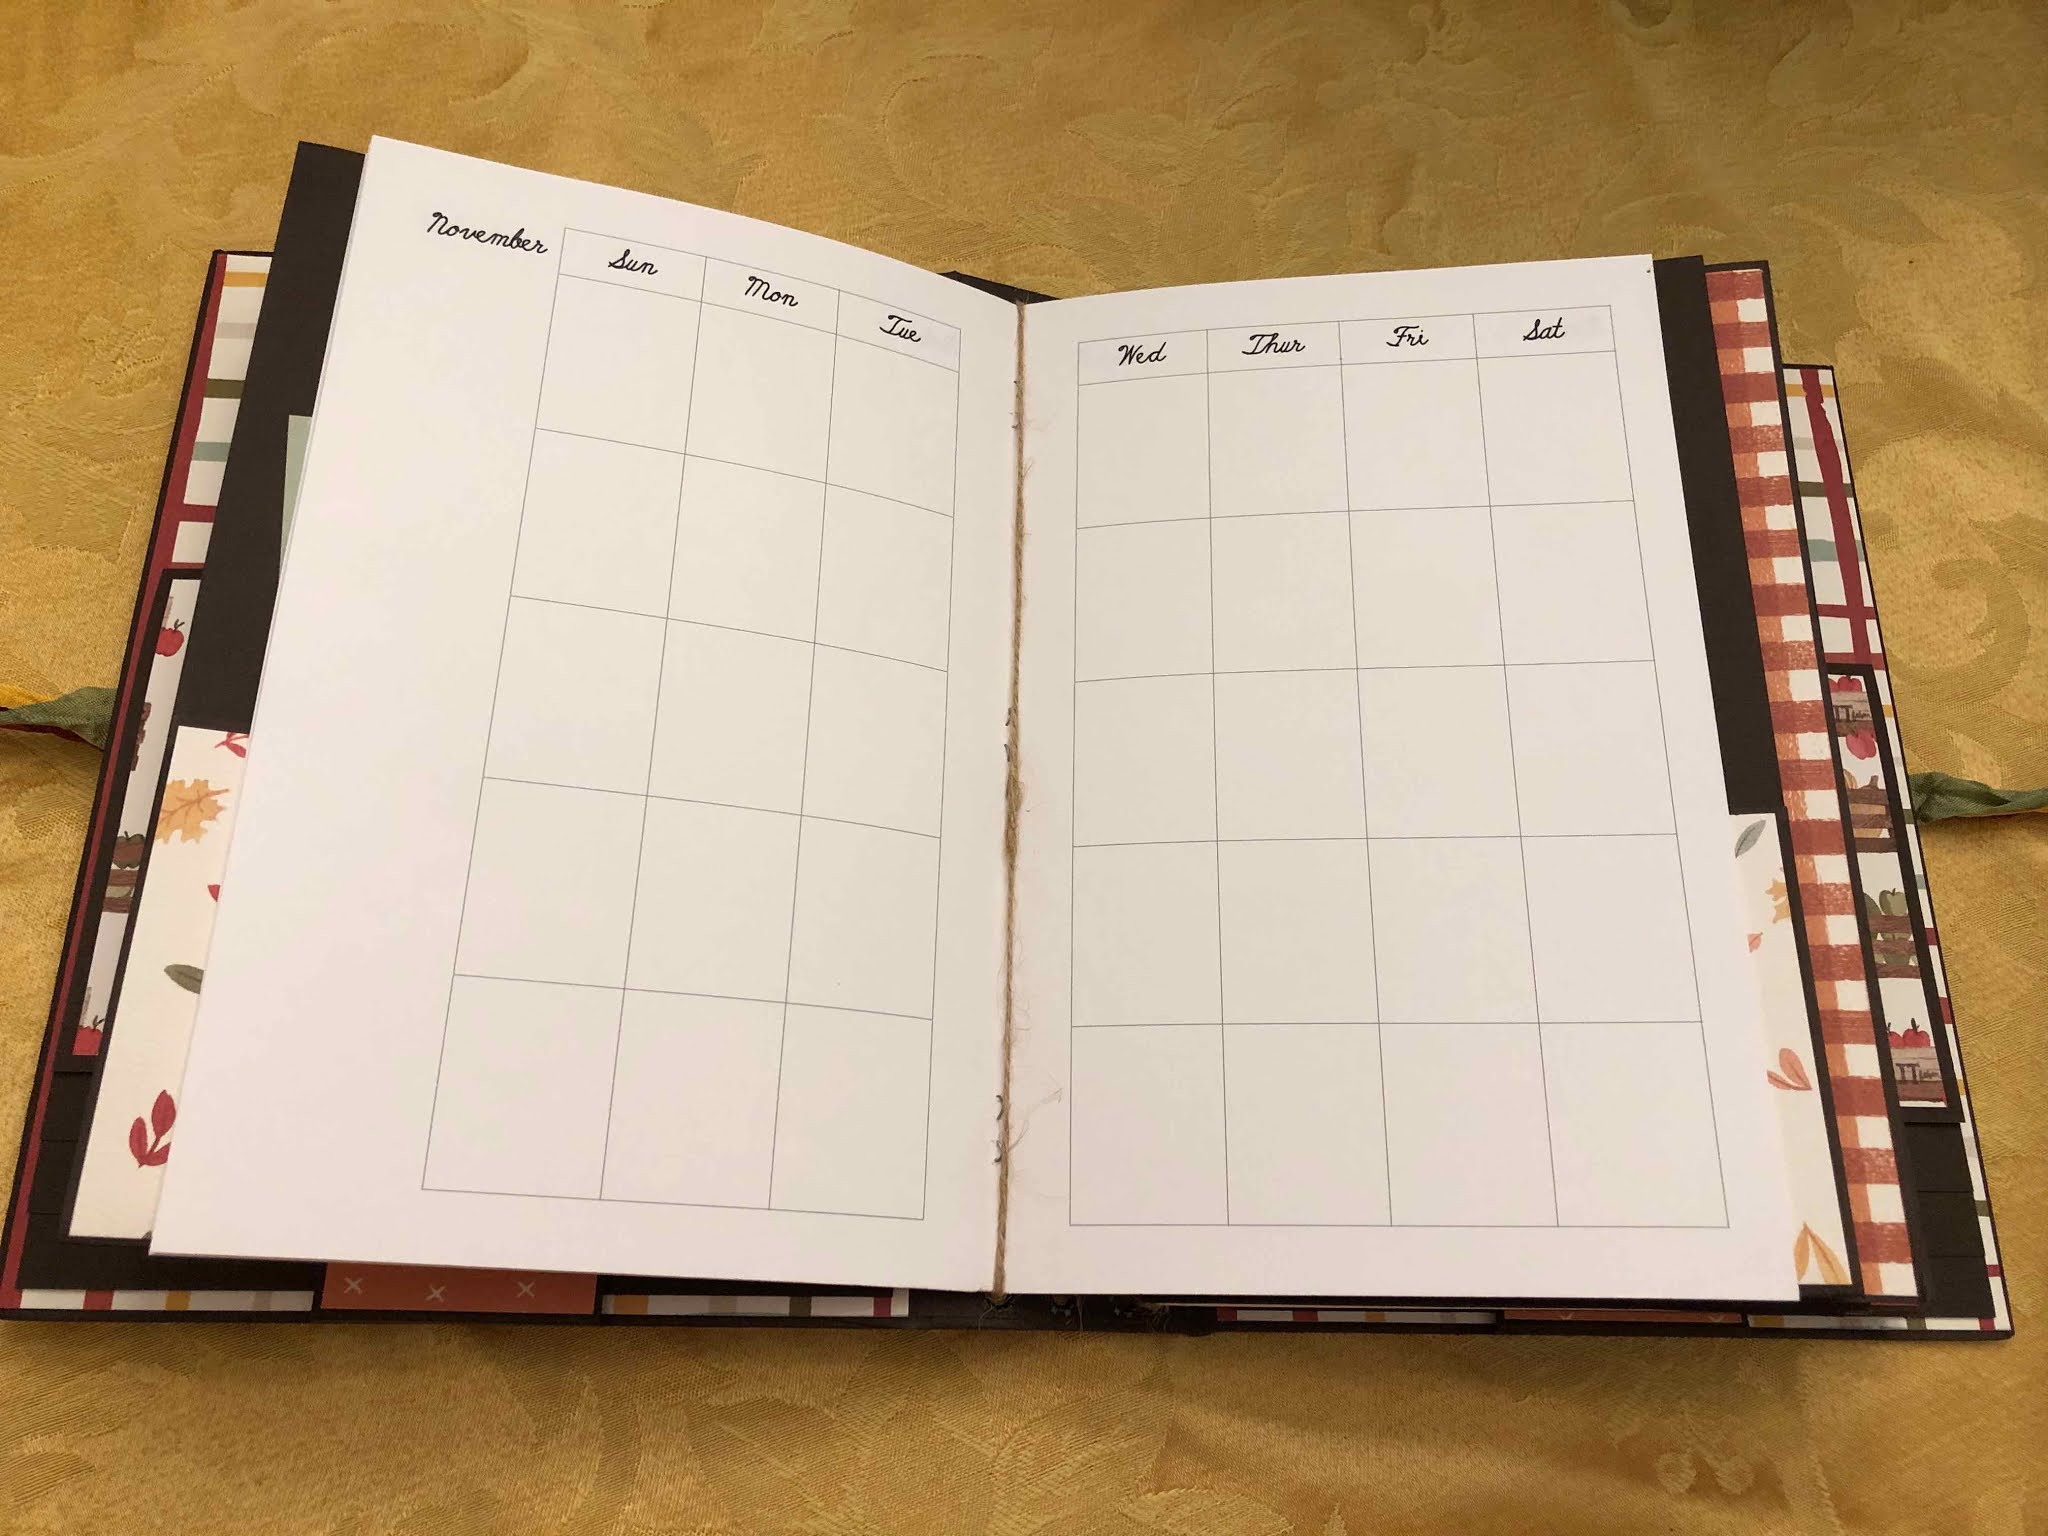
This is a planner, scrapbook and recipe book all in one.  There are plenty of places to add pictures, recipes, and pockets for notes and receipts.

Below you will see links to the PDF files I created for this album.


You are going to love this album!  Please hop on over to my YouTube Channel and check it out.

Here are the links for the PDF files.

The Recipe Booklet is here.

The Calendar Booklet, Nov-Dec is here.

The Calendar Booklet, Oct-Nov is here.

Below is the supply and cutting list for the project, after that I will have the pictures of the cutting guide.  Thanks so much for your continued support!

Michelle

Supply/Cut List:

Note: All cardstock for album and pages are Brown, photo mats are Ivory

Cover:
Chipboard, 2 at 6 1/2 x 9, 1 at 2 x 9
Cardstock to cover, 2 at 8 1/2 x 11, 1 at 5 x 11, 1 at 5 x 8 7/8

Waterfalls:
4 at 3 1/4 x 8 1/2 (booklets)
2 at 2 x 4 1/8 (closures)
2 at 6 1/8 x 9 3/4
2 at 6 1/8 x 8 3/4

Folders:
2 at 12 x 12
4 at 1 x 3 1/2 (pocket sides)

Photo pages:
3 at 8 1/2 x 12
2 at 5 x 6 1/2 (flap page)
2 at 4 x 4 1/2 (flap page)
2 at 2 3/4 x 9 1/2 (vertical pockets)
2 at 2 3/4 x 7 (horizontal pockets)

Photo mats (Cut from Ivory) Please see the walk through video for the placement on the pages
9 at 3 1/4 x 4 1/4
5 at 6 1/4 x 4 1/4
2 at 4 1/4 x 4 1/4


Other Supplies:
Patterned paper x 11-12 sheets (includes cut apart sheets)
6 eyelets
3 yards twine
Seam Binding, 2 feet each of 3 colors
4 large magnets 

Score tape sheets (8 1/2 x 11) x 2


Tuesday, October 6, 2020

Hello Autumn Holiday Planner Walk Through

 Hello everyone!!!  

Today I uploaded a walk through video for my latest design team project for Country Craft Creations.  

This is a planner/scrapbook/recipe album all in one!  This is perfect to plan your festivities for October and November...and as a bonus I will describe in the video, you can also use other papers and turn it into a planner for December!  

I think you will like this project and have fun with it. Please visit Country Craft Creations for your papers and supplies and meet me back here soon for the tutorial!


Wednesday, September 30, 2020

Three Junk Journal Bindings


Hello again...Wow, two in one day!  The other day I did this video going over three different and easy ways to bind junk journals.  I had some questions with some that I did, so I thought that I would share this tutorial going over the methods that I use most frequently.


Thanks for watching and supporting my crafty craziness!

Carta Bella "Hello Autumn" Design Team Package Share!!!

 I received my new design team package and can't wait to share it with you! I received Carta Bella's "Hello Autumn" collection, and it is GORGEOUS! Here's a quick video for you!


Thanks for watching!!!
Michelle

Wednesday, September 16, 2020

Masquerade Mini Album Tutorial


Good day to you all!!! 

I have the tutorial available for my latest mini album.  This is a design team project that I did for     Country Craft Creations.  I am using Authentique's "Masquerade" paper collection and I think you are going to love it!  I had some fun coming up with a couple of new ideas, and I have incorporated one of my other waterfall assemblies from a previous project in it.  There are a ton of places for photos!  

The video is a little on the long side, but it is worth the time...you will love this album.  I love, love, LOVE Halloween, and this paper was a JOY to work with.  You can find the video tutorial here.

Along with the "Masquerade" paper collection and Authentique's Spectrum (black, that I used for the large pocket tags) from Country Craft Creations, I also used Artisan cardstock in black and brown, chipboard, Scoretape sheets, Art Glitter Glue, and Seam Binding.  The flowers, bling, and the frame on the cover were from my stash...from Recollections and Tim Holtz.  The cover frame will hold a 4 x 6 photo.

Below are pictures of the cutting guide, and I also have a cutting list as well.  You will need at least 7 sheets of patterned paper (that is what I used, more may be needed depending on how you cut it!), 14 sheets of black and 5 sheets of brown. I try to the absolute best of my abilities to keep a count of all that is used, but I am human, so I apologize if there is an error.  If you notice something or have questions, please let me know!

I hope you enjoy the tutorial and make the album.  It will be a fun one to look through in the years to come.  

Happy Halloween!!!


Please note:  There are cutting guides for BLACK and BROWN cardstock.  Photos 1-10 are Black, then after there are photos 1-3 for Brown.


Masquerade Mini Album Tutorial Cutting Guide

Michelle Allen

Country Craft Creations Design Team Project

#3 for August/September, 2020


Chipboard

2 at 8 1/2 x 7

1 at 8 1/2 x 2


Cardstock to cover chipboard (black)

2 at 9 x 10 1/2

1 at 5 1/2 x 10 1/2

1 at 5 1/2  8 3/8 (inner spine cover)


Pages (black cardstock)

4 at 8 x 7

4 at 5 x 8 (pockets)


Inner front cover

Black cardstock

2 at 6 x 12

Brown cardstock

1 at 4 x 6 (photo mat)

1 at 4 1/2 x 6 1/2 (element base)

1 at 3 x 6 (tag)


Front page 1

Black cardstock

1 at 4 3/4 x 6 3/4 (large pocket photo mat)

1 at 4 x 12 (accordion)


Back page 1

Black cardstock

1 at 4 x 9 (pocketed belly band)

2 at 4 x 6 (mats)

2 at 3 x 4 (mats)

Brown cardstock

1 at 6 3/8 x 7 7/8 (mat for page)


Front page 2

Black cardstock

1 at 4 3/4 x 6 3/4 (tag)

2 at 3 x 4 (mats)

1 at 3 1/4 x 6 1/2 (tag)  


Back page 2

Black cardstock

2 at 3 3/4 x 8 (gatefold pages)

4 at 3 x 8 (mats)

Brown cardstock

2 at 3 1/8 x 7 7/8 (back of gatefold)

1 at 6 3/8 x 7 7/8 (page mat)


Front page 3

Black cardstock

1 at 4 3/4 x 6 3/4 (large tag)

1 at 4 x 12 (photo mat)

Brown cardstock

1 at 4 1/2 x 6 1/2 (element base)


Back page 3

Black cardstock

1 at 4 x 9 (pocketed belly band)

2 at 4 x 6 (mats)

2 at 3 x 4 (mats)

Brown cardstock

1 at 6 3/8 x 7 7/8 (mat for page)


Front page 4

Black cardstock

1 at 4 3/4 x 6 3/4 (tag)

2 at 3 x 4 (mats)

1 at 3 1/4 x 6 1/2 (tag)

Brown cardstock

1 at 3 1/8 x 6 3/8 (mat for tag)


Back page 4

Black cardstock

2 at 4 1/2 x 6 1/2 (gatefold pages)

2 at 4 x 12 (photo mats)

Brown cardstock

1 at 6 3/8 x 7 7/8 (page mat)

2 at 3 7/8 x 6 3/8 (mats for back of gatefold pages)


Inside back cover

Black cardstock

2 at 6 x 9 1/2

2 at 6 x 8 1/2


Monday, September 14, 2020

Masquerade Mini Album Walk Through Available on YouTube!!

 Hi Everyone! This is my walk through for the 3rd design team project I did for Country Craft Creations using Authentique's "Masquerade" paper collection. I love this collection! It is GORGEOUS! I came up with a couple little twists that I think you will like. The tutorial will be done soon and with that I will have a link to my blog for the visual cutting guide, and I also will have a cutting list for both the black and brown cardstock both on the blog and in the tutorial's description.


Please visit Country Craft Creations at https://www.countrycraftcreations.com and get this paper collection. I also used black and brown Artisan Cardstock, Scoretape sheets, Art Glitter Glue and black seam binding from the store as well. Thanks for watching!!

Monday, September 7, 2020

 The "Masquerade Candy Box Tutorial" is live on YouTube!  

This is my 2nd design team project using the AMAZING Authentique "Masquerade" paper line! 

The cutting list is in the description of the video, including chipboard, cardstock and patterned paper. I did not do a visual cutting guide since there are so few cardstock pieces.  


Thanks in advance for watching!


Have a lovely Labor Day!


Thursday, September 3, 2020

 Hello!  I have a quick video sharing my next design team project!  This is for Country Craft Creations, and I am using Authentique's "Masquerade" paper collection.  It is SOOOOOOO pretty!

Please check out the link here and see this fun project.  I will be back with a tutorial very soon!


Have a great day!


Michelle