
One of my YouTube viewers asked if I could do a configuration style page using 8 1/2 x 11 paper. So I came up with this. The really fun thing about this album is that all of the pages start off with the same size paper but I scored them all a little different and made them into 5 different widths. The pages graduate in size. Check out this video and you’ll see who fun this album is and how versatile it is.
Here are pictures of the scoring I used to make the pages with. The blue dashes are the score lines, the red indicates where to cut “slits” in the paper, or where to cut pieces out. I go over all of this in the video. The cutting list will be below that.


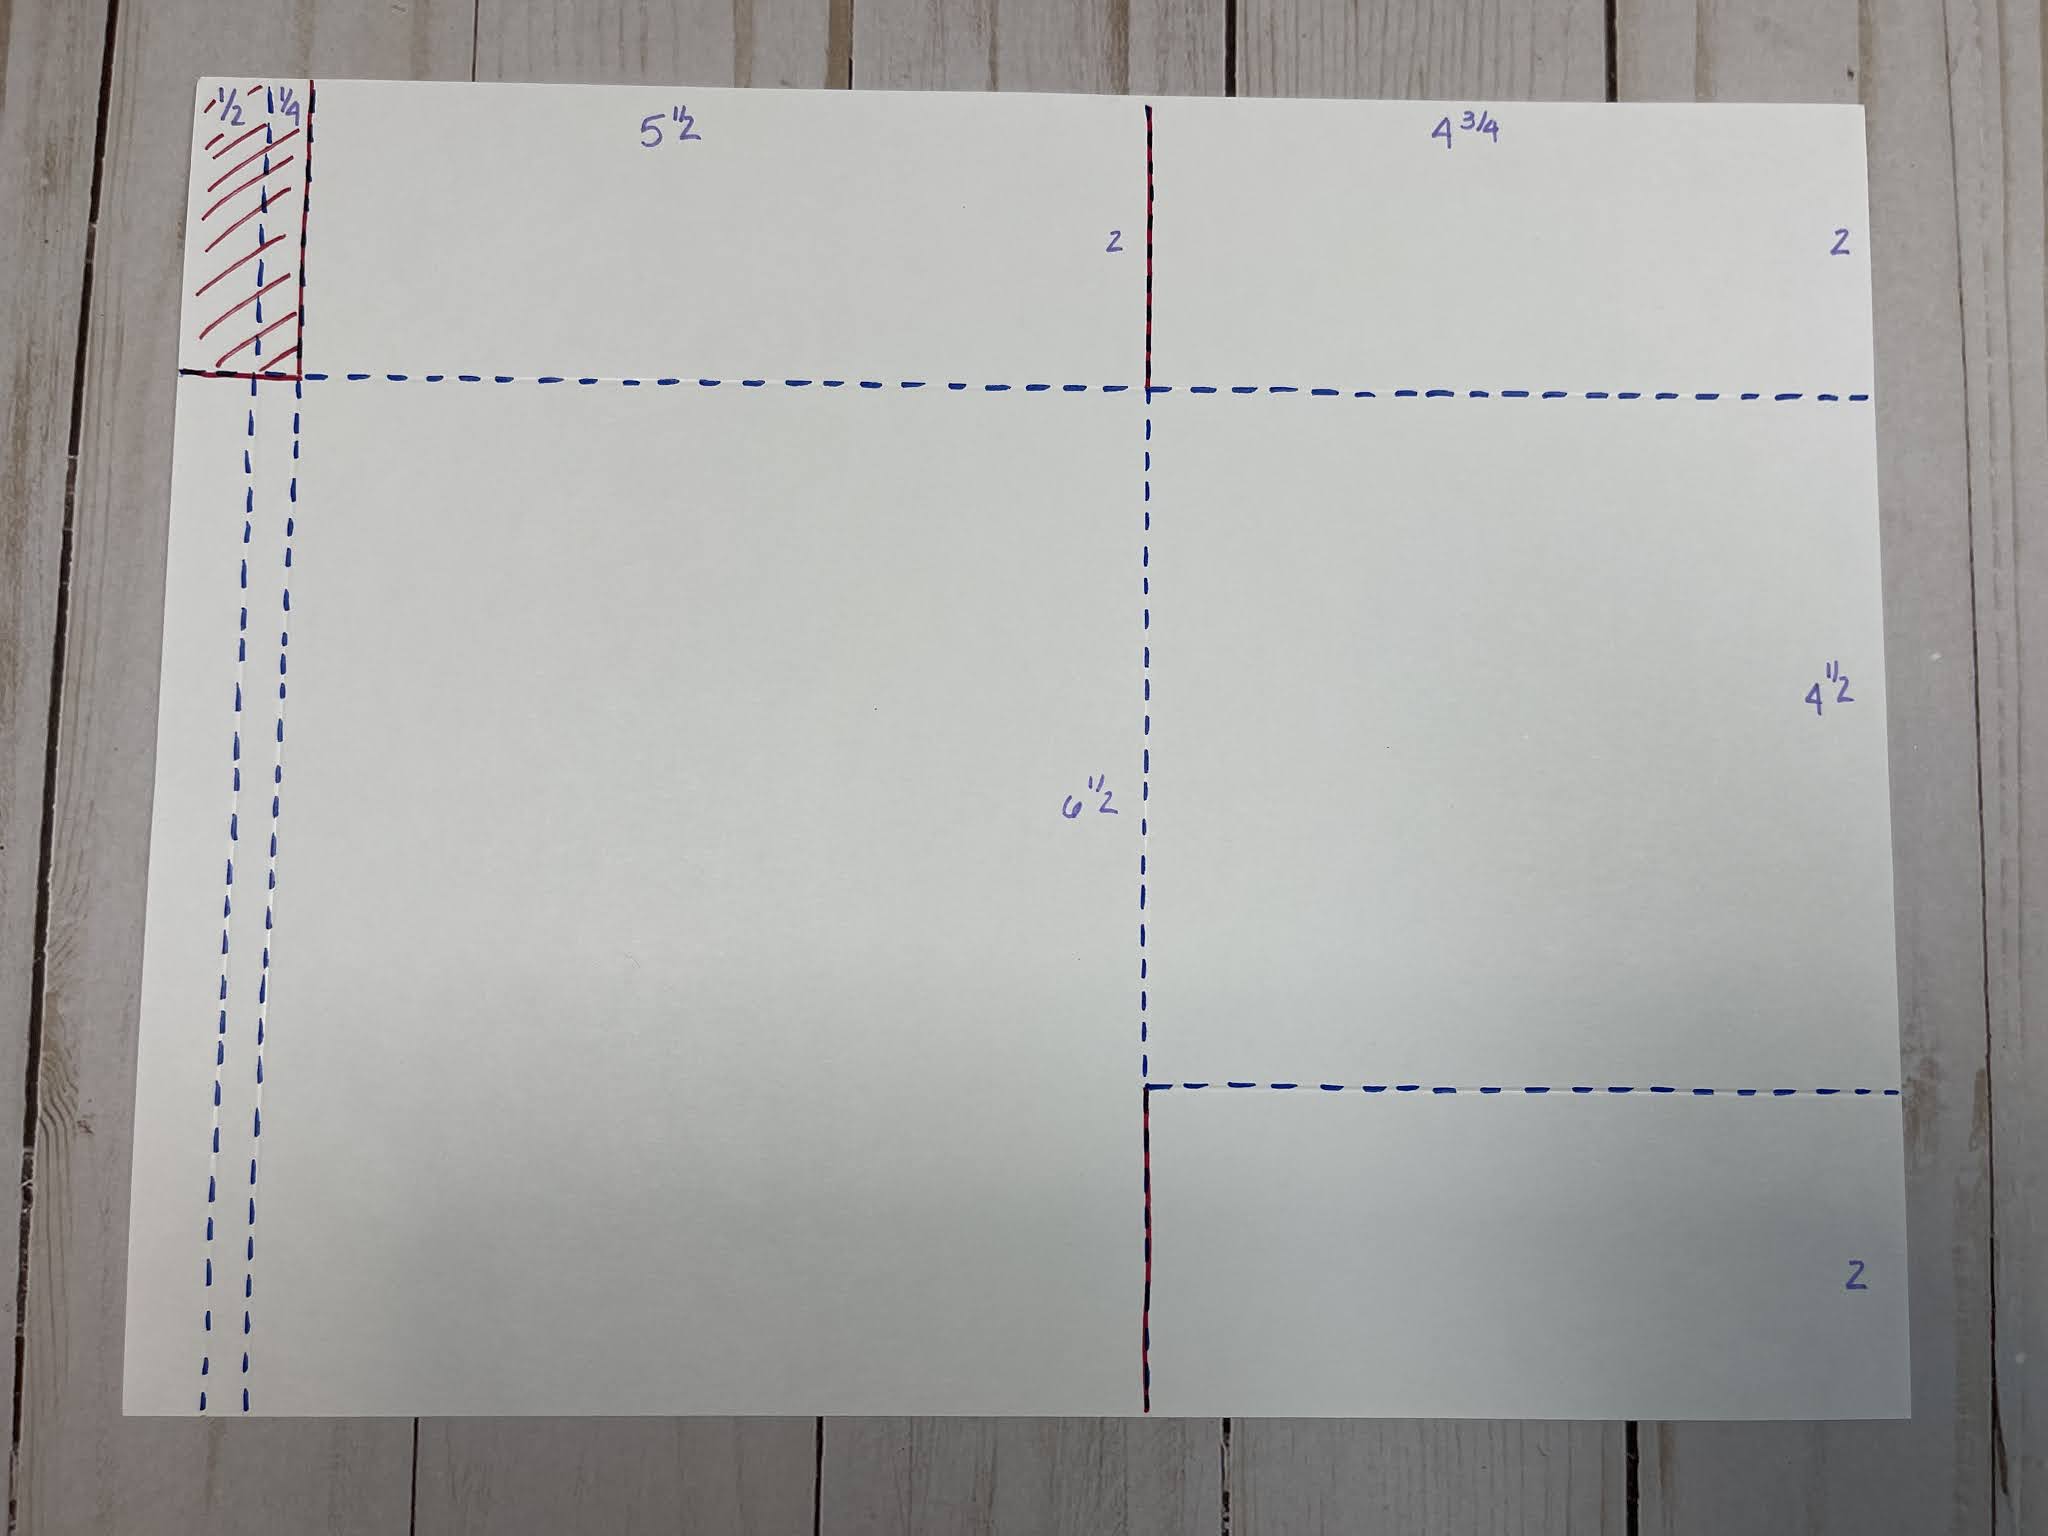


CUT LIST: Chipboard: 2 - 7 x 7 1 - 3 x 7 Cardstock to cover the Chipboard: (I used Artisan Black for this) 2 - 9 x 9 1 - 6 x 9 1 - 6 x 6 7/8 I did mat the patterned paper on the front of the album with Artisan Summer Ivory. I used 4 pieces at 6 7/8 x 6 7/8, two for the outside of the covers and 2 for the inside covers. I also cut a piece 2 7/8 x 6 7/8 for the outside spine. Pages: 5 - 8 1/2 x 11 From the scraps from cutting the pages above from the 12 x 12 Artisan Black, you will have 1" pieces. I used these for pocket connectors/hinges. I scored them down the middle at 1/2" and then cut them to fit the pockets. I go over all of this in the tutorial. Waterfalls (Stacked, one for the front and one for the back inside covers) 2 - 6 x 9 1/2 2 - 6 x 8 1/2 Waterfall closures (trimmed to make tag shapes) 4 - 3 1/2 x 3 Out of the scraps I made a variety of tags and photo mats that I added to the pockets. I also used 2 extra pieces of Artisan Black for this purpose. The triangle pocket under the front cover waterfall was made with a scrap left over, as is the pocket under the back cover waterfall. These were "after thought" pockets, and are optional.
Love this! You truly hit this one out of the park!
ReplyDeleteDo you have a video that shows how to add the pages to the cover please.
ReplyDeleteI'm really sorry I missed this in the tutorial. Thanks for asking. If you go to this tutorial https://www.youtube.com/watch?v=SfNyISrCdsg at about 2:34 you will see how to add the pages to the album. I used the exact same technique. Thanks for watching. I hope you enjoy the project.
ReplyDeleteHow do you add the pages to your book?
ReplyDeleteHi the video address for the adding of the pages is no longer available
ReplyDeleteIts working on my end...I'm not sure what's happening.
Delete