WELCOME!!

We are so glad you are here! We love making and sharing our projects, and we are excited to have you visiting our site. Please leave us a comment and let us know what you think!

Jackie and Michelle

Followers

Monday, August 30, 2010

A Creative Card

For this fun card we stamped the images, cut them out and pieced them together somewhat like a puzzle!  Cardstock= Bazzill, Stamps= Inkadinkado, Ink= Stazon

Friday, August 27, 2010

Meander Book, My Way!

I love these little books, the "Meander Books".  I usually see them in a 3" x 3" size.  But, I thought that I would like one a little different size, so I came up with this one.  It measures 3"wide  x 4" tall, when the covers are added,  it is 3 1/8" x 4 1/4".    I haven't finished decorating and embellishing yet, but will do it soon!
Using this size, it created three "top" pockets and 2 "side" pockets.  I covered some chipboard pieces measuring 3 1/" x 4 1/4", and used these for the covers.  I adhered ribbons between the covers and the first base pages for a closure.  The base paper is cardstock from Martha Stewart, the other papers are from DCWV.  I fell in love with the colors, perfect for a baby boy or a baby girl!  I thought this would make the most adorable brag book for the new Mom or Grandma!!! I made three tall tags for the top pockets, and 4 smaller ones for the side pockets.  These would be awesome for journaling!
 
Score the 12x12 paper vertically at 3", 6", and 9".  Score horizontally at 4" and 8".  Make your slits on the horizontal lines.  Fold, and adhere the base pieces to create the pockets.  Adhering the pockets creates a binding, so no extra work to do that.  There you have it, a beautiful little book. 

Stay Crafty!!

Monday, August 23, 2010

Never Ending Card

I saw this great card on http://www.hgtv.com/   by Carol Duvall.  It was really fun & will be a very creative was to present a gift card!  Hope you enjoy the Video!


So remember your dimensions for this card are 4=3"x6" pieces of cardstock. If you make it bigger, make sure your length is double your width, exp. 4x8, 6x12. 

Friday, August 20, 2010

FINALLY DONE! Mini Recipe Book #3!

Yeah!!  Now I can send these in and wait for the swap books to come back!!  I used a Sizzix die to make the aprons, cutting off the neck and waist ties, substituting them with ribbons.  The stamps are Fiskars.  I have no idea where the button hearts came from!
I used the ties of the apron as the closure of the book.  The ribbons are long enough to wrap around to the back of the book.
"Front" view...I used the oven mitt from the Sizzix die, and also a new one by Sizzix I just got yesterday!  It is called "Loops and Ric Rac" and I used the ric rac design for these pages.
"Back" view.  I sure hope my swap partners like it!

Wednesday, August 18, 2010

Quick Project from Scraps

I made this some time ago, and thought it would be cool to share.  I wanted to use up some scraps of papers that I had, and because I just can't stand to throw anything away I had a bunch!!!
I cut some 8 1/2 x 11" paper in half.  I made a chipboard cover, covered it with paper, and adhered this apron sticker.  I think it is by Jolee's. I bound it using my Bind It All.
I then randomly used my scraps and adhered them to the blank pages.  I have all sorts of ideas for this...a photo album full of pictures of a grandma cooking with the grandkids...your favorite family recipes...bridal gift filled with recipes from members of the family...the list goes on.  What could  you do with your scraps?

Monday, August 16, 2010

A Creative Wrapper

We jazzed up this extra large Hershey bar by wrapping it up with Cosmo Cricket paper,  created a gift card holder for the Starbucks gift card & there you have it, a cute way to present a special gift!

Friday, August 13, 2010

Mini Recipe Book #2


Here is the second set of recipe books I am doing for my swap on Split Coast Stampers.  This one  used Bo Bunny papers. I punched the flower on the front, and stamped the title with stamps from Fiskars.  I used leaves by 7 Gypsies for the flower, and some ribbon I got in the dollar bin at Michaels.
This is the "front" view.  The tags are topped with a punched pull I made from leftover cardstock.

Now on to recipe book #3!

Wednesday, August 11, 2010

More Quick & Easy Cards


Thinking Of You!  This easy card was made out of scraps & a few random stamps from our collection.

Monday, August 9, 2010

A new envelope mini album!


I was messing around, and came up with a new idea to use envelopes for another kind, and size, of mini album.  It is bigger than most "mini's" but still is small and adorable. Maybe it could be called a "medium album"?!  It is also the perfect size to use those 8x8 paper pads that I have stacked up wondering what I was going to do with them.  Oh yeah, I also got to use my new Tim Holtz flower die!!

The papers are DCWV's Nana's Kids.  I used the die to make the flowers and another Sizzix die to make the leaves with papers from Martha Stewart.  I ran the flowers pieces through three different embossing folders, and pinched the petals to give a little more dimension.  I bound it with my Bind-It-All, but you could certainly use whatever binding method you like.

There are four pages to this book, each page took 2 envelopes, the standard size business envelopes.  I also made one to "practice" using envelopes from my junk mail.  This could be a great recycle project!  Seal all envelopes.  For each "page" of your album take one envelope and cut it in half, so you have two pieces measuring 4 3/4" long by 4 1/8" wide.  You are going to lay these on their sides, so that they will be 8 1/4" tall, and that is what you need to cut the next envelope to...trim off 1 1/4" and discard this piece.

This just shows the envelopes adhered...the left side is the open ends of the halved envelopes which creates two side pockets, the right side shows about 1/2" of those cut envelopes...this will be the binding side.  The "long" envelope will be adhered to the two halves with the open part up.  This creates one long pocket.
I gathered my papers I wanted and covered the envelopes.  The papers covered the binding edge also, so that it gave it a little strength.  Each piece of paper measured 4 1/2 x 8".  I covered front and back.
I bound the pages.  Now, very important...be sure when binding that you bind the "binding edge and not the open end where you want to put your tags...Please don't ask how I know!!!  The tags measured 4 3/8 x 3 3/4" for the side tags, and 3 3/4 x 8 1/4" for the long tags.  You will end up with three tags per page, and lots of space in between!
 I raided my ribbon scrap jar and found ribbons for the tags.  You could also punch "finger pull" spots, but for this one, I didn't want to take up space on the pages themselves.  The project I made with the junk mail envelopes turned out cute too, just make sure that you have the same size envelopes for your pages!

Thanks for looking! Your comments and thoughts are most welcome and appreciated!  Have a crafty day!

Friday, August 6, 2010

Woven Card

Creating this card sure was fun!  After determining the size of your card you will take for exp. a 3"x4" piece of cardstock & cut 1/4" strips lengthwise.  Make sure you stop about 1/2" from bottom so that all strips are still attatched.  The cut approx another 16 1/4" strips all the way off from another piece of paper & begin weaving through the first piece of paper with the attatched strips.  After you are done weaving, trim up edges to a matching length & snip open all those ends that we left attached.  On this card we stamped a butterfly & heat embossed it!  Have FUN!

Wednesday, August 4, 2010

A Halloween Recipe Book

I love swaps.  I love Halloween. I love swaps on Split Coast Stampers about Halloween.  This one is for the swap called Mini Cookbook.  I only had to make 4 for the swap, but I made one more because they are just toooooo darn cute, I had to make one for myself!
I used a variety of papers from Doodle Bug and Karen Foster.  The flowers are from Doodle Bug and Bazzill.  The pumpkin brads are Doodlebug also!  I am unsure where the ribbon came from, sorry!
The tutorial for the book came from Scrapbook Crazy.  I altered the construction just a bit to create pockets for tags.
I used punched pieces of cardstock and adhered two of them to the ends of the ribbon, then attached velcro to the cardstock to create the closure of the book.  The ribbon is adhered to the back of the book.  The flower is attached over the ribbon.  I made this stamp "boo food" with my Just Rite stamps.
"Front" view...
"Back" view.  I have 5 recipes in this mini book for a ghoulishly good meal.  The tags were cut from my Cricut cartridge "October 31st".  I left them blank so that the recipient could put pictures of the beastly feast, or notes about the recipes themselves.  Each book has two pockets.

Stay scary my friends!

Monday, August 2, 2010

Summer Camp Autograph Book

My daughter is attending summer camp this year & I wanted her to have a fun way to collect little memories from her friends!
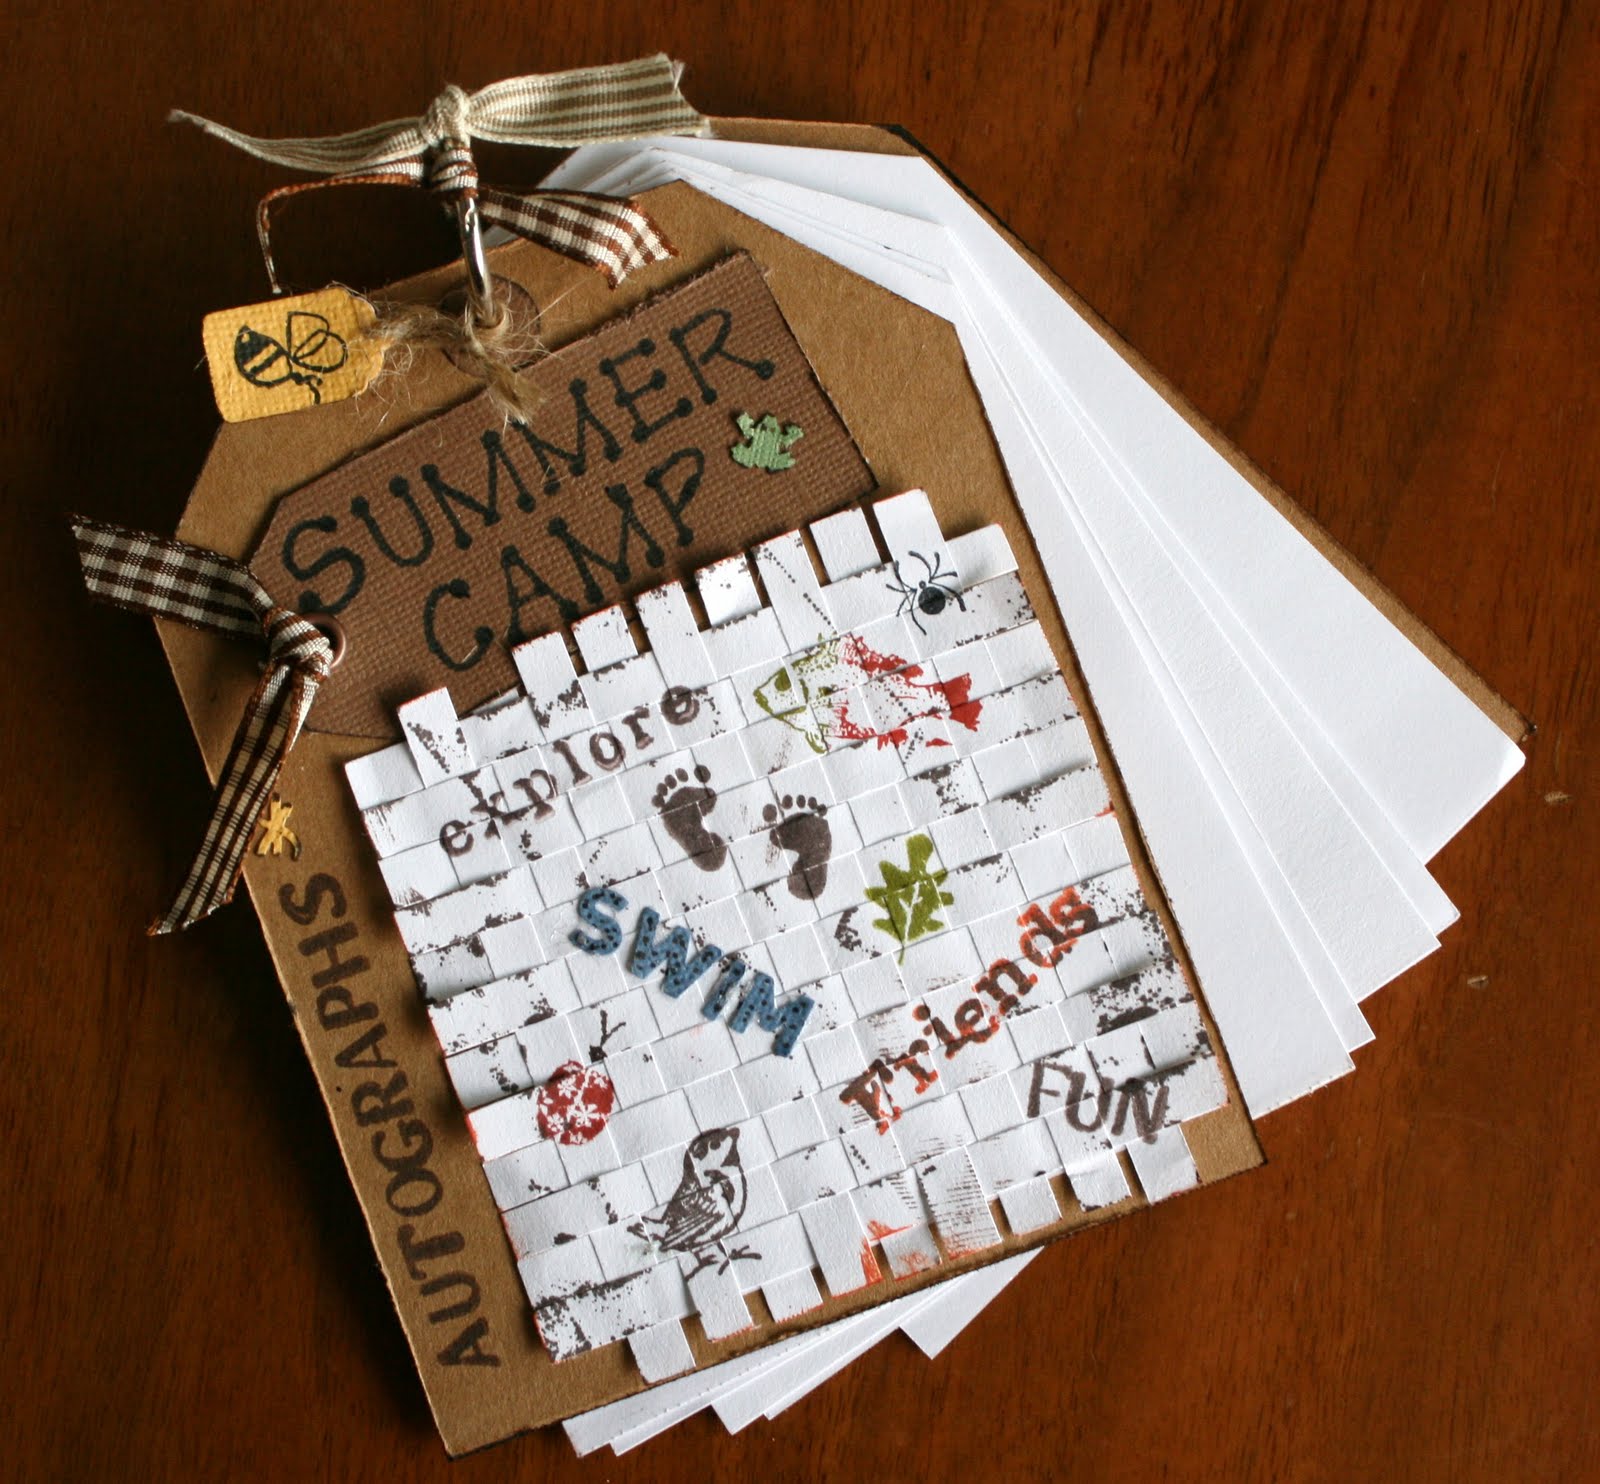
This mini album autograph book was created using a fun tag templete by Making Memories, approx 4x5 1/2.