WELCOME!!

We are so glad you are here! We love making and sharing our projects, and we are excited to have you visiting our site. Please leave us a comment and let us know what you think!

Jackie and Michelle

Followers

Saturday, March 26, 2016

Catching Dreams


I saw this pin in Pinterest, and just had to recreate it for my "grandkids" room.  I had made this doily years and years ago, and it has just been sitting in my closet doing nothing,  I got an embroidery hoop and framed it, then raided my stash of ribbons and tied them onto the bottom.  I love how it turned out and it looks so good in our "grandkids" room!  Hopefully when they spend the night they will all have the sweetest dreams ever!

Stay crafty, my friends.

Saturday, March 19, 2016

My new repurposed plastic bag drier

This is a quick and simple project, and it works FANTASTIC!!  I had the canning jar, filled it with mini marbles (that you would use for flower arrangements), and put a flower frog on it.  They I bought these bamboo chopsticks and put them into the jar.  TAA DAA!!!  My new cool bag drier!

I have these wonderful reusable zip lock type bags that I found at my local grocery store on clearance.  I bought a ton of them, and we use them all the time!  The problem was drying them after washing them…now problem solved.  The drier is very portable, and I can take it apart to put it away when I want to.  So far it is working great.

Stay crafty my friends!

Saturday, March 12, 2016

Princess Posse Mini Album

 This is the latest mini album that I have made.  I got the title "Princess Posse" from our oldest son.  He and his wife had their first baby, a girl, and then 9 days later our daughter and her husband welcomed twin girls to the family.  That made three new baby girls pretty much all at once.  Our son was joking about the Princess Posse that we now had, and I figured that it would make a great name for this album.
 I won this album at the Creating Keepsakes Convention last November, from Pinecone Press.  It is the perfect album to put pictures of all three girls during their first year.  I followed the instructions almost completely, but you all know I like to change things up a little.
 Since I have three girls to put in here, I wanted more space, so I created more places for tags to be put, for more pictures and more photos.  All of the ribbons that are sticking out everywhere are actually attached to tags.
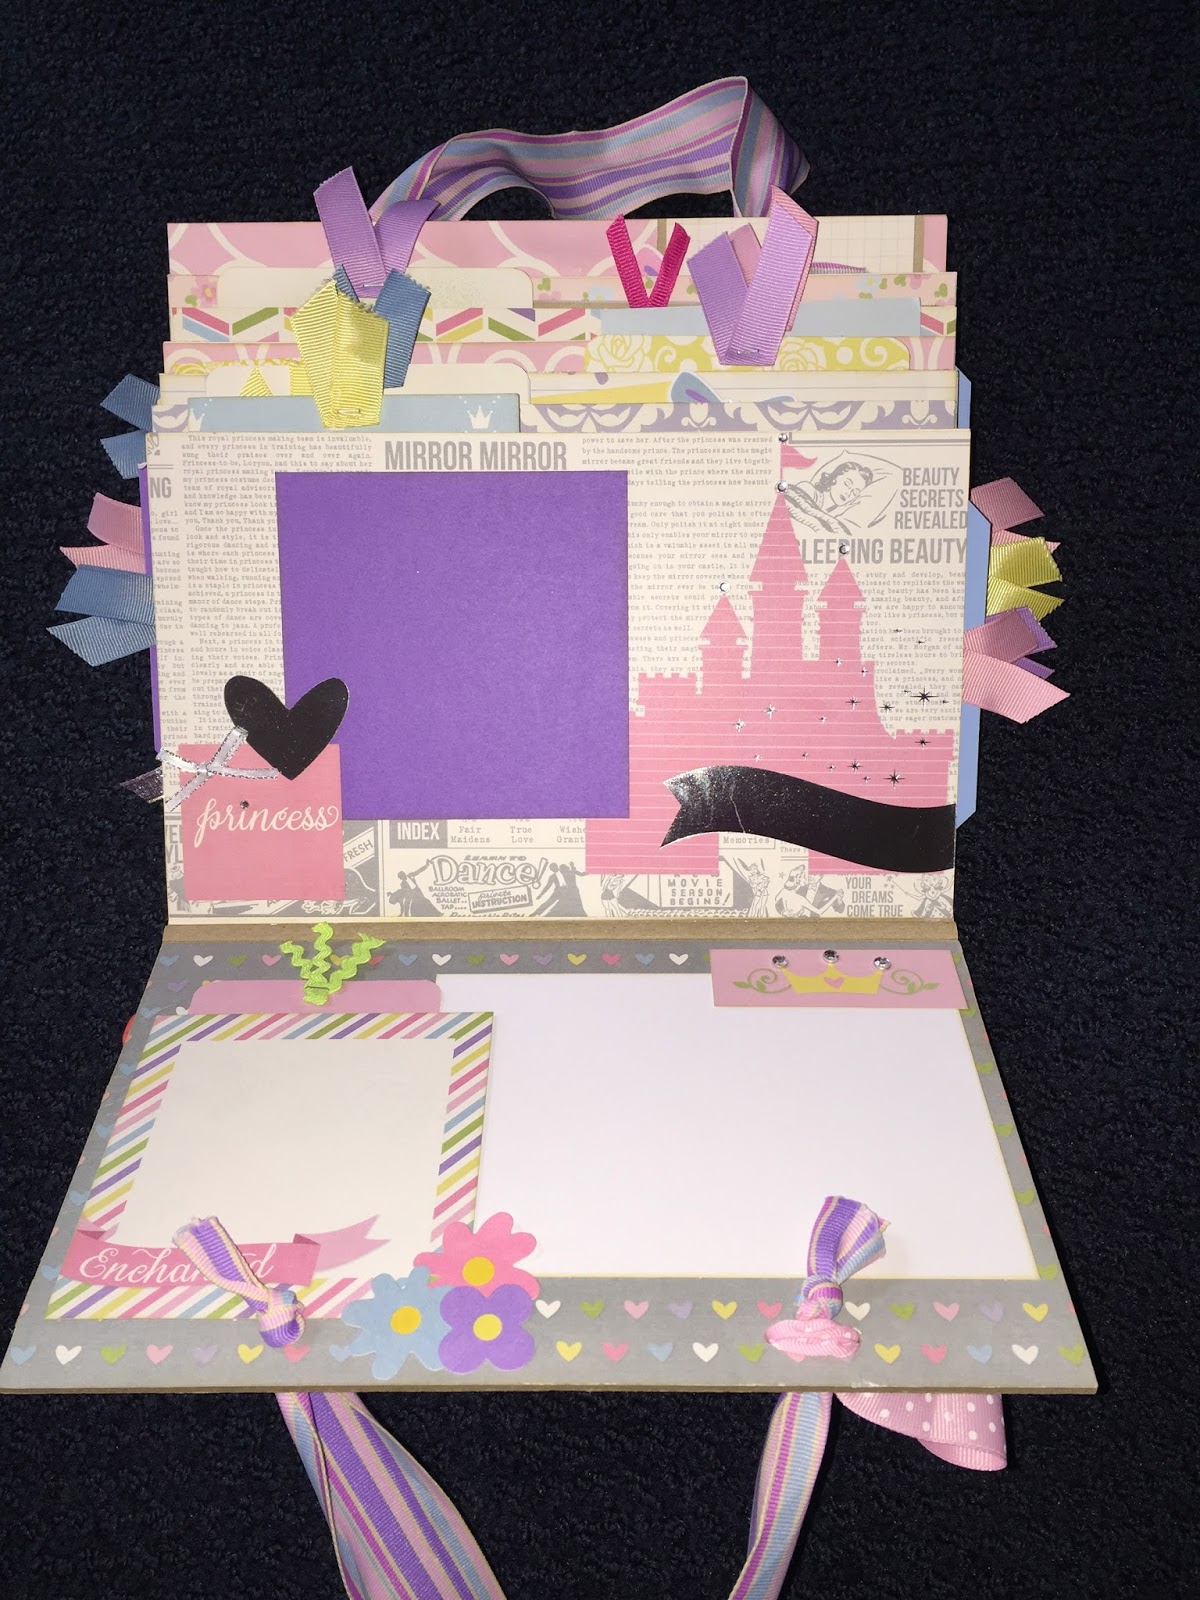
 The kit was awesome to work with.  The paper line used was from Simple Stories, Enchanted.  I love it!
 I added embellishments along the way, using some flowers and rhinestones.  On this page I added slides that pictures can slip into.  I left the post it flags in to show you.
 I was thinking of making all of the pictures mats white, but decided to use the colors instead.  I like how it turned out.
 I made the album while Jackie and I were at the Embellish It! crop a couple of weeks ago.  We had a ton of fun!
So, now, all there is to do is to gather up all of my pictures of my little grand-girlies and get them in this album.

Thanks for stopping by, and remember to always stay crafty!

Saturday, March 5, 2016

Vintage Potholders

 Hi, everyone!  You saw in my last post about my crafty decorating that I had used some vintage potholders in my kitchen as decoration.  Well, since I love to crochet I decided to make some of my own, that I could maybe use. Also, maybe, just maybe, my grandkids will display the ones I had in their kitchens some day.  After I bought all of this thread that will go awesome in my kitchen,  I went searching on Pinterest and found several free patterns.  Have I told you how much I love Pinterest?
 I found this pattern from Little Miss Stitcher.  It is an awesome pattern, but I worried that the open holes in it wouldn't allow me to be able to use it at all.  So, I did some alterations to it for myself.
 I decided to make the dress solid crochet, and I made it in two layers, like a "slip" for the dress.  I did the first row on the front loop, and the "slip" first row on the back loop.  Then I just crocheted both the same way, creating two layers of the "dress", which resulted in four layers of fabric made.  That should insulate it a little better.
Here is the finished dress, I mean potholder.  I used my nifty little cord maker gadget and created a tie for the dress, and here it is.  I love it!  I have a bunch of other vintage patterns that I am going to create with all of that thread I bought.  Even if I don't use them, it will be fun to make them.

Stay crafty, my friends!!!