WELCOME!!

We are so glad you are here! We love making and sharing our projects, and we are excited to have you visiting our site. Please leave us a comment and let us know what you think!

Jackie and Michelle

Followers

Monday, April 30, 2012

More DIY Washi Tape

I bought this paper by K and Company specifically for this.  I cut the paper in half, and ran it through my Xyron machine.  I am so glad that I have my machine out so I can use it.  Before my craft room move, I had to unpack a bunch of things just so I could get to it.  Now, I just use it, FUN!
 Then I cut the rulers apart.
Here it is in my junk/smash/inspiration journal!  Cool, huh?  I am looking at papers with border strips in a whole new way now!

Then I found this paper, and did it again.

And I found a third and a fourth paper.  I think I may have enough ruler tape now.  (And I think I need to find some help, I think I am addicted to "ruler" paper!)   At least two of the sheets gave me over 16 feet of yardstick "washi" tape each!

Stay Crafty, My Friends.

Saturday, April 28, 2012

I won a MAJOR AWARD!!!

Hi All!  I hope your Saturday is going super awesome!  As I write this, I am still in my jammies, drinking coffee, and dreading what housework I have to do after I get done posting this.  This week has been hard!  We have started using a new computer system at work, and we all know how stressful that can be.  I haven't been doing a whole lot of crafting, mostly because my brain is soooooo tired I can't!  HAHA!

I have also run into a problem...it seems that I have used up all of my Picasa image space for this blog.  I didn't realize that I could resize my pictures and that if I did that I wouldn't have used up my storage space.   I have figured out how to resize my pictures, and I am hoping that it is going to work.  I guess if you take them less that 800x800 pixels, it doesn't count towards your 1 GB limit. So, this post is also a test, using the newer picture settings, and seeing how it works.  If anyone has suggestions for me, please let me know.

So, to the blog post!  I follow Elsa at  Just a Few Designs, and have for a very long time.  She is awesome!  She is a designer for I Brake for Stamps, and I am Roses, and she also hosts blog hops throughout the year.  I have actually participated in one for Christmas with her.  Well, she also has a group of talented ladies she calls her Pride, and the Pride had a give-away associated with their St. Patrick's Day postings, and I won!
I received this awesome package of goodies last night, and it sure was one of the highlights of my week!  I received this organizer tote, the wood cut bird cages, Tim Holtz goodies and paint, and an embossing folder!  THANKS TO THE PRIDE!  They all contributed to the goodies.

Please go check them out, they are all so super talented!!!  Here are a list of the links to the ladies in the Pride, go check out their dens!!!

Elsa
Krystal
Kimi
Suzie
Linda

Stay Crafty, My Friends!

Wednesday, April 25, 2012

Trinket Journal

I think this turned out to be a cute little project.
 I bought this kit at Jo Ann's.
 I had this set of papers and embellishments.  I have used them is a couple of projects.
 Here is my version of a Trinket Journal.  I love how it turned out.  It is a one-subject kind of journal.
 I added lots of things, and it turned out pretty!
 It is a plain kraft cardstock cover, and all of the pages are white.  I covered some with papers.
 I added pockets and pullouts.
 I also added envelopes.
 I got some lace from my stash to add to the kit.
 I love how this turned out!
 I liked the music papers and rub ons.
 I really am not sure what I am going to do with it yet, but it is ready when I am.  Do you do projects like that...without a purpose at first, but the use comes to you later?
 Almost done...it is a 16 page album.
 The back of the album...
And the back cover.

Stay Crafty, My friends.

Monday, April 23, 2012

Builder's Juice Vase

While my wonderful and awesome hubby was building my room, he sipped on what he called "builder's juice".  I threatened to keep the jug and use it for a pretty purpose...and here it is!!!
I went to Jo Ann's and got a pretty spray of silk roses to put in my new vase, and found one of my vintage crocheted doilies to put underneath.  I think it has a certain charm...and it will go perfectly with my "Redneck Wine Glasses!!!"

Stay Crafty, My Friends!

EDIT:  After I wrote the post, but before I actually posted it, I decided that the vase needed a little something...so I did this...
I was at Craft Warehouse and found these battery operated floral lights...and they fit perfectly into my vase.  Crafty Mood Lighting!

Again...Stay Crafty, My Friends!

Friday, April 20, 2012

DIY Recollections Embellishments

I was at Michael's recently, and saw these cute little embellishments.  They were doilies, with bottle caps and a pretty center. I almost bought them, then realized that I could make my own.
I had the mini doilies already, I crocheted them a while ago.  I dug through my stash and found the bottle caps, and then found these epoxy bubbles, from Recollections and from Prima.  It fit PERFECT!  I used a little E-6000 adhesive, and TAA DAA!  I think I may make these into magnets for a magnet board I want to make in my craft room.

Stay Crafty, My Friends!

Wednesday, April 18, 2012

Raiding my stash to DIY!

I have seen these "Memory Files" by Heidi Swapp a bit on the net.  Click on the link and you can see a video of Heidi showing her products at CHA.   They are super similar to the lapbooks that teachers have been making for years, but done with fabulous scrappy goodness!  I have looked and searched and do not see that anyone around my neck of the woods carries the products yet.  BUMMER!  So, this morning, as I was drinking my coffee and idea hit.
 You all know I have just organized my very own Mom Cave.  With all of the organizing, I found a lot of goodies that I had forgotten I had.  So, I gathered them up, and decided to make my own file!!!  I think it turned out very pretty, and I used up some stuff from my stash that has been sitting in my closet for a while...win, win!
 Oh, yeah, I am trying out my new label maker too, what do you think??  I added the butterflies that were given to me by my friend Tracey from MAS.  Thanks, Tracey!!!

I digress... I used The Girl's Paperie papers and embellishments, and some phrase stickers from Creative Imaginations throughout.  I made the cover without too many dimensional embellishments because I am not sure if I am going to put these in a box like Heidi does, or have them just on the shelf, or what.  Decisions, decisions!
 Here it is opened.  I used two of my little minis I showed you in the picture above.  That means I have more files to make!  The possibilities are endless with this.  I made my own "Polaroids" for photo mats.  the one behind the booklet on the left comes out.  

By the way, does anyone have one of those Instax cameras?  I really want one, but would like some feedback...if you have one would you please comment on this post and let me know what you think about it?  Thanks in advance!!
 The sticker on the pull out polaroid folds over and the whole phrase says "lucky you and lucky me".  The mat reverses for another picture.
 This mini folder closes with a ribbon, and opens to reveal two pockets.  The "letters" are from the paper line, I just cut them out to make tags.
 On the right, I have a matchbook style book.  I closed it with the clip.
 There is a huge tag behind that booklet that pulls out.
 Here is the matchbook opened. I made more polaroids using the ledger paper.
 On the cover, I made a little mini book for journaling.
 I added more photo mats.
 And some more...
 And some more.
Well, that's it!  I know that if my LSS starts to carry the line of "Memory File" goodies, I will be buying them...but it is fun to create my own as well, although it took a very long time to do!!!!  I also have to figure out how to store them...I think maybe a trip to the office store is in order.  What do you think of my little DIY???

Stay Crafty, My Friends!

Monday, April 16, 2012

A pretty for my new room.

 I saw this idea at Craft Warehouse.  I decided to do it for myself.  I used the papers and embellishments I had from my Colorbok papers and decided it would be pretty in my room.
 These are chipboard banner pieces.  They are held together by paper strips at the "joints" and by the ribbon at the top for hanging.  I added bling from 7 Gypsies at the bottom.
 I think I will fill it with some silk ivy or something.
Or maybe it can be my secret chocolate stash.....shhhhh, don't tell.

Also, my awesome hubbin bought me this for my room!
It is gorgeous when the sun is shining in my window!!!  Thanks, DJ!

Stay Crafty, My Friends!

Friday, April 13, 2012

Magnetic Note Center

I have a cute little project to share with you...and it recycles as well!!!  I am eco-friendly today!
 My hubbin went and bought himself a bottle of scotch.  It came in this cool metal tin, and he gave it to me, thinking I could use it for something.  I immediately knew what to do.  I got out some paper and magnets...
 I covered the tin with paper, and found some yellow Prima flowers left over from another project, some magnets and some E-6000 glue...
And, Taa Daa!  I have a cylindrical note holder on my desk!  I think it turned out kinda cute, and it is serving two purposes...the lid comes off so I can also use it to store things.  I also did a couple of button magnets as well.  Maybe I can store pens or note papers or chocolate...what do you think?

Have a wonderful weekend!

Stay Crafty, My Friends!

Wednesday, April 11, 2012

Mom's Diner Recipe Book

Here is my finished project that I promised to show you.  I used a variation of an envelope book page that I showed you here.  I love how this turned out.  The measuring spoons are hilarious...they measure "Nip", "Smidgen", "Pinch", and "Dash".  I found them for $1 somewhere, but I can't remember where! I found them, and some of the other supplies, when I moved my stuff into my new space.
 I made 5 pages in all, but each page has three pockets and 8 recipe cards.  Phew, that's a lot of recipes!
 I made the cardstock page as a "tube".  Then, on each side, I adhered one of the envelopes like I described in the above link to my "Sweet Baby" album.
 Two recipe cards go into each of the envelope pockets.
 In the pocket created by the cardstock tube that I made, I put the tags (above).  They each have a recipe card on the back side as well.
 Then, in-between each of the pocket pages, I made a plain page of cardstock, with recipe cards on each side.  There are 4 of these pages, for 8 more cards.
 I love the feel of the book.  It is super heavy and sturdy.
 There is a ton of space for recipes...and one could even put pictures on the pages instead of recipes!
 I want a malt now...how about you?
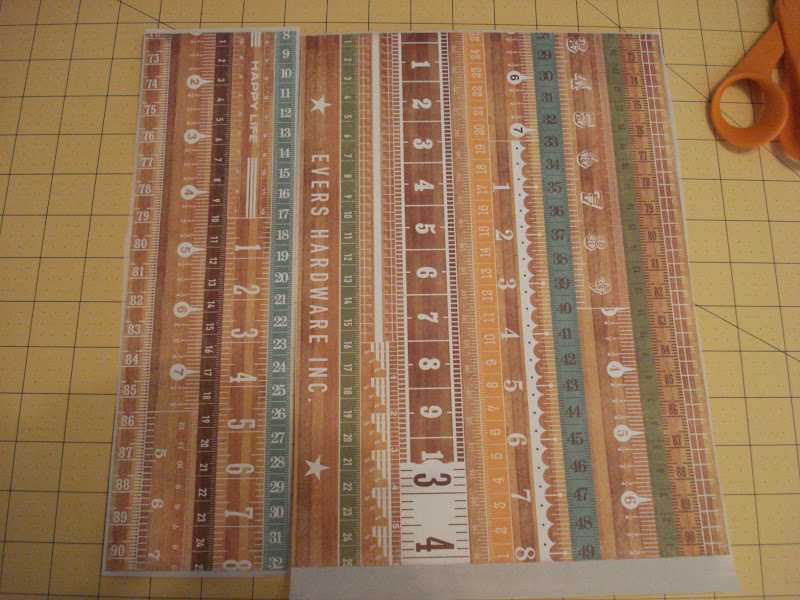
 The papers are from Echo Park, "Happy Days" collection.
 I used a ton of embellishments also.

The covers are made of chipboard, covered in paper.  Here is a list of supplies used:
Jenni Bowlin: Antique Buttons
Jolee's:  Dimensional Stickers
Doodlebug and Prima:  Flowers
Recollections and Teresa Collins:  Bling
Recollections, Bazzill and Echo Park:  Paper
Bazzill:  Envelopes
We R Memory Keepers and Martha Stewart:  Punches
We R Memory Keepers:  Eyelets
Unknown:  Measuring spoons, ribbons, recipe cards, book rings


I sure hope you like this project.  Let me know what you think!

Stay Crafty, My Friends!