WELCOME!!

We are so glad you are here! We love making and sharing our projects, and we are excited to have you visiting our site. Please leave us a comment and let us know what you think!

Jackie and Michelle

Followers

Wednesday, September 29, 2010

Exploding Envelope Box

I saw Laura so this on her Ustream class and I had to make one!  Frankly, it is soooo darn cute that I am trying to come up with reasons to make another one!  It was super fun and turned out ADORABLE!  Please go to her site The Paper Trail and check it out!
I used my Tim Holtz flower die to make the flowers.  The papers are DCWV.
Envelopes are used as a base for this and there are pockets EVERYWHERE!
Go check it out, I know you will want to make one too!

Monday, September 27, 2010

Go Hawkeyes!

My husband is a loyal and dedicated Iowa Hawkeye fan.  Last night, while he and our oldest son and our friend were watching the game, I quietly went into my room, grabbed my Gypsy, and designed this banner.  I didn't get it done before the end of the game, but I did get it done today.  He loves it!  He dropped what he was doing to figure out where to hang it up.  It is pretty simple, but guys don't really want frilly do they?
Thanks for looking!!!  Go Hawks!

Friday, September 24, 2010

Double Page 12x12 layout by Lickety Split


Another quick & easy double page layout by Lickety Split Scrapbooks!  This one is called,  Flowers!

Wednesday, September 22, 2010

Guest Book for Natalie

Jackie and I work with Natalie, another OR nurse.  She got married in August, and she asked me if I could make her Guest Book.  She had been seeing a lot of books designed with pockets to put  a card containing wishes, advice, etc.  That way people could have a little bit of privacy in their words to the couple.  We designed this together.  Her colors are an orange and purple scheme.  We incorporated that in the book.  This is the cover.  I used my Cricut and Gypsy  to create the monogram, using the Tie the Knot cartridge.  The book turned out bigger than we both anticipated, so I used a ribbon binding.
I used Fabulous Finds to create the library pockets.  One page contains purple pockets, the other orange. I stamped the pages with stamps by Autumn Leaves, and Stazon Ink.  The photo corners are from Martha Stewart. There are 21 pages in all, and 126 pockets!!
I created a sign for her guests to let them know what to do using my Happy Hauntings cartridge and my new EK Success border punch.  That cartridge has an easel piece for making a frame, and it worked perfect for this project!  I made the box with a simple design, and used my other EK Success border punch to create the purple lattice.  The flowers were die cut using my Tim Holtz Sizzix die.

She loved it!  Her guests loved it!  She said she and her husband had fun going through it later and reading all of the cards. 

Thanks for looking.

Monday, September 20, 2010

Double Page 12x12 layout by Lickety Split

Short on time? Need some help with finishing your scrapbook pages? Then try out these great double page layouts by Lickety Split Scrapbooks.  I won 3 dbl page layouts from the company & put this one together in about 15 minutes! Fast & fun with vibrant colors!

Friday, September 17, 2010

Mini Book Experiment, Take 3

  Pull Out Accordion Album

OK.  You saw the little book with the butterflies and the Halloween book.  Here is the way I made this book to create the bigger size used for the Halloween book.  This is the basic book, not including how to create all of the page pockets, or the bonus "pull out" pages.  Hummm, should we do a Take 4?

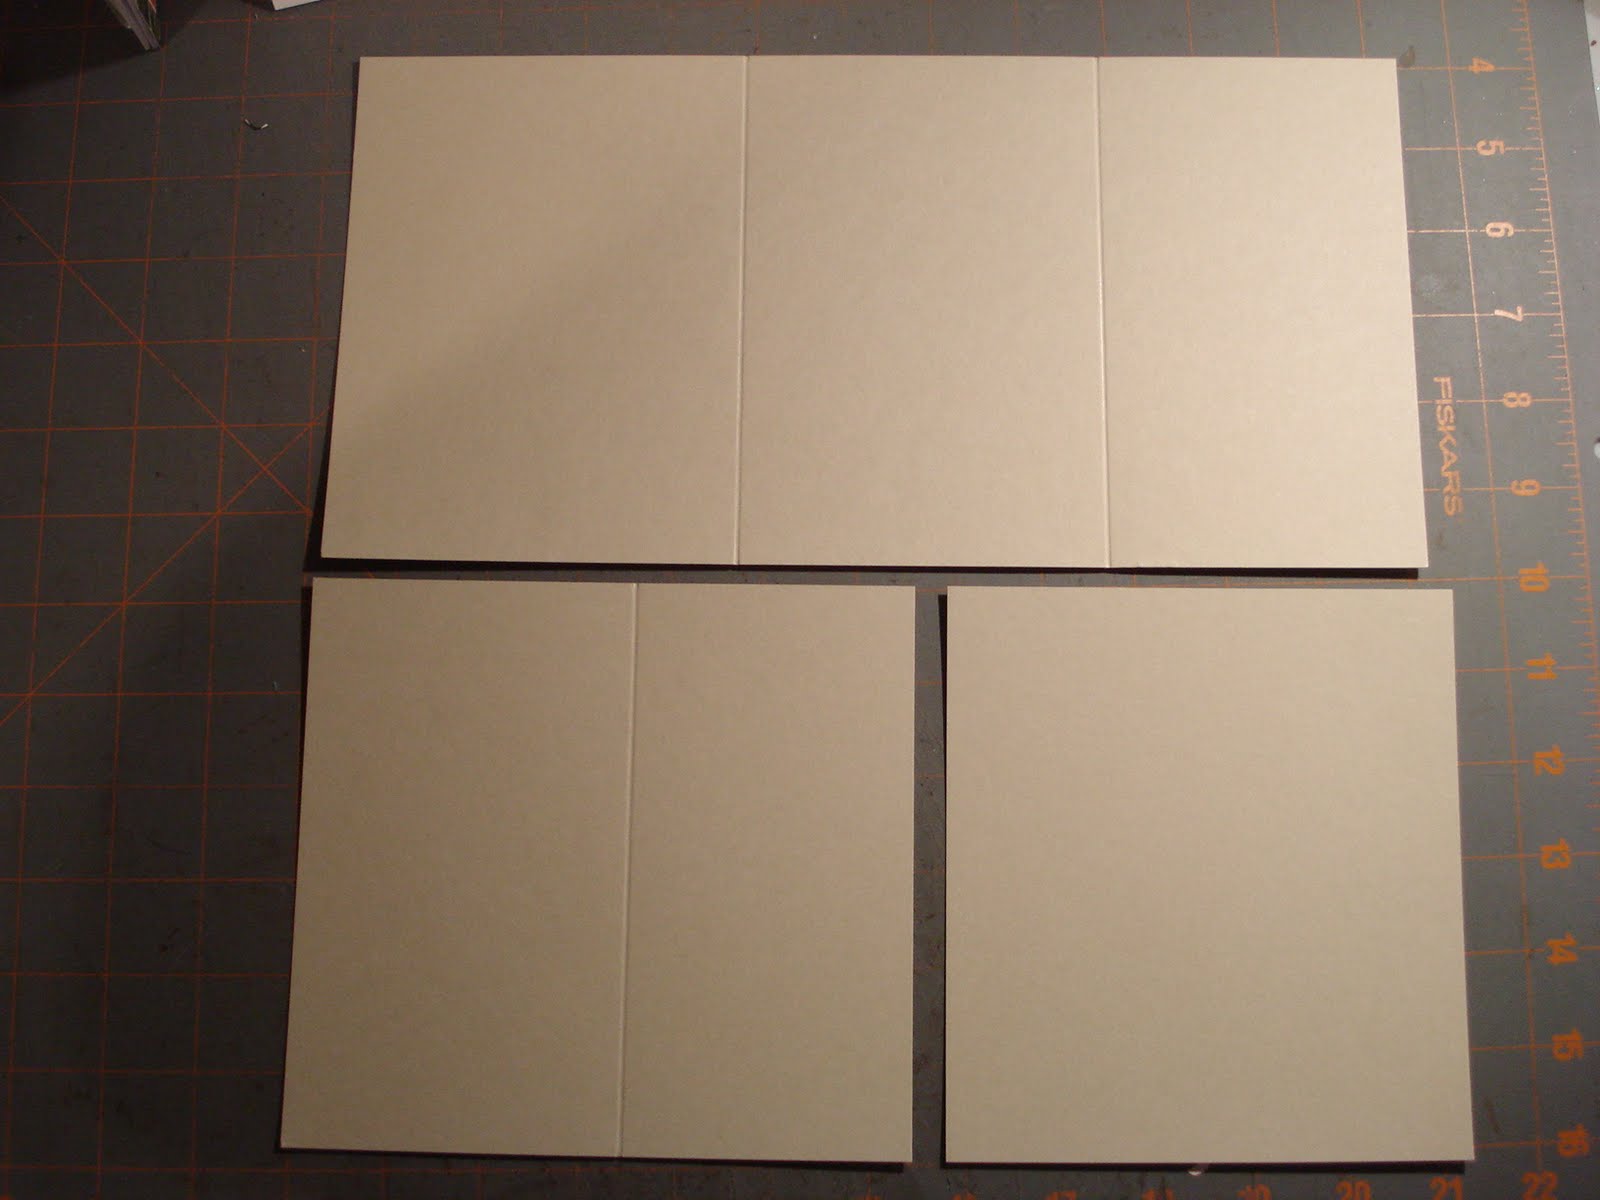
You will need two pieces of cardstock, 12" x 12".

Take the first, cut into two 6" strips.  Take one strip, and score at 5 3/4" and at 6 1/4".  This is the cover of the book, with a 1/2" spine.

Take the second strip and cut off 2 1/2", then cut off 1" of  this piece.  Score the 1" piece at 1/2".  This is the binding strip that attaches the pages to the book cover and reinforces the spine of the book.  Take the 9 1/2" piece and score at 5".
Take the second piece of cardstock and cut it in 6" strips.

Take the first strip, score at 4 1/2" and 8 1/2".  This gives you a 4 1/2" section, a 4" section and a 3 1/2" section.

Take the next strip, cut it at 6 1/2".  Take this 6 1/2" piece and score it at 3 1/2".  This will give you a 3 1/2" and a 3" section.  Take the piece that s 5 1/2" and set aside for use making tags or pockets later.

Fold the cover piece along the 1/2" spine.  Fold the binding piece.  Adhere the left side of the binding piece to the spine so that the right piece is "free" and towards the back of the book.

Take the next piece of cardstock with the 5" and 4 1/2" sections, and adhere the 5" piece to the right side of the binding piece.  I did it so the binding piece was behind the 5" piece.  I showed the top view to try and get you a clear picture of what was going on.
 This shows how the next pieces will be adhered together.  Take the cardstock that has the 4 1/2", 4" and 3 1/2" sections, match the 4 1/2" sections and adhere these together.  I only adhered the sides and bottoms, leaving the top open to create a pocket to put more tags.

Match the 3 1/2" sections and repeat.  Your accordion is complete!
This picture shows it all adhered with the tops of the attached pieces open so that you could place tags.
All folded up, this is the inside of the book, front cover open.
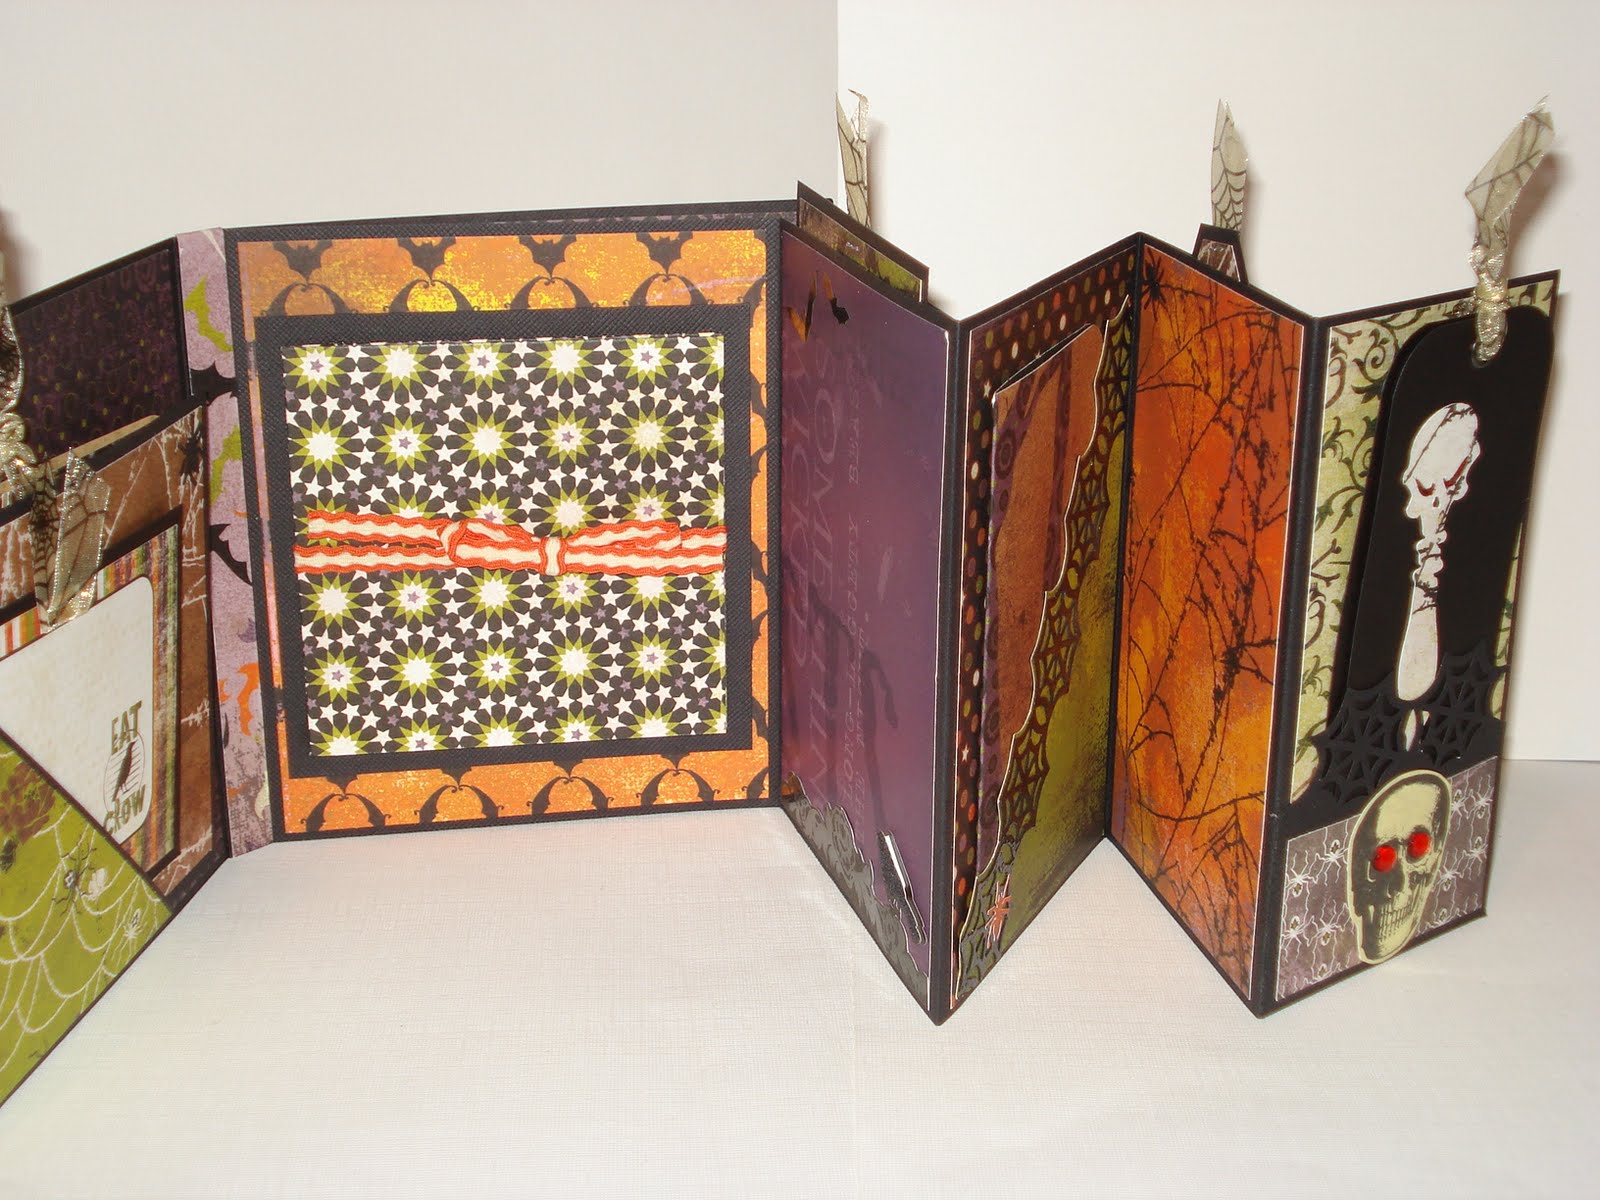
This is the front of the accordion opened.
This is the back of the accordion opened.

Now decorate to your hearts content and have fun!!!!!!!!!!

Wednesday, September 15, 2010

Mini Book Experiment, Take 2

  Pull Out Accordion Album

OK.  I wanted to redo the mini book I just did, but make it bigger.  So, I did.  This one measures 6" x 5 3/4".  It has a spine, once again so that I can use my embellishments as I desire.  I used my Cricut  for this book, using Happy Hauntings and October 31st.  I cut out the tree and the gate, which I heat embossed.  The sign was also cut out and Stickles added to the word "Beware".  The moon and bats were punched.  The papers are a variety, Pink Paisley and Basic Grey. 
Back view.  I cut out the witch and the house on the hill with the Cricut.  I sprayed the house with Smootch Spritz to make it shine a bit.  The closure was a technique I saw on You Tube somewhere, and can't find it now.  If you know where it is, please let me know so I can give credit.  A hole is punched and an eyelet set, in the back cover.  Put the ball and chain through, and through the hole in a bulldog clip and use the clip to attach the front cover, keeping it closed!
First view, open front cover.  Pocket with tags.  The big brown tag comes out and on the other side reveals another pocket with a tag book.  The front right is a small pocket with skeleton keys cut with my Cricut.  The sticker skull is from Reflections, and I added rhinestone eyes.
The front of the accordion opened.
The back of the accordion.  The center with the orange decorative strip is attached at the top and bottom so that it can hold more tags, three in all.

It is hard to see, but the 2nd and 4th pages of the accordion also have tags coming out of the top.  Hummmmm, maybe Take 3 should be a tutorial.....stay tuned.....

Monday, September 13, 2010

Mini Book Experiment, Take 1

 Pull Out Accordion Album

I was inspired by the post I found here on Obstinate Pursuit.  I thought it was an awesome book.  But, since I am liking to make my mini books with embellishments that make my books thicker, I decided to tweak the design just a little.  I came up with this book.
I adjusted the measurements and came up with a spine that would  allow for some expansion of the pages.  The papers are K and Co.  I used some bling from Reflections.  I don't know where the red and brown flowers are from, but the center I made myself using my Cricut.
The closure is the velcro closure I used on my mini cookbooks.  I just put the other piece of velcro on the front cover since I didn't have two ribbons to close this book.
This is the open book.  On the left, I created a pocket, and added tags.  On the right, the accordion part of the book.
The accordion opened.  The square piece with the green ribbon closure is a paper that opens to create an 8"x8" space for more pictures or journaling.  More tags in a pocket in the middle section of the pull out.
This is the back side of the accordion, and the back inside cover. More pockets and tags.  The right paper with the ribbon closure is the technique of the envelope pocket insert that I found on You Tube, but I just used papers instead of envelopes.  No extra pockets, but more extra space.

The whole album measures 4"x5".  It is very cute and very small.  I wonder what would happen if I made it bigger....hummmmmmm.  Take 2 on the way?!

Wednesday, September 8, 2010

Gate Fold, Accordian Bound Album Video Tutorial

To create this fun album you will need 2=6x6 pieces of chipboard, one cut in half. Adhesive, paper timmer, score device. 2=6x8" pieces of carstock or heavy paper for the binding, both scored every 1" and creased accordian style. Paper to cover your book and enough to make flaps, ribbon and embellishments.


Friday, September 3, 2010

Happy Labor Day!!!

Jackie and I are both having a mini vacation with our families, so we will return to posting next Wednesday.  We both hope that you and your families have a safe and fun Labor Day Weekend!!  Thank you all, our wonderful Followers, for all of your support!!  We can't do this without you!!  See you very soon!

Stay Crafty!
Michelle and Jackie

Wednesday, September 1, 2010

Envelope Tutorial for a 6" Card!

I made a card using Jackie's Never Ending Card Tutorial for a friend's upcoming wedding. Jackie is SOOOOO talented!!  I was trying to figure out how to make an envelope for a 6"x6" card, and I came up with a way, using an existing envelope, so I suppose it is an "altered envelope" rather than a new one, but it works and here's how I did it.
This is a 6 1/2" x 9 1/2" envelope I bought at the local office supply store.   It is called a "catalog envelope." You really need one that opens at the end and not on the side for this.
I cut 2 1/2" off of the bottom end off to make it 7".  Then I scored a line 1/2" from the bottom (represented by the pencil mark.)
I cut off a very small wedge from each end, and then cut off  the 1/2" end on the "wrong" side of the envelope. Apply adhesive and fold over and TAA DAA!
Now you have a 6 1/2" square envelope that is perfect for a 6" square card with lots of embellishments or papers added to it.  It is a lot easier than trying to make one from cardstock, and it is the perfect weight of paper, since it is already an envelope!  Have fun creating your own envelopes for your beautiful 6" card creations!

OH, by the way, the card was for a friend who is getting married.  I made her a guest book, that post will be following soon.