WELCOME!!

We are so glad you are here! We love making and sharing our projects, and we are excited to have you visiting our site. Please leave us a comment and let us know what you think!

Jackie and Michelle

Followers

Friday, July 30, 2010

Outdoor Quilt Show Mini Album

This is the book I made with my design "Never Lose a Tag."   I made it with the annual quilt show in mind.  My mom and I try  to go every year.  It is always amazing and this year was no exception.  It is in Sisters, Oregon, about 3 hours from where we live.  Click on this link to check it out
I filled the book with some of my favorite pictures from the event.  That lady there in the second picture, that is my beautiful Mommy!
The Elvis quilt was very cool!
All of the stores in the center of town are adorned with these beautiful quilts.  The bed was in a gift shop.
The Double Wedding Ring...my favorite!
The pharmacy counter is decorated with quilts.  The "Beer Cave" was in a mini-market.  I thought it was too funny to not have a picture of it. I think my husband wishes he had one!
I put a label on the back that you are supposed to sew onto garments that you have made, but thought it was fitting for this book.

Thanks for checking it out!

Wednesday, July 28, 2010

Quick & Easy Card Ideas


If you have never used Crushed Velvet Flock, you are in for a treat!  I made this sample with two stamps, a glue pen & blue flock.  Stamp, add glue, sprinkle and tah dah!
It comes in single bottles or a multi pack!
The consistency is much finer than regular flocking.
It gives your projects a great velvety texture. 
                                                                     Have Fun!!!

Monday, July 26, 2010

Christmas in July!

As you all know by now, I love swaps.  This was a swap I did, where we chose a month,  did a 6x6" recipe card decorated for that month, and a recipe that would go well with that month.  I did a bunch of them, and then had to figure out what to do with them...and here is the answer!

I looked online, and found a free calendar printing site.  I sized them to fit on 6x6" papers.  Then I cut solid cardstock, 7x8", bound it with my Bind it All, and adhered the recipes with their months.  I punched a hole so it could be hung in the kitchen.  Everyone loved them!!!  It is a gift for every month of the year!  Add family birthdays, and happenings to the calender, and after the year is done you have a cookbook and a scrapbook full of little memories.  I could see putting little cropped pictures in the little boxes for different events.

Stay crafty!

Friday, July 23, 2010

Too much of a good thing

I created this FUN paper bag book using 3 bags sewn together down the middle and the great Cosmo Cricket line, Snorkel!

Wednesday, July 21, 2010

Sunburst Mini Album

I saw another great tutorial from Laura at The Paper Trail and just had to make one.  Here is the first one I did, using Martha Stewart papers.


I used punches to make the flowers and the butterflies to put on the album.  It holds 7 tags!
Here is the second one I did.  I had a page kit from Cloud 9 that was perfect for this project.
Open view...
The other side of it...
When you use double sided papers you get different looks depending on which side you are looking from.  It is a super cute mini, and super fast to make.  Take a look!

Stay crafty!

Monday, July 19, 2010

U R U

I made this 12x12 page inspired by the uniqueness of my 11 year old.  100% original!!!

Friday, July 16, 2010

Happy Birthday Card

I got the new Tim Holtz bingo card embossing folder, and decided to try it out.  I love it, it's COOL!!!
I used some of the old line of Making Memories Vintage Finds (I think that is what it was called) left over so, after I embossed the card, I inked over it with the Distressing ink, and added the fun ephemera.  I punched the butterfly, inked the edges, and sprayed it with Smooch Shimmer Spray.  I sent  this  card to the July birthday girl in a year long birthday swap I am doing at Split Coast Stampers.  I am happy to say, she liked it!

Try out the new line of embossing folders by Tim Holtz soon, they are all really nice!!

Wednesday, July 14, 2010

Dimensions for my Picnic Basket

Wow!!  Two posts in one day!!


I was asked for the dimensions I used to make this project.  Please see the post here at "Picnic Basket full of Cards"

So, here it goes.  I think maybe next time I make it I will make the basket deeper, but this was an awesome size for a couple of handmade cards!  Please note that the dimensions are for the cardstock only.  The papers were just cut 1/8" smaller on all sides to fit.

Handle: 1 x 11 1/2"
Brace for the Lid:  1 x 7",   scored at 1" on each end
Basket:  7 x 9",  scored at 1" on all sides, then cut the tabs to create the box
Bottom: 5 1/4 x 7 1/4"
Top: 5 x 9", scored at 1", 4", 5", and 8"

I hope this helps, and THANK YOU for asking!!!

Happy 4th of July!!!

OK, better late than never! I am sitting here in my craft room and looked in my closet and spied the red and blue lunch bags I bought at Target a while ago.  They have been sitting in my closet for a long time. I decided to use what I had on hand, and used up some old product doing it.  I don't even know where I got the supplies, or what company they are from, but, in my jammies, with a cup full of coffee, this is what I created!
I had this ribbon from forever ago.  The sticker for the front...have no idea when I got that! The stars are brads from an office store, I just cut off the tines and used pop-dots to adhere.  The number stickers are Scenic Route.
I cut three tags to go into the three bags.  I used the first ever paper bag style that started me on mini albums!  Anyway, this is just a cute and quick little project that is perfect for documenting this year's celebration!

Have a crafty day!

Monday, July 12, 2010

Tim Holtz Butterfly Card

I just bought the Tim Holtz Butterfly Die!  Cut the top layer out of a solid, then a contrasting piece full of color and Wow! The border is made with Fiskar's Leave it to Weaver punch. Sentiment stamp by Unity.

Friday, July 9, 2010

Welcome Baby!

I found an awesome tutorial here at Paper Punch Addiction, and knew it was the perfect card for an upcoming baby shower I am going to.  It is a slider card, and the fun thing is that there are three little surprises when you pull the tab!
I used Coredinations papers, Fiskers stamps with Stazon ink, and buttons from Favorite findings.  A ribbon scrap for the tab pull and some brads.  It turned out to be about 5 3/4" x 5 3/4", and I had to make a custom envelope for it because of the size and the bulk, but I think it turned out SUPER CUTE!  Go check out her tutorial, and Stay Crafty!!

Wednesday, July 7, 2010

Paper Aprons


While window shopping in a store in California I saw a cute version of these Paper Aprons on display and these are my rendition!   I cut a 8"x8" square out of dbl sided card stock and stapled a pleat on either side at the top. Using the scraps or a separate piece of card stock, fold a a 3" strip in half lengthwise to create a waist band.  You will have to use two pieces stapled together to make it long enough.  I hid my staples with cute flowers.  Use the remaining scraps to create pockets and punch a decorative scallop edge on the bottom if you wish!  Wouldn't this make a great kitchen decoration!

Example of Pleats

Monday, July 5, 2010

Picnic Basket full of Cards!

I was looking around at Two Peas when I came across this wonderful tutorial from here on min lille BLOGG

I worked with the measurements and came out with this.  I decorated it with my first quilled flowers, and leaves from the wedding supply section at Michael's.  I punched the butterfly, and added pearls to the body.  The box opens on both sides and closure is by magnets.
I used kraft cardstock from The Paper Company, but I don't know where the checked paper came from.
Sorry, it is from my stash!
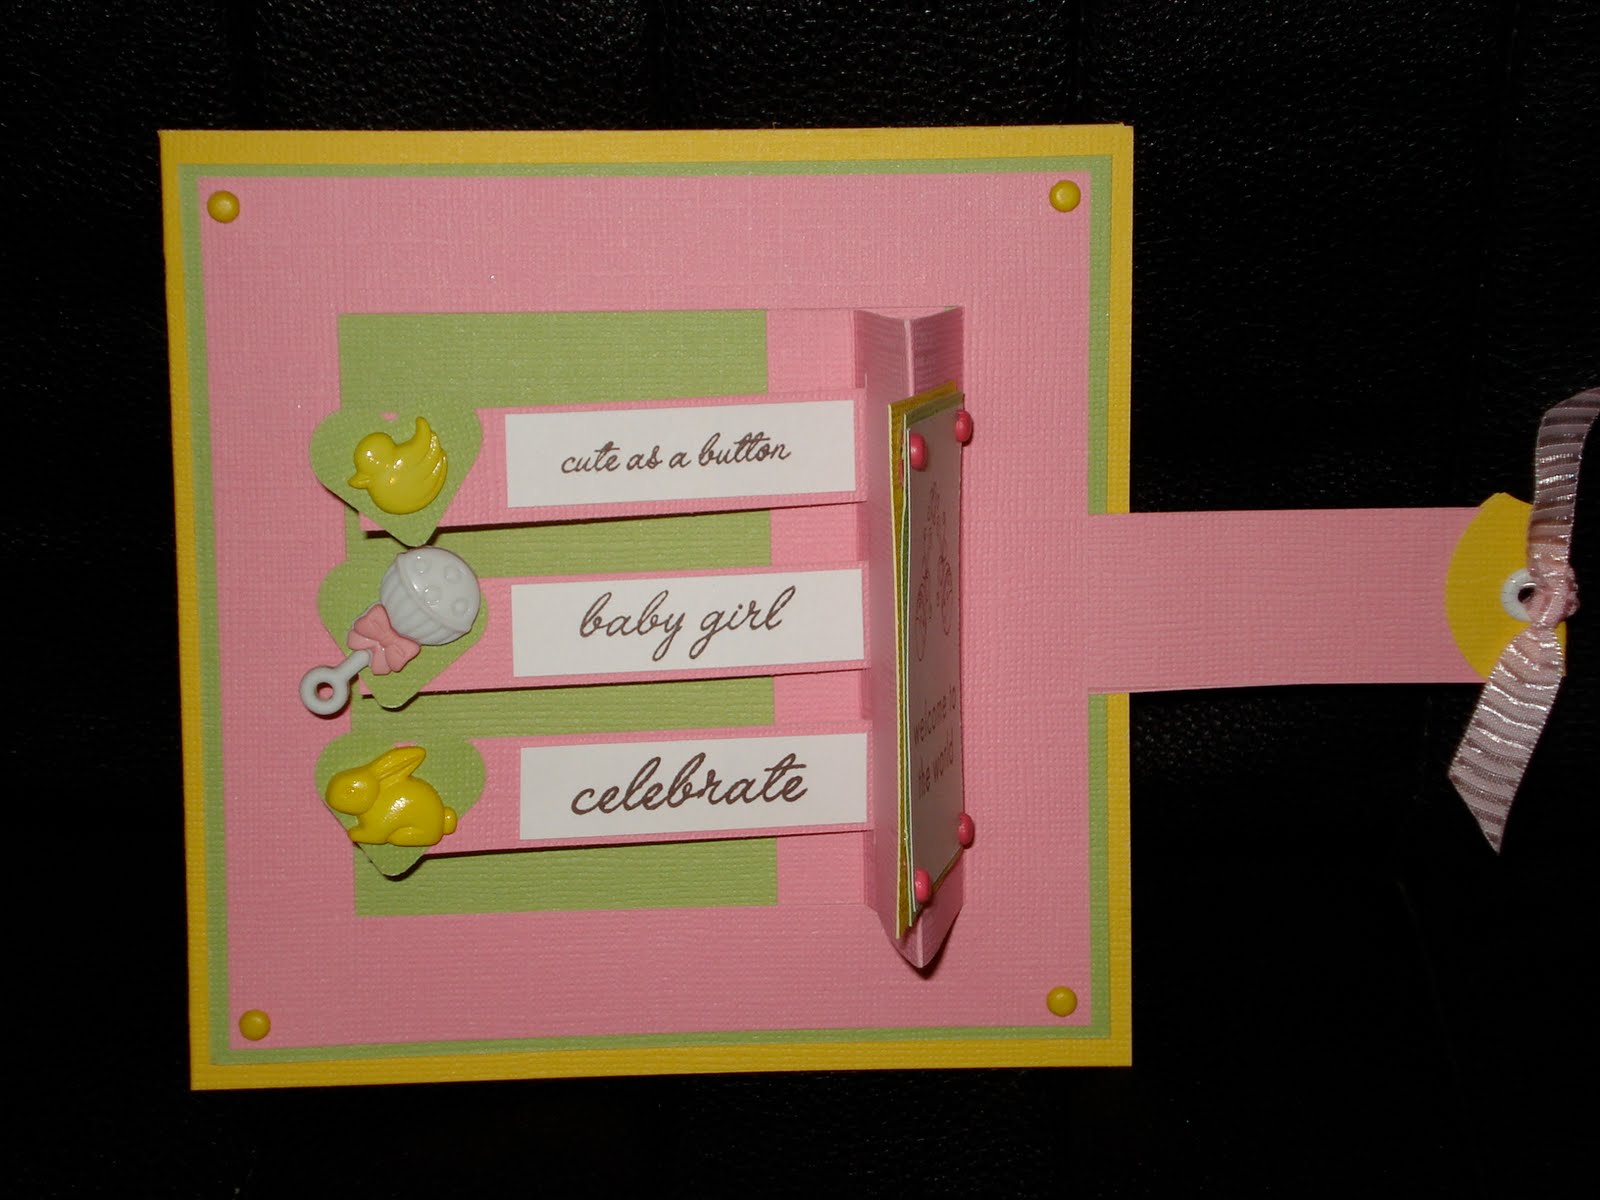
Every box needs something to put in it, so I got out my Gypsy and used my  Just Because Cards Cartridge and came up with a couple to put in the box.  These above are blank inside...The "RAD" card also used some adhesive paper ribbon from K and Company.
Inside, the carrot card says "Thanks a bunch" and the pig card says "Hogs and Kisses," with more adhesive ribbon.
Outside...
Inside.
All of the cardstock used for the cards was leftovers from my stash!
Thanks for looking!  If you are interested, let me know and I will post the dimensions for this project!
Have a wonderful, crafty day!