Hi Everybody! I hope you all are doing great! I have been doing just fine, but have been super busy.
I know that the blog has been neglected lately, and I'm truly sorry about it. I like doing the blog, sharing my projects, and sharing things I have learned and done through the help of other wonderful crafters in our crafty cyber world. I have taken on some more roles at work, doing some charge and education duties and we are currently gearing up for another orientation-residency program. It has been fun, but had taken a toll on my crafting and free time.
So, here is the plan. I really have to take a little minor break. I need a bit of time to get some things organized and settled. (Yes, I know I have already taken time!) My intention is to get back into the swing of things and start being a better blogger starting in January. I will do catch up posts and let you know what I have been working on, and show you my projects in progress. You will see some Halloween and Christmas in January, but really, can you get enough of Halloween and Christmas??
Thanks for sticking around for me. I appreciate everything...all of the page look-sees, all of the comments. Thank you my friends!!
Stay crafty, and I will see you again really soon!
💚💛💜
Michelle

Wednesday, November 30, 2016
Sunday, October 16, 2016
Framed Halloween Art
I have been working on several Halloween projects lately, and I wanted to share some super simple props that I made.
 I'm sorry for the glare on the pictures. This first one was an awesome deal. I was at my local Fred Meyer. I always go through their clearance aisle because you never know what you will find. I found this awesome 12x12 frame on clearance from $40 to $10! I picked it up and knew that this would be perfect for a Halloween picture. This paper came from a paper pack by Recollections, and it is gorgeous. Really, the picture doesn't do it justice, but it has hues of purple and silver and it looks great. Not bad for just a few dollars!
 The next pictures I made came from images in a paper pack by My Mind's Eye, "Frightful". I had the frames, I just had to add the papers to them.

 They are on the wall in my nook area of my house. This is a wider shot of where they hang.
 This is also from that same paper line, and it fits beautifully in my kitchen. This is the ledge above my sink. It works perfect with my crow!!
I have more in store for you, so stay tuned.
Stay scary, my friends!


I have more in store for you, so stay tuned.
Stay scary, my friends!
Saturday, October 8, 2016
My Vintage Halloween Crow


Thanks for stopping by. Stay scary, my friends!!
Wednesday, October 5, 2016
A Haunted Collections Box

Most of the embellishments came in the kit, and as a matter of fact, I didn't use them all! I had quite a few bits and pieces leftover.
I just left the box the kraft color it is, and wrapped the outside of it with some burlap and lace "ribbon". I added bottles, a spider and pumpkin by Tim Holtz, and some candy 3D stickers by Jolees.
It came out cute.
I am sensing a theme...looks like this year I am into the vintage style decorations. I wonder where this is going to lead...
Stay scary, my friends!
Saturday, October 1, 2016
Vintage Style Halloween Star

Ok, you all know that this is my favorite holiday...and I have been making some new things to decorate my home with. The first project in my new decoration arsenal is this vintage style halloween star. I have seen these all over the net, and have seen one in a store that I just loved. So, came home and made my own version.


I am making a lot of cool things, and I am planning on making a video of our house after it is completely haunted...I'm soooooo excited!
Stay scary, my friends!!!
Saturday, September 24, 2016
My Mini Desk Caddy Project


Stay crafty, and organized, my friends!
Saturday, September 17, 2016
I fixed my Duck Jammies!


That's it for today...stay crafty, my friends!
Sunday, September 11, 2016
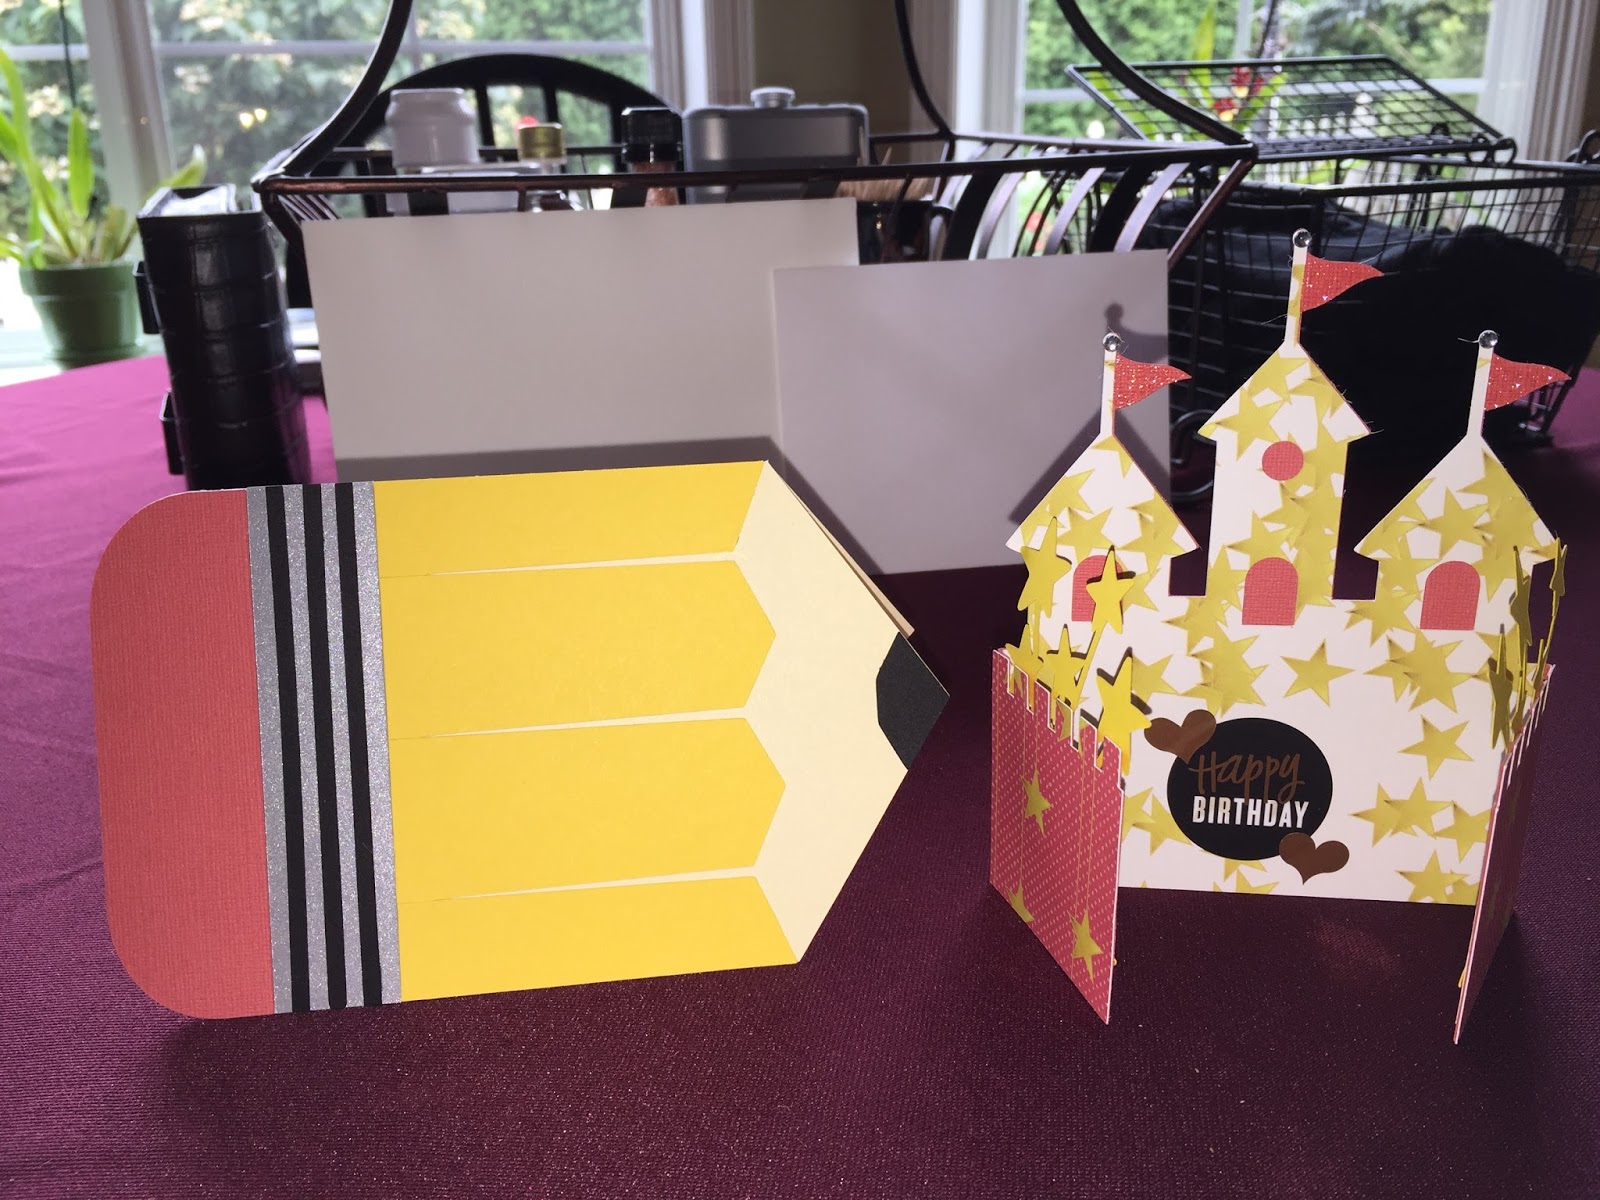
Cards for the Grandkids


Thursday, September 1, 2016
Fairy Jar Lanterns
My daughter sent me a link to a video, which you can see here, by Nifty. My twin granddaughters are in their new bedroom, which is a fairy themed room, and Grandma is making these Fairy Jars for them.
 Here is a picture of my set up started. I sent this to my daughter, so she could see that the project is finished. I found the jars at Target for $3 each. I painted the lids silver, and used white paint inside the jars. I had some Silhouette fairy files, so I used them, grass and butterflies for the project.
 After I adhered the die cuts inside the jars I had to test them out. I used a larger battery operated candle inside the jar.
 Here are different views of the jar...
 ...One of the fairies had mushrooms, so I used them too!
 I wantend to add some flowers to the project, so I decorated the lid.
 Here are the finished jars.
 I used a coat hanger for the handle. The flowers are from Recollections. The brads are, I think, Basic Grey. The white floral embellishments are from Jolee's.
 I don't know where I got the leaves, sorry about that. The silver glitter Washi tape is by Heidi Swap.
 I painted a wooden base to set the jar on, and thought that it needed decoration with the flowers. I think it turned out very pretty!
 Here is an inside shot of what it looks like. I added moss inside, which filled out the bottom and made it look very cool when I put the candle back in it.


I hope you enjoyed looking at this project. It was super fun to make. Now I just have to figure out how to get it to the girls through the mail without destroying them! Wish me luck!!!
Stay crafty, my friends!!
Sunday, August 21, 2016
My new TYPEWRITER!!

We Are Memory Keepers has come out with a Typecast line of papers, labels, tags, all sorts of things to go with this typewriter and it is beautiful and awesome! They also have multiple colored ribbons that you can get...All come with black, but then there is white, gray, teal, blue, purple, pink, red, and brown. I hope I didn't miss any.
It is manual, so no electricity needed. It comes in pink or black, and it is sold at Michael's. It's a bit spendy, at $199, but it is sooooooo worth it to me. It works great, looks and types in a vintage style, and, GET THIS...it takes 12x12" paper!!! The possibilities are ENDLESS!!!
Oh, and I am writing this review on my own, I am not being paid to do this...I just think that this is the best thing since sliced bread and Justin's Chocolate Hazelnut Butter! :)


There are a lot more uses for this wonderful little toy, and I will be showing you all more things later.
Thanks for stopping by, and don't forget to stay crafty, my friends!
Saturday, August 6, 2016
Repurposed Aprons
Hey all! You know that I am a huge fan of repurposing items and creating new things out of old things. Well, I have another project for you today.
 This started out as a jeans turned skirt project. I have always hated these jeans, they never fit right. So I made a skirt. Then I tried it on. NOPE!
I was trying to keep the pockets, but it just didn't look right, at least on my figure. So, what to do? I couldn't just throw this project away. I spent too much time on it.
 I cut them in half, front and back, and I used bias tape on the edges. I added ribbon to the front apron for ties, and added the bib and ruffles to make it bigger. The back apron I didn't have to add ruffles, as the bib was wide enough.
I gave one to Jackie, and I am keeping one for myself, BFF APRONS!!! They look awesome on, and they will be perfect to cook in.
Thanks for looking, and I will see you all later!
Stay crafty my friends.

I was trying to keep the pockets, but it just didn't look right, at least on my figure. So, what to do? I couldn't just throw this project away. I spent too much time on it.

I gave one to Jackie, and I am keeping one for myself, BFF APRONS!!! They look awesome on, and they will be perfect to cook in.
Thanks for looking, and I will see you all later!
Stay crafty my friends.
Subscribe to:
Posts (Atom)