WELCOME!!

We are so glad you are here! We love making and sharing our projects, and we are excited to have you visiting our site. Please leave us a comment and let us know what you think!

Jackie and Michelle

Followers

Friday, October 29, 2010

Triple Fold, Never Ending, Envelope Book

I saw this technique on several places on Youtube.  I have no idea where it originated.  I saw it used as inserts for mini albums, creating pages that are interactive, but never as an album in-and-of-itself.  So, I decided to try it.  I saw it the first time here from WhatYouMakeIt1, so check it out if you are interested in the construction.  It is super easy!  I used much bigger envelopes for mine, so it is a stand-alone album.  I used Recollections papers, transparencies, and stickers.  There are also a couple of Martha Stewart border stickers thrown into the mix.  I used my Cricut a lot as well.

Above is the first front page...

Opened to the left...
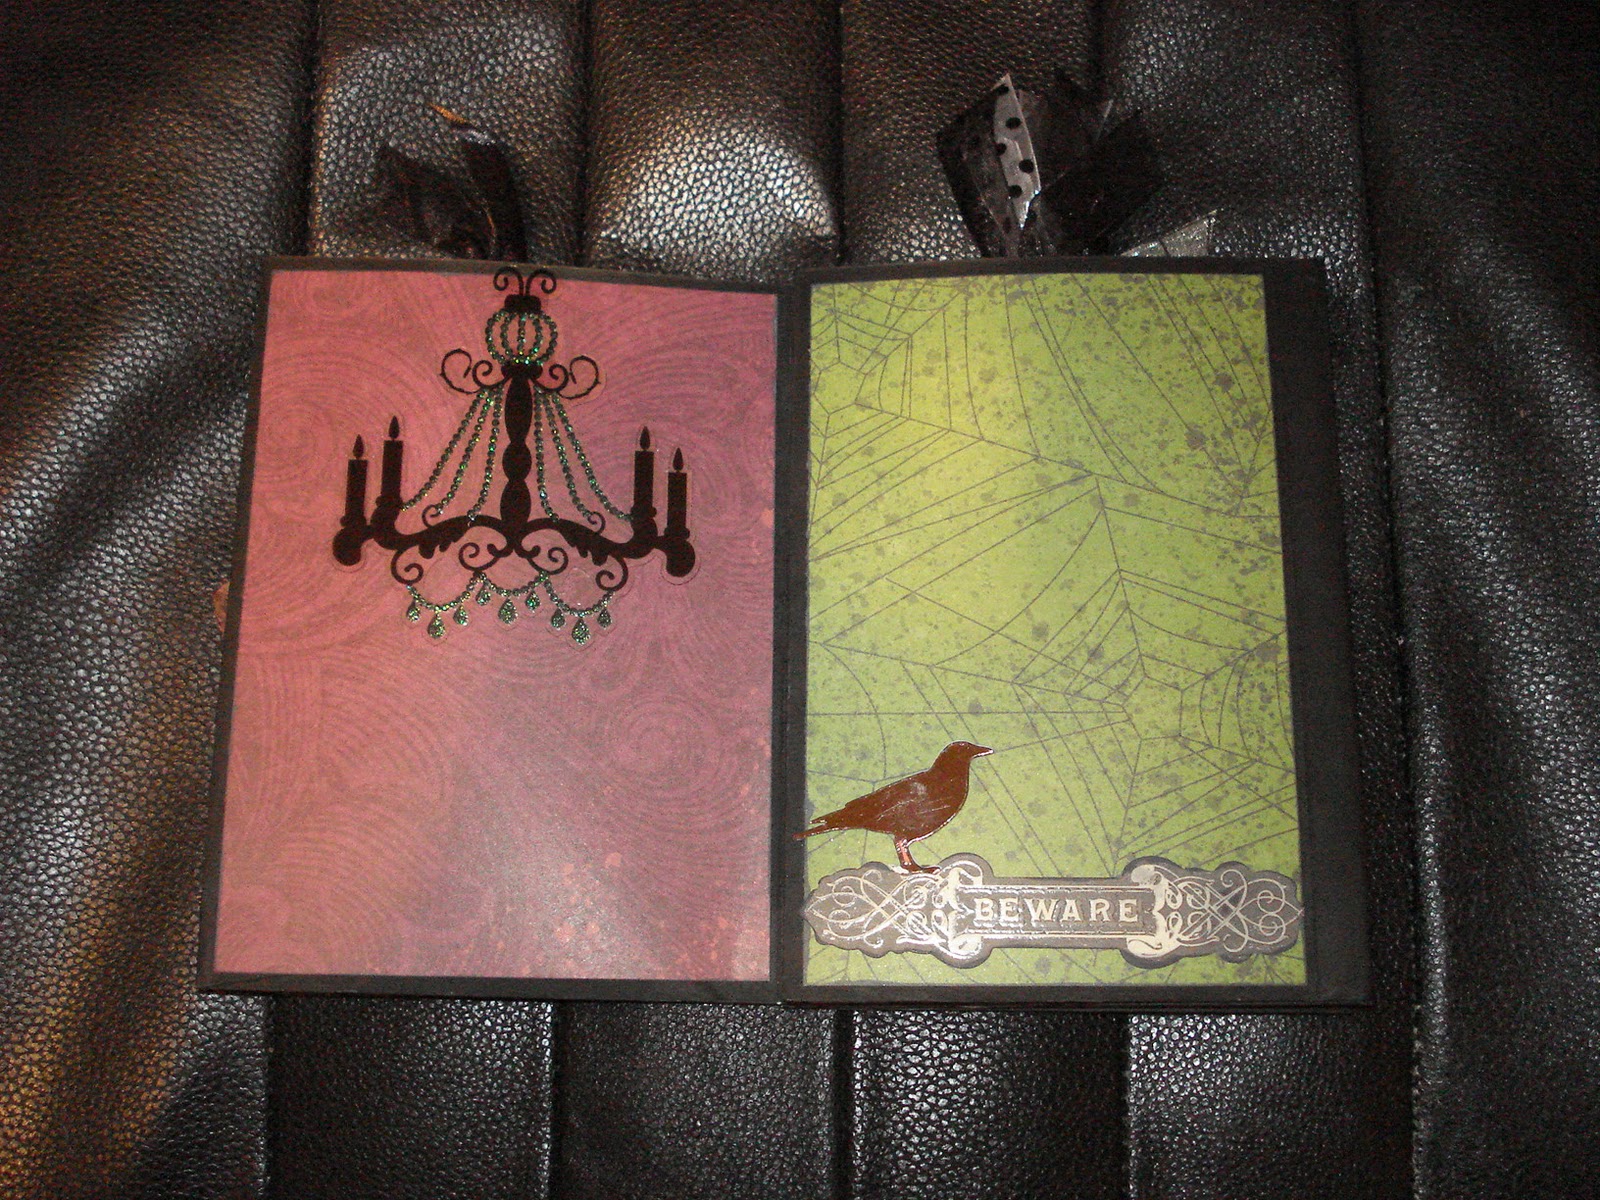
Then the "Beware" page opened to the right.  This gives you a triple panel of workspace!  The chandelier is only attached at the top so that a picture can slide under, the Cricut spider web is a pocket for the tombstone tag.
The triple panel closed, and the second section is opened from the other side, this panel is opened to the right...
And to the left.  Another triple panel!  The fence is another Cricut cut, only adhered at the bottom for the tombstone tag.
Closed up, flipped over, this is the second cover!  The back side of the book, if you will.  See why I called it a never ending album?  It can be opened from any direction you want!
This particular section opens once.

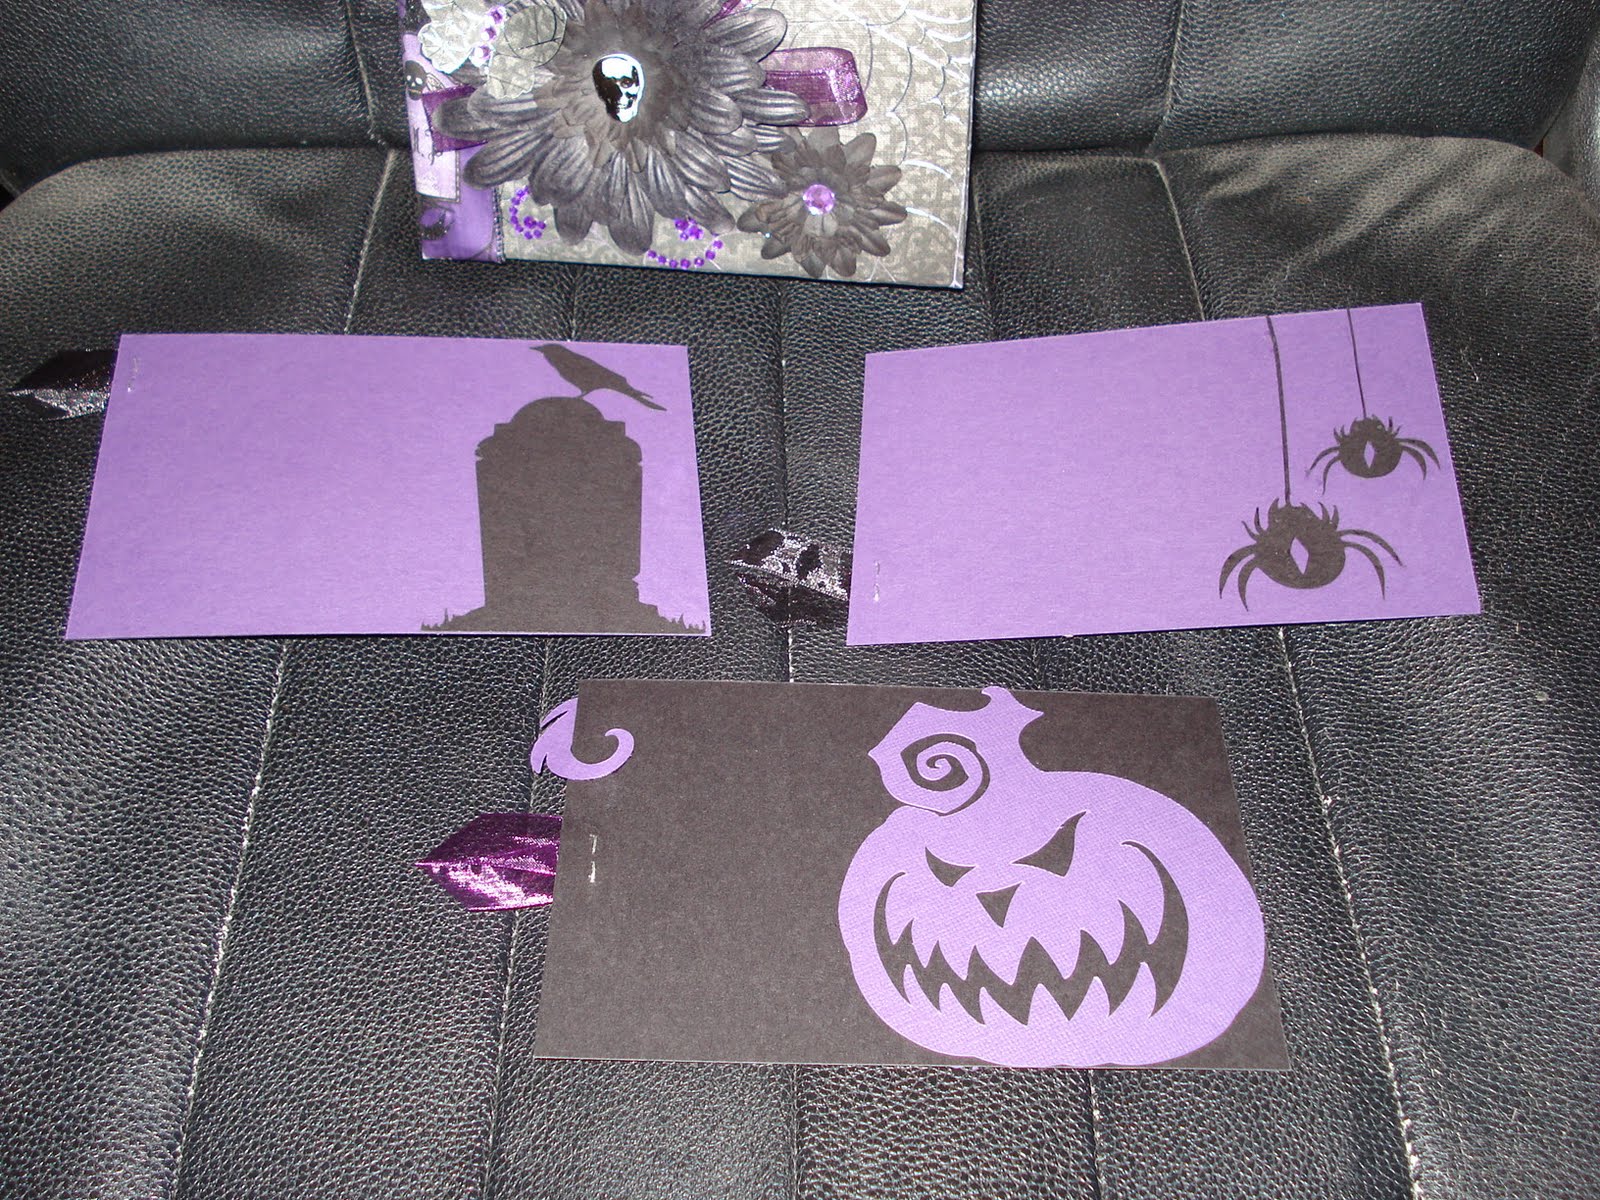
I kept the pages a bit simple so I can add pictures from the Halloween Party I am going to next weekend.
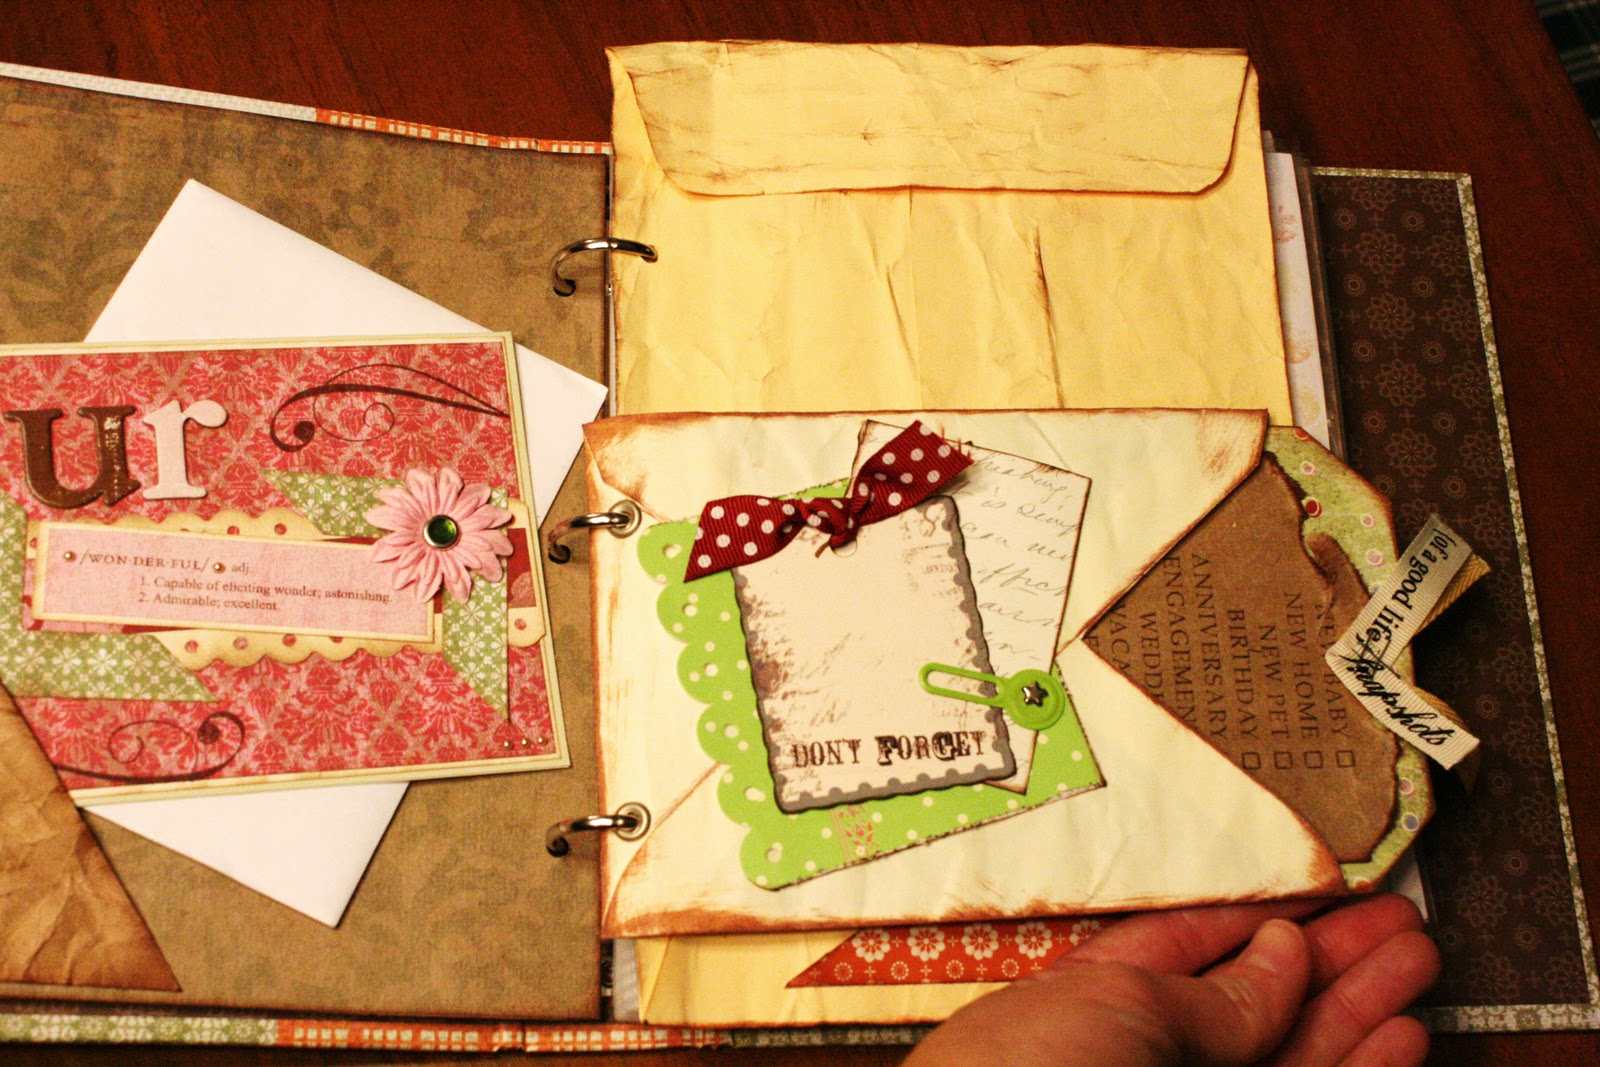
A lot of the things on the pages are adhered so that pictures can slide underneath.

This album has 12 "pages" and 6 "pockets", not including the ones I made on the pages themselves.  I made these tags with papers from Basic Grey, Recollections, and cardstock.  It is bound with one simple fold and some glue.  COOL, HUH?

The envelopes are brochure envelopes, measuring 6 1/2" x 9 1/2".  I painted them black before assembling the album.  The finished size is 6 1/2" x 4 3/4".  I just may have to do a tutorial for this one...Thanksgiving and Christmas are coming!

Have a spooky and scary Halloween!

Thursday, October 28, 2010

Halloween Welcome!

I was looking at the site, One Pretty Thing, and came across this posting from That's What She Said.

It is a really cool project, I needed a wreath, so I whipped one up.  I used papers from a My Mind's Eye kit to do it.
She suggested to use pages from a dictionary, I used this double sided paper.  It was harder to roll, but really beautiful, I think, when done.  When alternating the outside of the cones with the papers, you get quite a few different looks.  I also suggest that if you do it this way, use a hot glue gun!!!
I made more inner cones than the tutorial suggested.  I used my EK Success Spider Web punch and created a wrap for the inner circle and cut a circle for the center, carefully placed around the ravens, used a stamp from Studio G to make the "beware".  I sprayed the paper with some Smooth Spray to give it a little pop.

This is paper, and it is hanging on the outside of my door, but I have a covered porch.  This is not recommended if you plan on putting it where the weather could be a problem. 

BOO!

Wednesday, October 27, 2010

Velcome!

I was at the Craft Warehouse one day with my Husband.  We passed some wooden coffins and I blurted out, "OH! I have an idea!"  I think he said something like, "Great...here we go again!"  HAHAHA! Just kidding, he supports my craft habit completely, and I support his...Football and his classic rock band that he plays guitar in.  Who doesn't swoon over a guitar player? 

Ok, so I had an idea...

I brought it home and painted it black.  I chalked the edges with white to age it a little.  This "key" was found at Michael's.  It had a chain and a word dangle that said "Scary" but I cut that off, then hot-glue-gunned it onto the top.
I also painted the inside.  I had some of the Recollections line of embellishments and papers, so I used them also.  I ran some of the velvet ribbon in the top and added the sticker.  I traced the shape of the coffin, trimmed to fit, then created an accordion to put inside.  The hologram sticker on the cover was cool!  Here it is one direction, and below is the other direction...
I made the black rose from some Kaiser Kraft paper flowers, with a purple rhinestone center.  I made some leaves from an old little punch I have in my stash.  I attached the ribbon to the back page of the accordion to provide the closure.
This is the accordion opened.  I made the fence from my Tim Holtz fence die.  I stamped the tombstones with a Studio G stamp, and cut it out.  The bats are from ribbon in the Recollections line, as are the Raven stickers.  The pumpkin is from my stash, and I lost the packaging, but I am thinking it is Making Memories.  The witch is punched out from an old punch I have, and layered on top of some cool paper from the Recollections line.  I stamped "Happy Halloween" with more Studio G stamps, using white chalk ink.

Stay Scary, My Friends!

BWAHAHAHAHA!

Tuesday, October 26, 2010

Halloween Bouquet!

This is a kit I had for a very long time, and finally decided the perfect thing to do with it.


I covered the canister in paper, and wrapped a wide wired ribbon around it.  I used scraps of Halloween papers for the flowers.


This is from the Cuttlebug.  I love that thing!


What Ghostly Girlie wouldn't love a bouquet like this?  

Happy Hauntings!!!

Monday, October 25, 2010

Coin Envelope Book for Halloween

I have a kit burning a hole in my stash (kind of like how money burns a hole in my pocket!) from My Mind's Eye.  I decided to create a book I thought of, using coin envelopes.  The total size of the book is 6 x6".
Some of the envelopes are outside, on the pages, some of them are sandwiched between the pages.
It has 10 pages total, and all of the tags you see come out for more pictures or journaling.  I just got some lovely twine by jillibean, and thought it was perfect for the tags.
Some of the pages I left blank...
Some of them I added another pocket using a coin envelope for more tags.
I love the bottles of poison in this kit.
The back cover has the "Happy Halloween" pocket with three mini tags that come out.
There are 14 large tags total in this book.  Lots of room for pictures and journaling.  I think my grandson, Cooper, will look adorable in this book for this year's Halloween festivities!

Thanks for looking, and stay crafty, my friends!

Friday, October 22, 2010

Daily (Kinda) Journal Project

....continued


So I started printing out my collection of pictures and narrated them in Office Word, my hand writing is illegible! So I added a few smaller pics & journaled on a separate piece of note paper & embellished once again with sticker remnants.
More to come....

Wednesday, October 20, 2010

Halloween Recipe Swap Cards!!!

I made these for my Splitcoaststampers A-Z Recipe Swap.  I used my Cricut Cartridge, Happy Hauntings, to create the pieces for my cards.  I am unsure where the patterned paper came from...but thought it was really cute and played on the pattern to create my asymmetrical pumpkins.


Here are the cookbooks I made with the cards I received back!  They are SOOOOOO COOOOOOL!!!!!  I can't wait to make a Creepy Feast!

I got some 6x12" page protectors a long time ago, and they were perfect for these cards.  I cut cardstock to make a page base, and put two cards on each one of the pages.

The papers are from DCWV.  I cut the title "Ghoul Gruel" from my Happy Hauntings Cricut Cartridge.  I added purple glitter to the drips.  I also got on my computer and printed out "Good Crypt Keepings Book of" to add to the title.


I made dangles of skulls from beads I got on a Halloween bracelet this year at the Craft Warehouse.


On the back cover, I made a seal that says "These Recipes Have Urned the Good Crypt Keeping Seal of Approval."  I did this with my Print Shop program.

The little label on the bottom says "Recipes from the Allen Family Vault."


Here is a view from the top!

Thanks for looking, and here's wishing you Creepy Eats!!

Monday, October 18, 2010

Daily (Kinda) Journal Project

...Continued from Oct. 12th

I've been working on my page dividers again!  This time I use a piece of ordinary cardboard.  I peeled away a few layers & added a collection of odds & ends that I had stashed away!  All I need to do now is print about a weeks worth of photos!

Friday, October 15, 2010

Halloween Luminary


I made this using my new Happy Hauntings Cricut cartridge!  I know the pictures are not that great, I need a better camera, but I think it shows it pretty good!  Two sides are the haunted house, and the other two are "Fright Night".
Stay Scary!

Wednesday, October 13, 2010

HAPPY BIRTHDAY, COOPER!!!!!!!!!!!!!

This is my Grandson, Cooper!!  He is TWO YEARS OLD TODAY!!!!!  He loves baseball, and his favorite team (and Mom and Dad's too) is the Chicago Cups.  He is going to be a baseball player for Halloween.  Mom dressed him up in part of his outfit (minus the shirt) to show me the socks...I knit them for him because you can't find athletic socks for a toddler!!  I think they match the outfit pretty well!
Isn't he cute!?!  Ready for action.  He knows what "Batter Up" means!  He hits his little T-ball set, and runs around the house like crazy!
I made this banner/birthday card/album for him.  I used my Cricut to make the various shapes.  I ran the large scalloped rectangles through my Cuttlebug to give a little dimension.  I added eyelets, tied with ribbons, and when they are done hanging it up to look at, they can put pictures on the back and fold it up like a mini album. 

Have a wonderful day!!!

Tuesday, October 12, 2010

Daily (Kinda) Journal Project

continued.........
I've been taking my photos & adding them to my book, but this week I thought I would focus on page dividers. 


Here I took a envelope did some distressing, placed a tag inside that has important dates to remember & added a couple of journaling spots. 
Hope you are enjoying this as much as I am!

Thursday, October 7, 2010

Daily (Kinda) Journal Project

Well, I started adding my photos, skipping only a couple of days.  I've decided to fill some pockets with journaling and maybe a 4x6 mini scrapbook page here and there.  


If your new to this project, check out Monday & Tuesday's post :)

Wednesday, October 6, 2010

Box Book for Halloween, with a Mini Tutorial

I was looking in my closet and saw some boxes my husband saved for me, and an idea struck me like a lightening bolt...MAKE A BOOK WITH THEM.  But, how?  Then another thought...do it like a toilet paper book!!
I only had three boxes...
I cut the ends off of one edge...
I trimmed the other to 1/2".
I tucked in the 1/2" flaps and glued with strong glue to create a flat, closed ended pocket.
I covered them with paper, just like you would do with a toilet paper roll.  I bound them by punching strips with my EK Success  border punches, and used them to attach the pages to eachother.
I created tags for the pockets with my Cricut.
The backs of the tags.
I found some wide and wired ribbon that I put on the outside spine of the book.  The flowers added the details for the cover.  What do you think?  I LOVE IT!