Monday, August 9, 2010
A new envelope mini album!
I was messing around, and came up with a new idea to use envelopes for another kind, and size, of mini album. It is bigger than most "mini's" but still is small and adorable. Maybe it could be called a "medium album"?! It is also the perfect size to use those 8x8 paper pads that I have stacked up wondering what I was going to do with them. Oh yeah, I also got to use my new Tim Holtz flower die!!
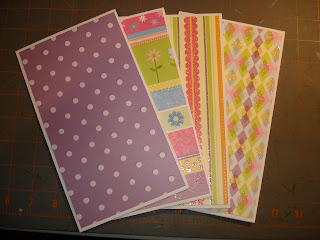
The papers are DCWV's Nana's Kids. I used the die to make the flowers and another Sizzix die to make the leaves with papers from Martha Stewart. I ran the flowers pieces through three different embossing folders, and pinched the petals to give a little more dimension. I bound it with my Bind-It-All, but you could certainly use whatever binding method you like.
There are four pages to this book, each page took 2 envelopes, the standard size business envelopes. I also made one to "practice" using envelopes from my junk mail. This could be a great recycle project! Seal all envelopes. For each "page" of your album take one envelope and cut it in half, so you have two pieces measuring 4 3/4" long by 4 1/8" wide. You are going to lay these on their sides, so that they will be 8 1/4" tall, and that is what you need to cut the next envelope to...trim off 1 1/4" and discard this piece.
This just shows the envelopes adhered...the left side is the open ends of the halved envelopes which creates two side pockets, the right side shows about 1/2" of those cut envelopes...this will be the binding side. The "long" envelope will be adhered to the two halves with the open part up. This creates one long pocket.
I gathered my papers I wanted and covered the envelopes. The papers covered the binding edge also, so that it gave it a little strength. Each piece of paper measured 4 1/2 x 8". I covered front and back.
I bound the pages. Now, very important...be sure when binding that you bind the "binding edge and not the open end where you want to put your tags...Please don't ask how I know!!! The tags measured 4 3/8 x 3 3/4" for the side tags, and 3 3/4 x 8 1/4" for the long tags. You will end up with three tags per page, and lots of space in between!
I raided my ribbon scrap jar and found ribbons for the tags. You could also punch "finger pull" spots, but for this one, I didn't want to take up space on the pages themselves. The project I made with the junk mail envelopes turned out cute too, just make sure that you have the same size envelopes for your pages!
Thanks for looking! Your comments and thoughts are most welcome and appreciated! Have a crafty day!
Subscribe to:
Post Comments (Atom)


Love this idea! Been lurking on your blog for a while now and loads of great ideas. Keep up the good work! x
ReplyDeleteWow, this is truly wonderful! LOVE your idea!
ReplyDeleteSuper ideas , loved the pockets .Will start on this mini book soon. Thanks for sharing.
ReplyDelete