WELCOME!!

We are so glad you are here! We love making and sharing our projects, and we are excited to have you visiting our site. Please leave us a comment and let us know what you think!

Jackie and Michelle

Followers

Saturday, June 27, 2015

"15 Things" Album

 Several years ago, Jackie and I took this class at the CK convention.  We created this album that is to be all about ourselves.  During the class we made several layouts, but I didn't think there was enough for a full album.  So I decided to make more pages using the leftovers from the kit.  
 15 Family Tradidtions.
 15 Things I do Every Day.
 15 Things I would like to do.
 15 Random things.  This is the last page from the kit.  Below are the pages I created to finish the album.
 15 Things I Like to Eat.
 15 Favorite Movies.
 Top 15 Songs I Love.
 Fifteen Things About My Favorite Holiday.
 15 Obsessions.
This is the insert for the cover of the album.  Now I just have to find the right pictures and fill this album out.  I love how it turned out, and Cosmo Cricket's Circa 1934 Line is perfect for this album.

Thanks for looking and remember to stay crafty my friends!!

Saturday, June 20, 2015

Pocket Letters

My craft group, "The Sassy 6", has done our own Pocket letter swap, and here are the pocket letters I made for my friends.   I just discovered this craze, and had seen it all over, but didn't really understand what it was.

Janette Lane is the one who started this, and here is a link to find out what it is all about.

Here are my versions and what I sent to my friends.  Please enjoy!

 They are all the same in that the goodies are the same, but I tried to mix up the papers and colors to fit each individual lady.
 I used the label maker to label the pockets and put it on the outside of the pockets.  The inside is lined with pretty papers and filled with goodies they can use in projects, or just keep in a binder.
 For the back of the pages, I printed out these awesome pages from Silhouette.  I wanted the backs to be pretty too!
I filled the pockets with fun stuff I love from my stash.  It was fun to go through my stash and find things to share with my friends.
I love how these turned out!  You can do anything with these pockets to suit the "pocket letter pen pal" you send to.  They have themed swaps, and there are Facebook communities dedicated to this.  What a fun and creative way to meet people.
 The backs of the above pages.
  This one was the first one I made, my page for myself.  I wanted to practice before I made one for others.  I am going to get a binder and decorate it, and put my pages received in them.  I can't wait to see what they make…I hope they like mine!
Stay crafty and connected, my friends!

Saturday, June 13, 2015

To Do Today (Mini?) Album, Part Two

Today I am going to share a couple of pictures of how I made this album.  I failed to take pictures as I was making it.  After I did it, the neighbors heard a loud "DUH!!!!!"  Hopefully this will make sense on how I made it.
 I found these gigantic envelopes at Craft Warehouse.  They have since discontinued carrying them…I bought every one they had since I found this out.  They measure 12 1/4" square…big enough to send layouts in.  But I didn't want to do that…I wanted to make an envelope album with them.  But, 12x12 albums are too big…I pared it down to about 8 x 12"(for the pages).  Of course the cover is a little bigger.
 The covers are made from the envelopes.  I cut them to the size I wanted and placed chipboard in them to give them more stability.  It worked like a charm.  Then I just used pieces of the envelopes I cut from the covers to create the spine, again adding chipboard to it for stability.
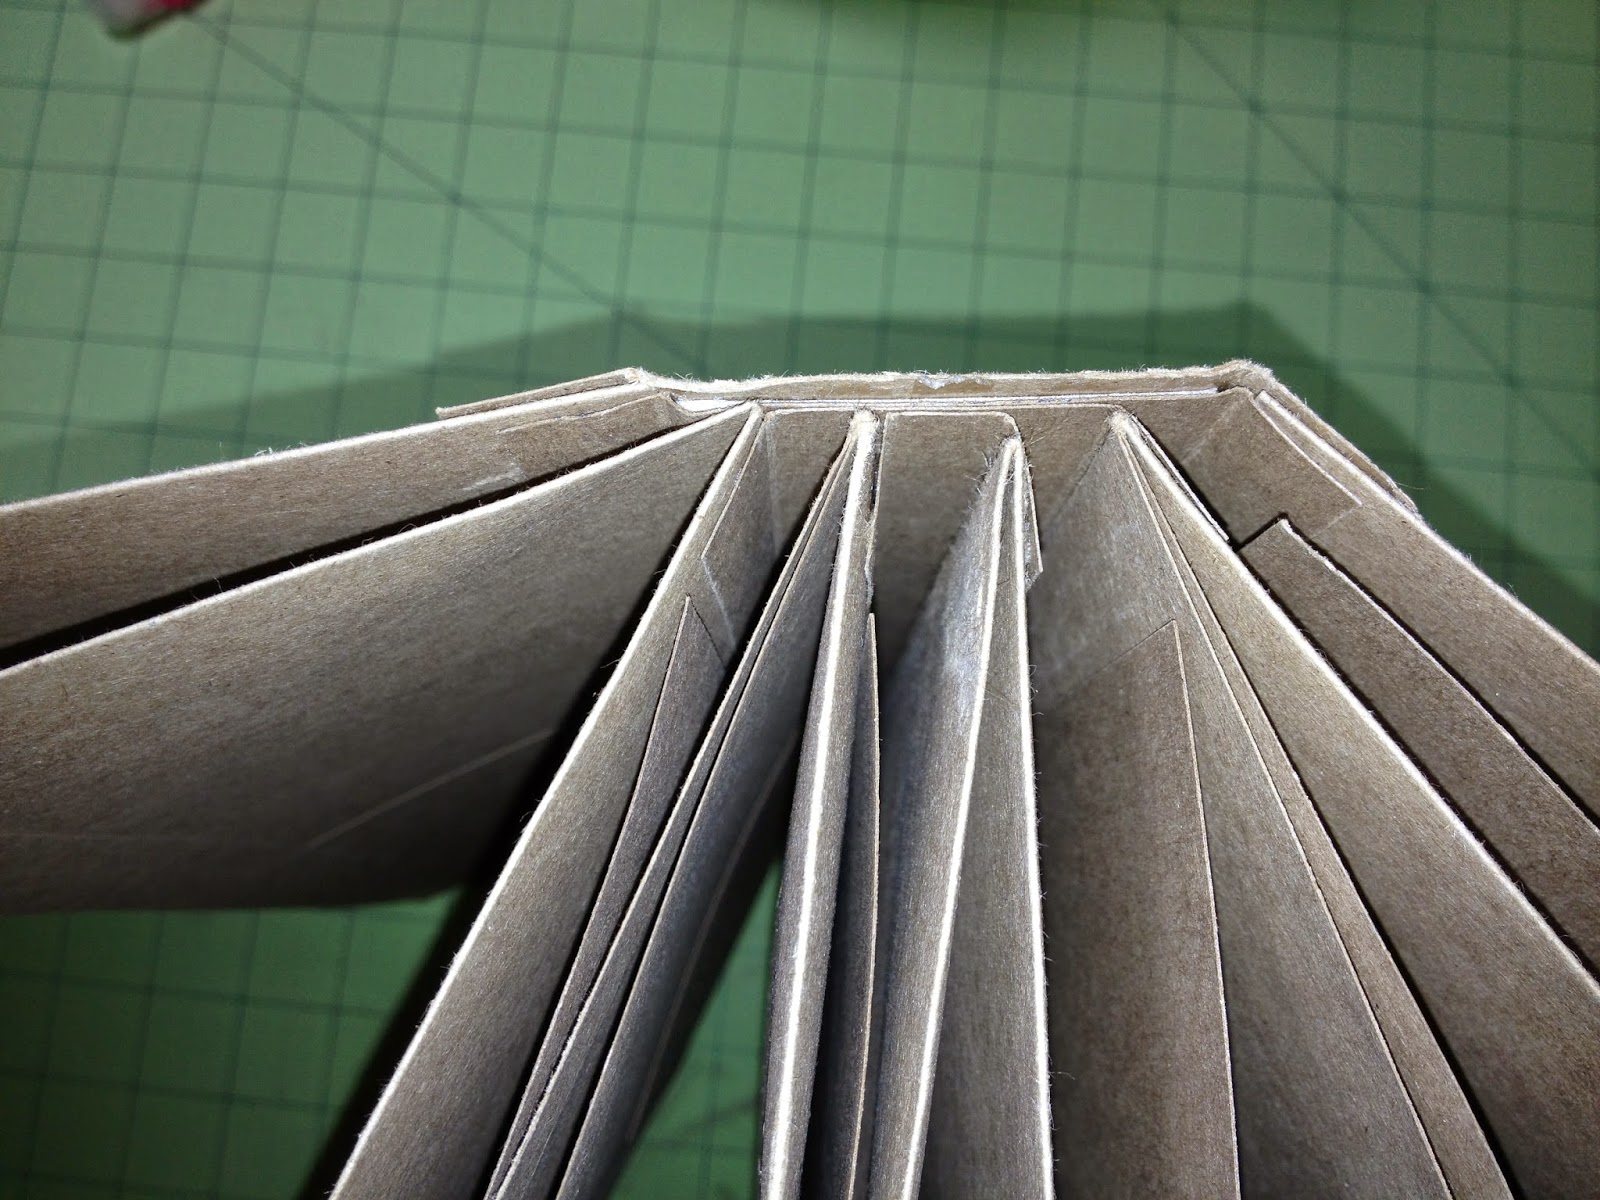
 I used a simple "Stack the Deck" binding by Laura Denison for attaching the pages.
Here's kind of a closeup of that.  The base pages are a full envelope that I scored 4" from the bottom edge.  The binding strip is attached to the back of the 8" side of the envelope.
 The above picture shows the front of the page.  I folded the envelope at 4" from the bottom, and cut off a sliver of the bottom to open it up.
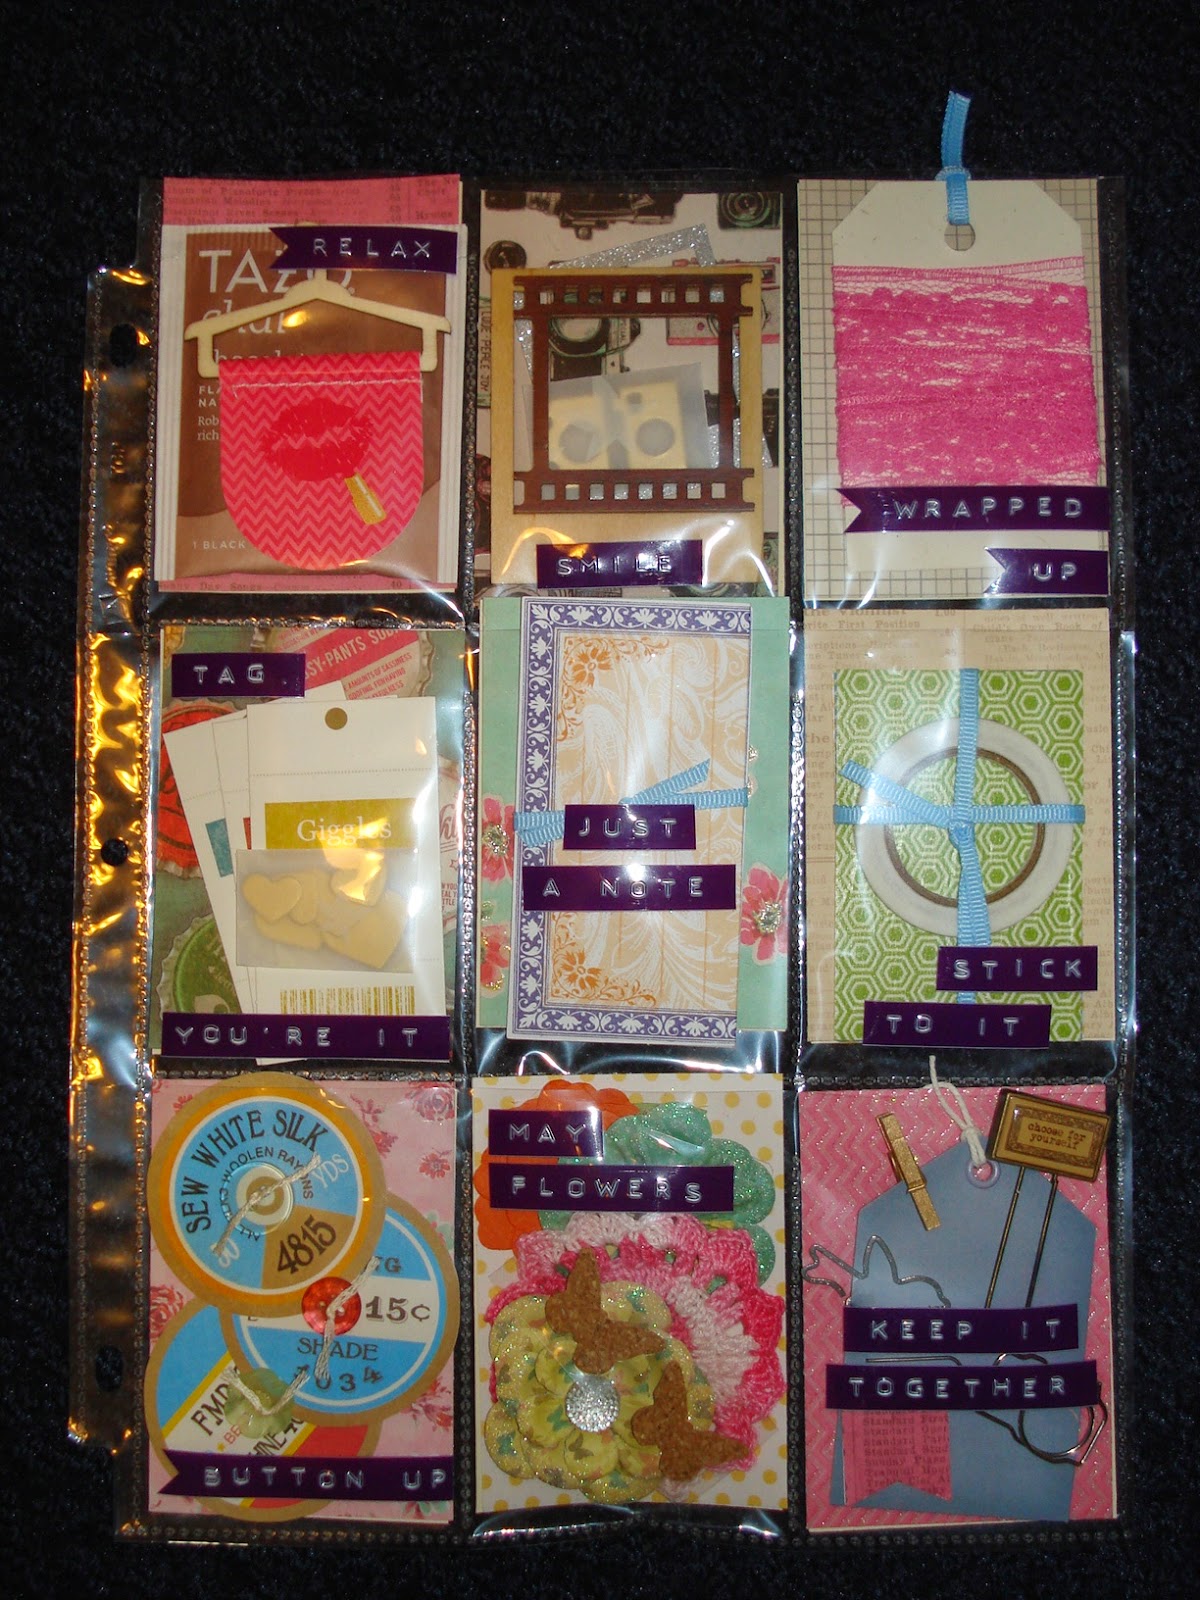
This created a 4" front and back "first page" with a pocket to put things.
 The 8" side of the envelope (which is the "top" of the envelope) is already open.  I folded the envelope flap to the back of this page.  So what you have after you see the 4" page is an 8" page, again with a large pocket.  It is hard to see, but I created a file folder with kraft paper to put in each of these pockets created.  I think it goes along with the office theme, don't you?
Now we have turned the 8" page.   It is hard to see, but the flap of the envelope has been flipped to this side, the back side of the 8" side of the envelope. I took another piece of kraft card stock and attached it to the flap, thus making another page for this envelope assembly.
This shows the kraft card stock page opened, and attached to the flap of the envelope.  You can see the page, the flap it attaches to, and the back of the envelope (the 8" piece).  You can see the binding attaching the entire thing on the right.

That is the entire page assembly.  For each of the 4 page assemblies I made you will get:

A 4" page, front and back, with a pocket
An 8" page, front and back, with a pocket, filled with a file folder
A 7" cardstock page, front and back, attached to the flap of the envelope

LOTS OF SPACE FOR STUFF!!!

I hope this made sense.  I will get the video done soon, so you can see all of the decorations and the fun stuff I added to what's already here!

Stay crafty, my friends!

Saturday, June 6, 2015

To Do Today (Mini?) Album, Part One

Here is my latest project.  I made the "bones" of this album ages ago.  Do you ever do that?  Come up with an idea, then between work and home and not knowing which papers to use you don't finish it?  I did.  At the last Creating Keepsakes convention I bought a kit with the October Afternoon paper line "9 to 5" in it, and knew this was the paper line I needed to use.  I had a few pieces of this collection from a past project I did, so I combined the two and came up with this.
It is not a mini album…it is a huge album.  By the time I got done adding all of the decorations and such, I could hardly keep it closed.  I made the closure with two bulldog clamps and tied ribbon to them.  This way the closure is easy to remove, but pretty too.
 The album has 4 base pages, but is FULL of places to put things.  And, believe it or not, it is made out of envelopes!
The next post will be about the base pages and how I put them together.  I sure hope you like it!  I am working on a video about the book as well.  As soon as I get it done I will let you know.

I'm not really sure what "subject" is going in this book, but it's ready when I do decide.  I am so happy with how it came out…I just love it!

Stay crafty, my friends!!