WELCOME!!

We are so glad you are here! We love making and sharing our projects, and we are excited to have you visiting our site. Please leave us a comment and let us know what you think!

Jackie and Michelle

Followers

Saturday, February 25, 2017

Zipper Pocket for your Happy Planner

 I love my Happy Planner.  You may recall a previous post I did on my set up for 2017 with the pocket pages being used as the tabbed dividers?  Well, I have a mini Happy Planner that I keep in my purse for quick on the go stuff.  I put events in the calendar, and I have note pages for lists, etc.  I can't always carry the big planner, so having the "satellite" planner works well.

Anyway...I was at Michael's and they have a huge selection these days of new planner things for their line of planners.  I say these and had to have them as I knew they would work in my Happy Planners.

The small pockets are very cool!  They also have Accessory Packs that contain stickers, a ruler, washi tape, some clips and a cool zipper bag.
 Isn't the tape pretty!?!?  They have four different packs that I saw.  I bought 2 of them.  (But, I'm only showing one).  I have wanted a ruler for my planner, and it fits into the pocket of my planner cover perfectly.
 So, here is what is SO STINKING COOL ABOUT THESE...They are NOT PUNCHED!!!  I guess they figured that you would want to punch the pockets however you wanted to punch them!!! (Or even not punch them at all!)

I was just so happy when I saw this!!!  I raced home and tried it, and it WORKED!
 The zipper pocket fits PERFECTLY into my mini Happy Planner!!!  Can you believe it???

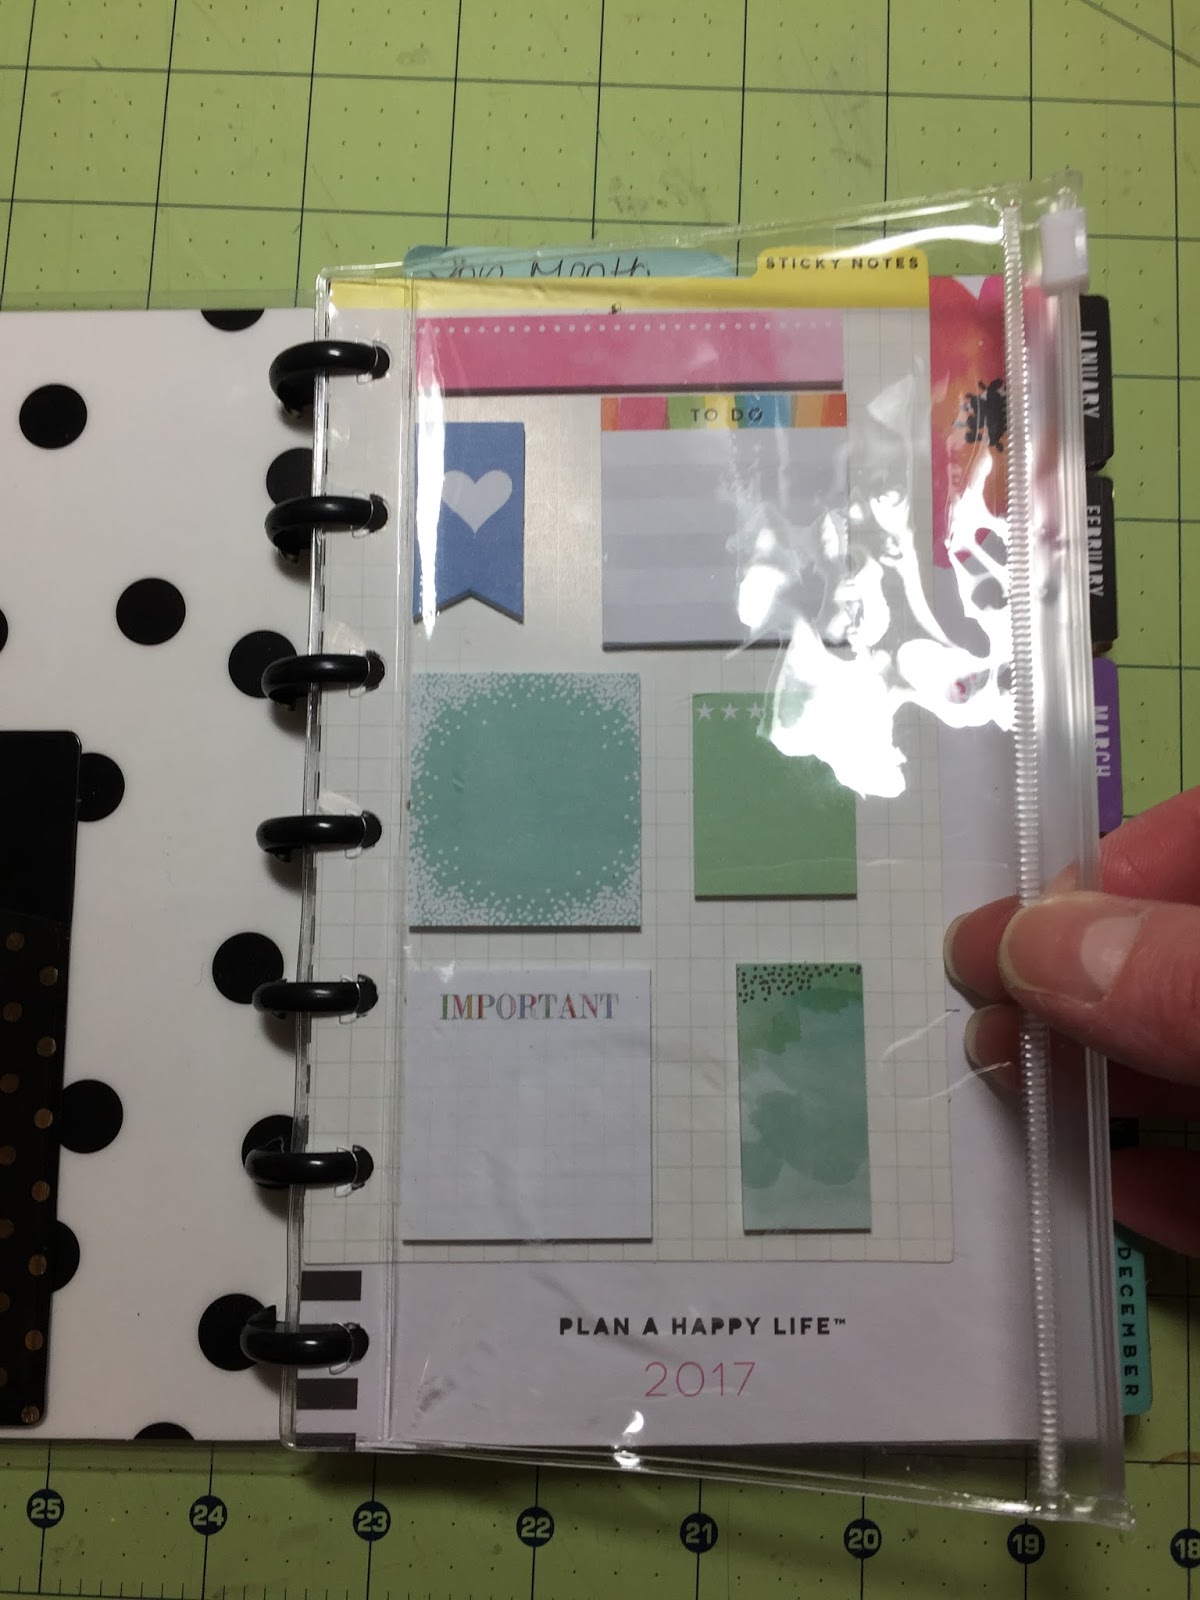
I bought two of the accessory packs, so I made one for my big planner as well.  This is a discovery that is just too cool to keep to myself!!!  I put stamps and address labels and paper clips in this.  Ohhhh the giddy giddy giddiness!!!

Happy Planning!!

Michelleđź’–

Saturday, February 18, 2017

A Mini Album Challenge for Myself

 I was kinda bored the other day and was trying to do something creative to maybe get my mojo working.  I had made this album a while ago, at the last CK Convention.  It was a kit that I bought, and it turned out super cute, but I had a TON of leftovers.  What to do?
 I dug into my stash and found this mini album with pocket pages by SEI.  I decided to make a mini album, no real theme, but something simple that could be used for any occasion.  I used one of the journaling cards for the title of the album.  I added the teal/glittered paper from my stash to set off the title page, and I added brads from my stash.
 I took one of the pocket pages and my Fuse tool and created a quad-sequin page.  Inside, I took some of the leftover stickers, put them back to back and added them to the sequins.  It turned out really neat.
 I decorated the inside front cover as well, so another picture could be placed.
 I made several pages, but I'm just showing you a few.
 I had a bunch of stuff leftover, including stickers and washi tape!
 This album will be great for a day event, maybe a birthday party.
 I love the colors, and I love that I used up the leftovers and they didn't go to waste.
 I also decorated the back page of the album as well.

Leftovers can make a great second project!

Happy stash busting!

Michelleđź’–

Saturday, February 11, 2017

Graphic 45 Valentine Challenge

 I decided to join the Valentine's themed challenge on Graphic 45 and see if my submission might be chosen to win a wonderful prize package of their luscious products.  The project is supposed to be Valentine/Love themed and, of course use their paper and products.  This is what I came up with. 
  I found the heart at my local Craft Warehouse, and the tag album, then I got the idea.  I found hooks and went to town using they paper line "Mon Amour".  The above picture is my layout idea that I was playing with.  I usually take a picture of things after I am happy with their placement and  before I adhere them so that I can reference the picture as I build my project.
 I created a wall hanging that can be changed.  Each hook has four of the Graphic album tags.  I covered them with papers front and back so that multiple pictures can be placed and changed at will.
 I added some of the butterflies by Graphic 45, along with their brads for the centers.  I added bling by Eyelet Outlet.
 I fussy cut some of the roses and leaves, and layered them with the pictures.  I added a key by Graphic 45 as well, the "key to my heart" you know!
 Another butterfly, more bling and some more fussy cut flowers.  I also used Graphic 45's brads in the hooks that I bought.  I think they fit perfectly with the style of this project.
 My intent with this project is to add my favorite photos of me and my awesome hubby, DJ, and have room to add more through the years.
So, what do you think?  Is this a project idea that you could do in your home?

Have a wonderful Valentine's day!

Michelleđź’–

Saturday, February 4, 2017

Happy Planner Set Up

 I just love working with my Happy Planner.  I thought I would share some of the things I have done to customize it for my needs.  I definitely do not have a very busy calendar, but it is nice to have all of my "brains" in one spot!  Above is a view of my planner.  I got the cute polar bear and penguin printables from Lovely Planner.  I just discovered her site and I love it!  Maddie has a bunch of free planner goodie...so go check it out!
 I really like the planner covers that they came out with!  It really helps to keep things organized and your planner contained.
 I keep a collection of sticky notes and the washi stickers in the front so I can use them in a pinch when I don't have my big tote full of stuff handy.
 Inside the front cover I put this little reminder...
 With my planner this year I am trying something new.  I removed my old tabbed dividers and replaced them with the Happy Planner Pocket Pages.  Then I used my tab punch and created tabs for the pockets.  This is a side view to show how they look, my categories, and that they are a bit bigger than the tabs for the calendar, so it works perfectly.  
 This is just a view of how I decorated a page.  I like that my dividers have pockets!  I can add a lot of things now...which may be a good or a bad thing...HAHA!
 A closeup of my Mailing Supplies divider.  I have labels, stamps, etc. for mailing something in a pinch.

 This is my "Calendar section".  I am trying to add a page for each month.  On one side is a master to do list for the month.  On the other, a tally of "important" things that happened on that date.  I'm trialing this, I don't know if it will be useful to me or not, but it may be a good idea to share that others may like!
 My "To Do Lists/Notes" section.  I keep a variety of papers to add to the weekly pages if I need it.
 I have a "Contacts" section, and I think the pocket dividers will come in handy when I get something I need to add to my section but don't have time yet to do so.  I also added some stickers into my planner for miscellaneous sticker needs.  These are in my "Misc" tab section...
 ...along with more sticky notes, because you can never have too many sticky notes.  
In the back I have some Post-It tabs that I punched.  This way I can quickly add a paper or card to my planner when I don't have a punch handy.  It works very well!  I also found this stencil by Recollections that I am keeping in my planner.  I also added a pen loop so that I can have my basic pens with me...one black, one red and one pencil.  

That's my planner set up.  I will let you know how it works for me.  Go visit Lovely Planner and get signed up to get some awesome freebies.  I love them!

Have an organized day!!!

Michelleđź’–