
I had an idea the other day...so I used my March Counterfeit Kit and some grocery bags and created another mini album. It is a combination of an accordion album with pockets built in and added on. I will do a tutorial if you are interested, so please leave a comment and I will show you how I did it!
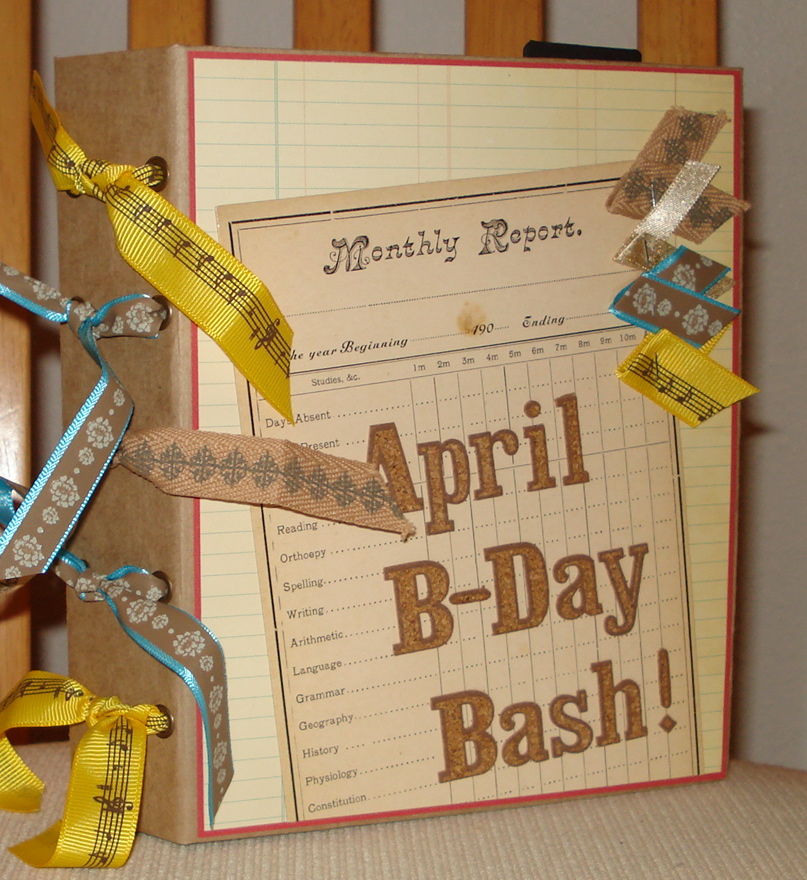
This album will be housing some pictures from the annual April Birthday get-together we have with my husband and one of our friends who also has an April birthday. It started several years ago, and has become quite a tradition! I thought I would round up pictures of past get-togethers, and add this years pictures as well.
This album is one of my recycled projects. I used grocery bags. Yes, grocery bags! I cut them up and used three of them in all. Everyone has been using those cute lunch paper bags, why not a grocery sack!

The overall size is 7 1/4" tall by 5 3/4" wide. It has six built in pockets, and I added 9 more. The binding is a simple ribbon binding.
The only things I added to it that weren't in my kit are one ribbon on the cover, the black file tabs and mini file stickers (7 Gypsies), and the paper hole reinforcements.

I cut the shaped paper to make a pocket. All of my pockets were adhered on two sides only. The die cut shapes are what I used to make the pockets. Some weren't big enough, so I layered them. The album has a total of 15 pockets for 15 large tags, and 5 "blank" pages for large photos. I love the papers and die cuts I chose for this kit because it gives me a lot of journaling area as well!

The hole reinforcements were white, I inked them to make them match the project.


The little die cut shapes on this are actually cut from the packaging and layered onto the packaging paper itself in the photo above to create the pocket! Reuse and recycle...waste not, want not!!!


Another collage of smaller tags and pieces from the packaging to create a pocket. I layered them on cardstock and cut the whole thing out.
Like I said, if you want me to show you how I made the pages I will create a tutorial. It was really a cute way to make a mini, simple, and uses stuff we all have handy!
Stay crafty, my friends!
what a great project - i love it. so creative and what a lot of gorgeous pockets to fill with memories. fabulous
ReplyDeletewhat a fun project. I just love making mini books.
ReplyDeleteTFS
Ang
ok - WOW! All that goodness from a grocery bag? Call me impressed! Great job! My grocery bags are jealous!
ReplyDeleteyes, yes, yes, I want a tutorial! I love this! Is the cover out of grocery bags too, or just covered with the bag?
ReplyDeleteWow, this is fantastic!!I love all of the detail!!
ReplyDeleteGreat project.... I used to teach a little class using the brown lunch bags and we made a little 5 bag scrapbook that tied at the ends for mementoes. Each bag was painted and decorated... Your Grocery Bag project is wonderful. Just took a little tour of your creations, they are wonderful. Thanks for stopping by my blog to say hello.
ReplyDeleteCarole
Love your mini!
ReplyDeleteI love this and would definately like to see you do a tutorial on how to put it together. Thanks for sharing. Marie
ReplyDeleteI think a tutorial would be great thanks...
ReplyDeleteReally nice mini!
ReplyDelete