I recently finished a card swap on SplitCoastStampers where we were making fancy fold cards. I was playing with a piece of paper, and came up with a cool fold for a gatefold card that created a diagonal shaped pocket on the inside. I wanted to share it with you all.
Here is the front of the card. It looks like a regular gatefold card.
Open, here is the diagonal pocket created with the folding.
The tag out of the pocket
And this is Ace, my almost 7 year old Dachshund. He is the reason the pictures are a little blurry. He was helping his Mommy.
Take your solid cardstock, score on 3", 6" and 9" lines.
Rotate and score at 6".
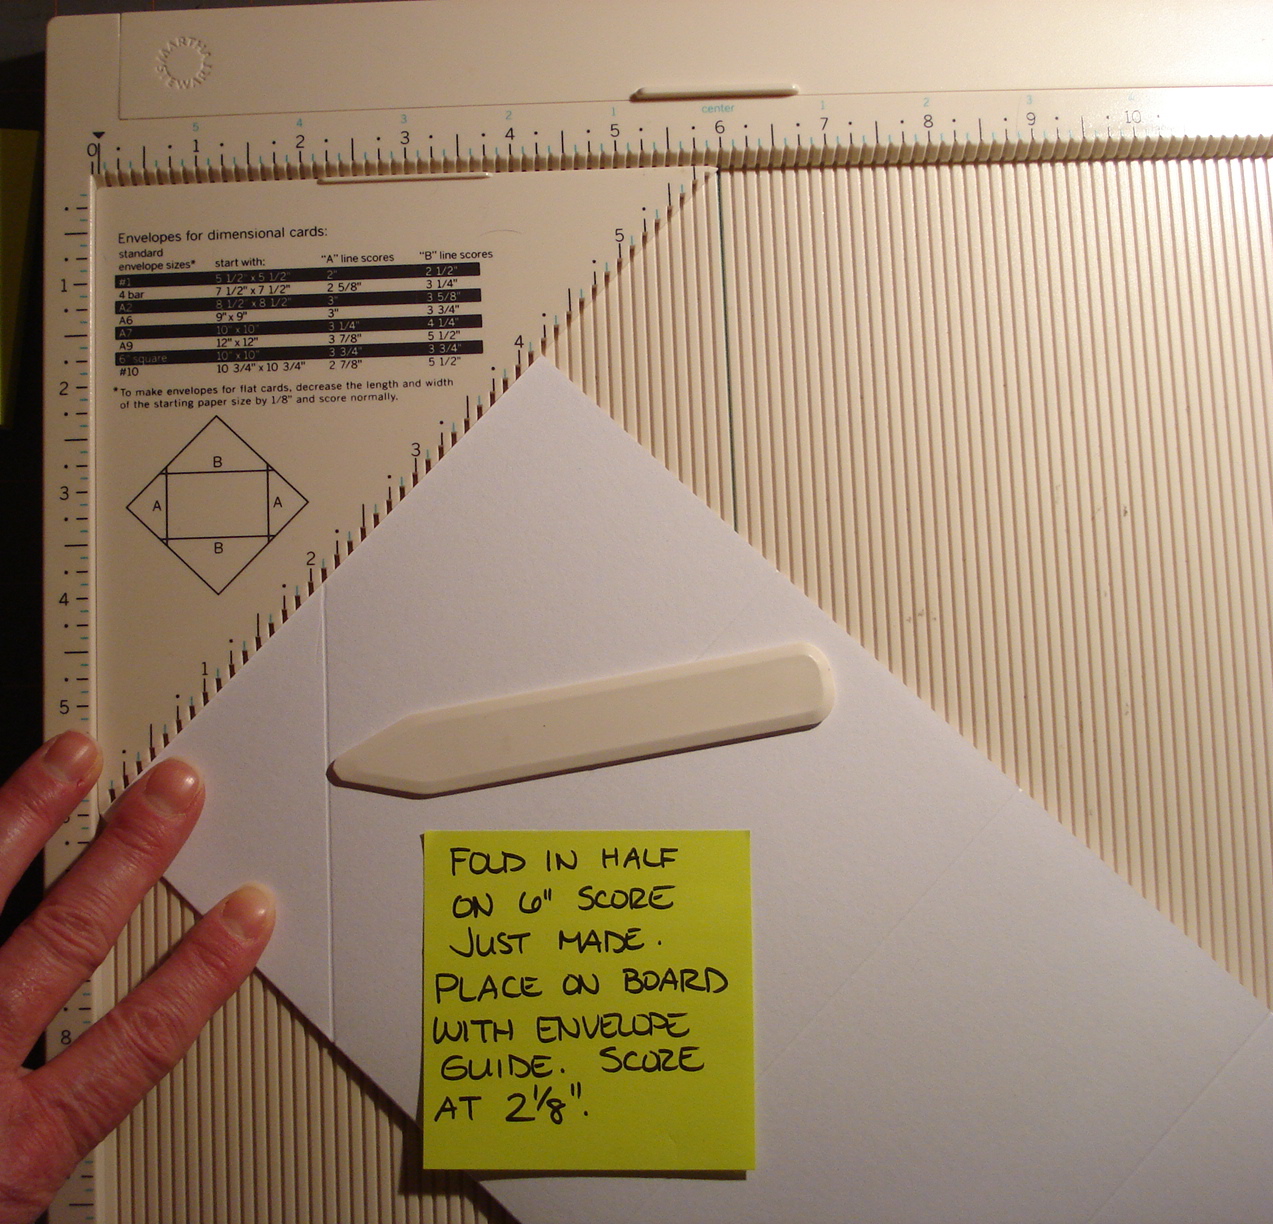
Fold in half, and ON ONE END ONLY, use your envelope guide and score at 2 1/8". You should be smack dab in the middle of the end of the paper and it will line up with the first score line.
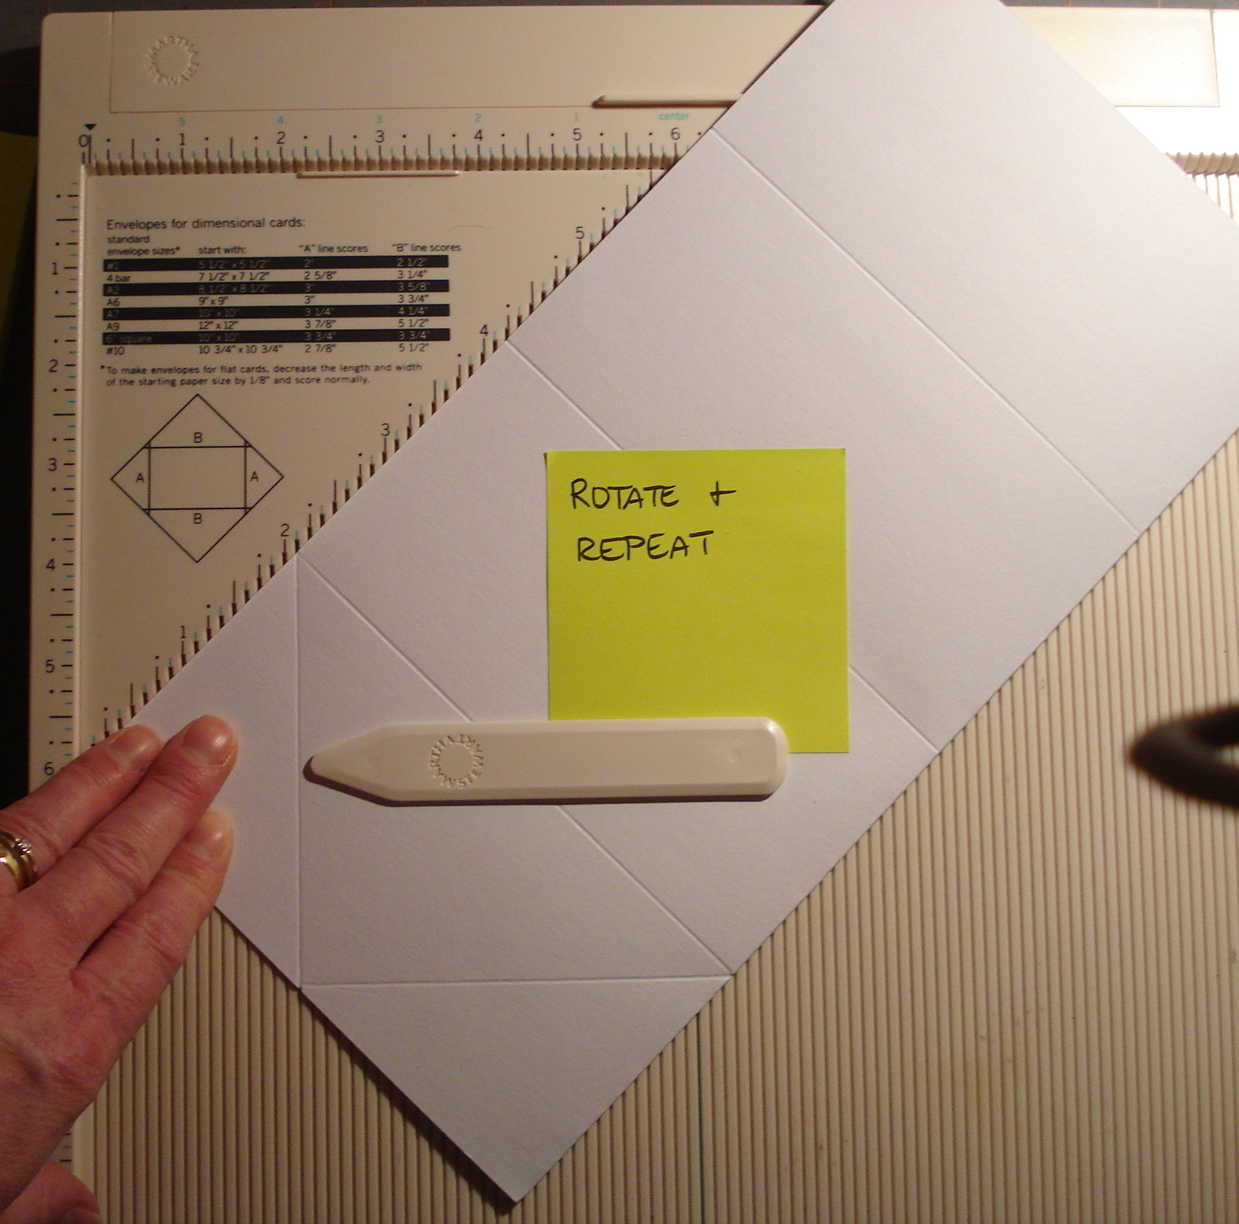
Rotate and do it again. This will give you a triangle on one end.
Turn the piece over, and on the same end, rescore the lines to reinforce since it is a double thickness.
Open the piece of paper, you should have two triangles in the top. Cut the 6" score line to this set of scores only. You want the 3" piece attached above the arrow on the post it note.
Fold your paper in half again, then fold the cut ends out. This will give you a "pocket" piece.
Carefully ease the bottom angled scores to create the upside down triangle shaped pocket.
Fold the top scores under, creating the sort-of 3D diamond shape.
This is the back side the diamond shape you just made. I adhered this "tab" down. You could cut it off if you chose, but I liked the sturdiness it gave.
To fix the back so that it is not split, cut a 6x6" square of cardstock of the same color, and adhere the middle section of the card to it. That will create a sturdy "back" for the card.
TO DECORATE:
You will need a total of 6 panels of 2 7/8" by 5 7/8" patterned paper to cover the panels. COVER THE INNER PANELS (the red and white dotted paper) FIRST!!! Then adhere the diamond down ontop of that panel to secure the pocket. Cut a square of patterned paper to fit the diamond shape and to fit into the pocket (this also gives sturdiness to the card since the back of the pocket is "split") and a patterned paper triangle to cover the outer pocket. Create a tag to fit into the pocket. I used a matted white cardstock so I could write on it. Create the card front. Decorate and you are done!
I hope you liked this tutorial! Stay Crafty!


Wow! So complicated. Looks awesome. I don't have that scoring thingie. Do you use it alot? xoxo
ReplyDeleteHi Michelle, Thank you for doing this. It looks a little complicated...I'm going to play with paper and see if I can do it. I love the card you made and I'm sure whoever gets your cards are going to be thrilled too. Thanks for joining the swap!
ReplyDeleteHugs,
Betty
This is incredible, thanks for sharing!
ReplyDeleteThis is fantastic, thanks for sharing!!. A really simple idea, and very easy to follow instructions!! I will be back again, thanks!!
ReplyDelete