I had a question about the assembly of this book. I made the base pages (that we are doing here) first. Then I will show you how to bind them. Then we will decorate. I find it easier whenever I construct my pages to do it in this way. When I decorate, having them bound in the book first helps me to see the colors and plan my use of embellishments, etc. I hope that you like this way too. So, make the pages, but don't bind them yet. You don't have to place them in the order that we are making them. Do what is visually pleasing to you. After all the pages are bound, then we'll decorate! :)
This is going to be very picture heavy. Sorry.
First, score your 12x12" card stock at 2", 6" and 10"
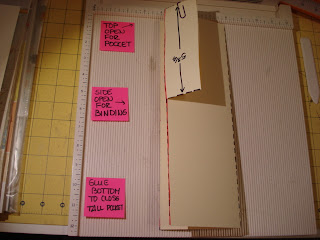
Cut 6 1/4" up on the left side, and down on the right side, as shown on the red lines.Score the 2" sides as shown. They are reverse of each other, so that one mini pocket is on the top, and one is on the bottom. You could, however, reverse them, or make them both top or bottom pockets. The choice is yours.
For each side, fold the 2" side in...
Fold the flap down, and the 1/2" tab under, this creates your pocket. You just have to glue the outer edge and the tab.
This shows the page folded and glued.
First side of the page...the mini pocket and the first 4" page...
..turned over here is the second 4" page and the other mini pocket.
Another view.
Using card stock here...cover the card stock with papers to make it pretty. This shows the left mini pocket not glued down, and the right pocket glued together.
It is important to remember to fold the pocket piece flap to the back of the project when using card stock, so that your pocket doesn't compete with the score lines on the page it attaches to.
If you are using straight patterned paper without card stock, you have to fold the pocket flaps OPPOSITE so that you can utilize the reverse pattern on the paper. To make it fit nicely, and not compete with the score, cut out a SLIVER of paper on the side of the pocket. Then the pocket will fold nicely into the score line.
There it is...page 3 done. Now lets look at page 4.
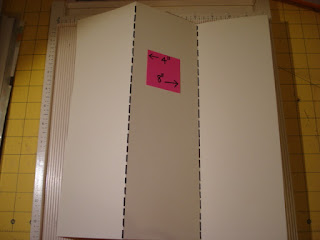
This is a simple trifold. Score at 4" and 8". Fold as shown.
The space between the first 4" section and the second section will create the binding edge and the tall skinny pocket. The third section is a separate page in this assembly.
Here it is using card stock covered with patterned paper.
Top view...
What it will look like inside the book, this with be the 2nd and 3rd sections of this page assembly.
And the 4th section.
Just using patterned paper. The first three sections will be the same paper, but the 4th will be the contrasting side.
Now page 5.
Score as shown. Can you see where this one is going? This is going to create a pocket page, but one bigger pocket on one side.
Cut on the red line as shown.
Fold and glue, and there it is. Simple.
My hand is in the binding side.
If you are using patterned paper only, remember to cut a sliver off of the paper on the pocket flap side so that when you fold it in it fits nicely into the score.
Here it is, finished.
I am loving how this is turning out.
That's that for now. Stay tuned. More pages to come.
Stay crafty, my friends!!!


What a GREAT tutorial!!! I'll have to go and find the first pages, and will look further to the next ones!
ReplyDeleteHugs!
Michelle ...what brand is the double sided paper that you are using in this tutorial? It's amazing!
ReplyDeleteAudrey, good to see you! Thanks for checking this out!
ReplyDeleteI am glad to see you back!
Kathie, I am using Basic Grey, the Clippings and Fact or Fiction collections. They are all fantastic and seem to go together quite easily. Thanks so much for looking!!