Wednesday, May 12, 2010
Recycled Envelope Mini Book, Part Deux
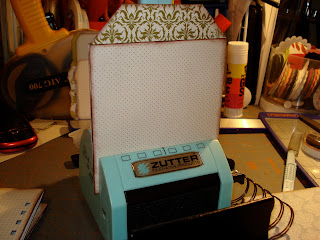
So now, you should have all of your pages made. The picture just gives another shot of the orientation of your book.
Ink the edges of your envelope. The papers will cover the entire envelope, but it helps to "hide" the edges of envelope.
Ok, now choose your papers and cover. I used a glue stick, use whatever adhesive works for you. Go to just the edge of the pocket on the top, and on the right side...
Turn it over, and cut off the remaining paper.
Cut a strip of paper for the "tag" part of your project. I cut it a little wider than required, and slipped it inside of the pocket a bit.
Once the other side is also covered in the same manner, ink all of the edges again.
Do this for all of your envelopes. Oh, by the way, the papers were from Making Memories.
The next step is to bind your project. Do it however you want. I used my bind it all because it is one of the coolest toys in my craft room and I LOVE IT! You can tie all kinds of pretty things the spine of your book when you are done. It is a lovely thing!
I then measured the pockets and cut tags accordingly. You need one of these for every page you made. These tags went into the middle pocket...
These tags, cut from my Cricut (I love this toy also!!), are for the pockets on the front and back of the envelope pages, so you need two for every page you made. I love these papers, blue and green are my favorite colors.
Ink the edges of your tags.
Tomorrow...Part three...embellishing!
Subscribe to:
Post Comments (Atom)


love it.
ReplyDelete