Today I am going to show you the final piece of the folio puzzle, the finished piece. I am so very happy how it turned out…I just love it. I hope you do too. I'm sorry it is so picture heavy, but I wanted to show you all just how much I was able to put into this album.
I decorated it and added some fun elements from the paper collection. I have enough paper left to decorate after I put pictures in it.
I used stickers throughout the album with fun words and phrases on them. It is a simple album, but I wanted it to be that way, I want the focus to be on the pictures.
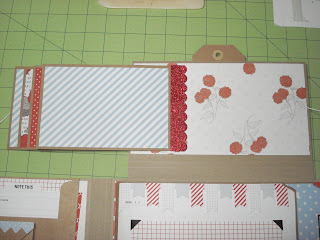
The envelope flaps all have stuff in them. I put pieces of the collection in them, there's plenty of room for pictures and journaling.
The middle part, all closed up. The mini tags came with the mini album, so I added them to the bigger tags. I think it came out cute.
The waterfall piece was re-configured…but I like it and it turned out great. I have an idea about a different way to do it…I will work on it and get back to you all.
I had black photo corners that I used to add a bit of contrast to the photo mats. A variety of stickers and such also made the file folder pages pop.
The page with the pocket pages…this turned out cute. I used the polaroid type cutouts on the other side.
This bottom blue photo mat is shiny…that's because I used packaging from the stuff that I used for this album. I love that I can repurpose packaging!
The back page of the folio…I put a notebook into the pocket. It has several pages in it for pictures and journaling.
The back of the folio...
…the back of the folio opened. I put file folders in the pocket and there's room for more pictures. I really love how this album turned out.
Here is a pile of the products I used for the album. On the left, all of the leftovers from the binding mechanisms, folders, cards and envelopes. I did pretty good using all of the things I pulled for this project. Now I have to get the perfect pictures to put into this album. It turned out amazing. I hope that I have inspired you to create your version of this album. Have FUN!
Stay crafty, my friends!
Subscribe to:
Post Comments (Atom)


Amei! I love it!
ReplyDeleteA forma como as abas vão se abrindo e aparecendo mais e mais espaços/bolsos ficou muito legal!
Parabéns!
Congratulations!
Edelise
Hi there! I know I livd on the other side of the world but your post has taken 5 yrs to show up on my screen! I love this folder you made back in 2015, just have question, is it brown Manila folders that you have used as your base? They're not shown at the beginning g and as we gave different names for things, I'd like to try and name this album. Thanks for all the great descriptive photos! Kris
ReplyDeleteI am so sorry it took so long to get back to you. There was an update and it messed up my settings, I finally figured it out. So, I did a tutorial on the base, which is made of chipboard and cardstock...you can find it here. https://www.youtube.com/watch?v=RMQcfopcoXs I hope this helps. Take care!
Delete