I was planning on doing this, but also had requests...so THANK YOU!!!!! It makes Jackie and I happy when you like our work!!!
I made this book for my Counterfeit Kit Challenge...
It is just a meander style book, and I was planning on making it actually smaller, but I didn't follow the directions, thought I messed up, but then had the "AH HA!!" It is 4x6" and I decided to make it into a tag shape!!! It turned out better than I had anticipated! There are a bazillion types of meander or maze books, this is just my take on it! I did not invent the original idea, I just modified it!
Choose a 12x12 cardstock or a patterned paper that is double sided and doesn't have a directional pattern. Score at 6", turn and score at 4" and 8".
Cut on the two red lines only!!! Just two cuts!!
Fold the bottom right over...then just flip the paper OVER...
...and fold that section up...then just flip the paper OVER...
...and fold the left side over...REPEAT UNTIL IT'S ALL FOLDED.
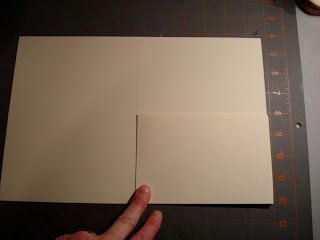
You will end up with this. The front page is a single piece, then you will notice the folds give you two places for pockets...the first one I made into a pocket with a top opening, and the second I made into a side opening...then there is a back page.
I just glued the teal lines to create the pockets.
This is the side opening pocket.
All glued, showing the pages and pockets. The book is now bound. The left edges are glued or folded.
I then measured in 1" on the left corners and cut a triangle off to create the tag shape. I used a craft knife to do this, because of the layers of cardstock. I then used a paper hole drill to make the hole, because you can't have a tag without a hole in it! It doesn't need a binder of any kind, so I looped a piece of ribbon and tied it loose so that the book would open. Taa Daa!!!
I am thinking that if you wanted to make it with more pages, just make two or three of these, then attach the back page of the first, to the front page of the second, making another pocket, and then you would have more pages to your book.
I love the size, 4x6" is a great size for a mini!
Have a crafty day!
Subscribe to:
Post Comments (Atom)


Fun! I can't wait to try it!
ReplyDeleteBethany
Counterfeit Kit Challenge
Thanks so much for sharing this! I have been searching for a couple days for a pattern for a mini scrapbook. This will work perfect!
ReplyDeleteGreat tut! TFS!
ReplyDeleteOMG you made it look so easy... and it looks like the exit card books I made for my students so I should figure this out easily
ReplyDelete