As soon as I saw this tutorial I knew I had to make it. I can not take the credit for this one...That belongs to Kit at Paperkitz. Her video is awesome, and it is
here. I tweaked it a little, adding some more goodies, but the base of the book is hers. Thanks, Kit, for the inspiration. She used one envelope, one 12x12 piece of patterned paper, and 5 tags. I used one envelope, one greeting card, 7 tags, one 12x12 card stock, and then patterned paper to cover it. You can actually build and build to your hearts content!
Above is the front of the book, held together with a belly band closure.
This is the back of the book. I used K and Company's new Halloween line, I love it!
It is made from tags and an envelope. I added two more tags to mine and the greeting card that came with the envelope I used. She did another one, and I incorporated an idea of hers. I also used one 12x12 piece of paper to create another added piece to this book. This is the flap of the envelope, covered with paper.
When you open it, the right side has a pocket created by one of the tags, and the left has a pocket created by the ends of the two sideways tags.
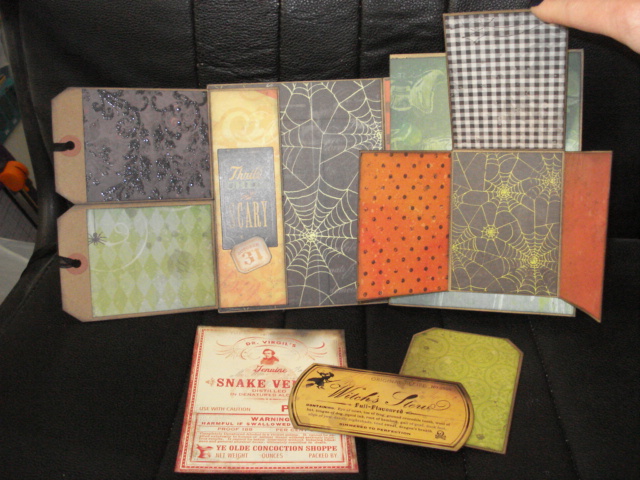
This shows the tags pulled out.
I turned the orange picket page, and took out the other two tags in that pocket. It hold three in my book. Then the left side has the small 2 1/2 x 2 1/2" flip out.
Here it is, unrolled. The tall tag is adhered.
You turn this and the tall tag and the sideways tag created another pocket. On the left, I added a folded page, creating another pocket.
Tags pulled out, fold out opened.
This is the back of the mini, on the right. I added the greeting card, which is on the left First the right...I made a folded 3x4" mini, and created another pocket. On the left, I attached two tags, which do open separately, to the greeting card, and inserted the other end into the envelope.
The tags opened, and the tags pulled out. The two label tags are housed under the flap that says "Thrill, Chill and Be Scary. This pocket is actually the ends of the two tags I added to the card. It is easier to see in the next picture.
This shows the inside of the belly band (on the top) and the greeting card, being pulled out of the envelope. I left the pages of the card that go into the envelope open for large pictures.
The card, turned over.
The inside of the belly band has two pockets, and then...
...a folded page for more pictures.
Here is a top view of all of the parts and pieces. I love how this turned out, and I will be making more of these, as they are super easy and fun to do.
Stay Scary, My Friends!


I just viewed Kit's tutorial and loved it because it is so versatile and you proved it!! what a beautiful Halloween tagalope mini!!
ReplyDeleteLove it, Michelle! You took it to amazing levels and I just want to reach through this screen and touch it!! Thank you for sharing this with us! Happy creating and stay blessed! Hugs, Kit
ReplyDeleteYou did a brilliant job on that album! I admire your creativity!
ReplyDeleteTammy
Your mini looks great, will have to view Kit's tutorial and make one.
ReplyDelete