I have been using the Create 365 Happy Planner. I love it. I have loved disk bound planners for a long time, and have been using the ARC planner, BUT this one is very cool! I am glad that I decided to make the switch. I am still not a huge fan of the vertical day set up, so I am using my own pages, but I love the calendar and the size and the colors, it's fun! I also love that the paper is so thick and wonderful to write on. It is a joy to use this system. I can't wait to see what other things they will add to this line.
I am planning on using the vertical pages for something else…Stay tuned...
I needed a notebook/take with me planner for my purse. But, quite frankly, once I get my whole "brain" and such into my planner, I don't want to lug it with me every day, it is very full. So, I decided to create a "mini" or "skinny" take-with-me notebook that would be easy to stick in my purse. I used some small Levenger disks for this project, since I want it to be skinny. I used covers from the planner collection, the pocket page, and papers.
I had to cut 1/8" off of all of the covers and pages, since the punched "holes" are deep, too deep for the very small disks I wanted to use. However, it works great. I added paper for notes and lists. I wanted a pocket to keep loose bits. My coupons will fit perfectly into the pocket...
The idea is that if I have a particularly busy week, I can put the pages from the main planner into this planner and take it with me. If I am shopping, I can pull the shopping lists from the main planner and put them into this one and take it with me. The length of the main planner pages won't be a huge issue, since they will be temporary. If I make a page that needs to be in my main planner, the page will fit just fine. So far, it is working like a charm!!
Stay organized, my friends.
Saturday, August 29, 2015
Wednesday, August 26, 2015
Planner PDF'S!!!
Hey everybody!! I FINALLY FINALLY FINALLY figured out how to get a PDF on the blog so that I can give you stuff!!! WOOOOOO HOOOOOO!!!!!
I was asked by Pammie Wong (Thank you for stopping by) if I could share my layout for my August pages for my Create 365 Happy Planner. I finally figured it out, how to add pdf files to a post!!! It only took me how many years??? Wait, don't answer that. I'm just thankful I figured it out.
Now this page is made for my schedule, and I created bigger boxes for Sunday, Wednesday and Saturday because those are my days off, and I do more scheduling on those days. The file also has the SMTWTFS on the weekly grid, and the numbers are blank. I also had changed the days of the week to only be abbreviations and removed the boxes. So it isn't exactly as it shows in the picture below because I tweaked it a bit, but it is the same layout.
A few things to note. The file I created is made with the Happy Planner page size in mind. If you print it out for a letter size page, you will have to cut it out on all four sides (because the image will be centered on an 8.5 x 11" page) to make it the size you need for the planner. If you create a custom page size like I did for a Happy Planner (which is 6.88 x 9.25 inches) it will print out so that you only have to cut two sides of the paper to get the proper proportions for your planner. You could also cut paper of size before you print in Happy Planner mode (cut the paper at 6 7/8 x 9 1/4) before you print, then select your custom page size before printing. If you want double sided pages like I use, then
CUT YOUR PAGES FIRST BEFORE PRINTING ON THEM, so that they will all be properly centered.
Please check out the link, and let me know how it works. Remember, this is my first try, and I am so excited I figured it out. I'll be able to do so much more now. YIPEE!!!
Stay crafty, my friends!!
Saturday, August 22, 2015
Everyday Captured, The Folio Album is FINISHED!!!
Today I am going to show you the final piece of the folio puzzle, the finished piece. I am so very happy how it turned out…I just love it. I hope you do too. I'm sorry it is so picture heavy, but I wanted to show you all just how much I was able to put into this album.
I decorated it and added some fun elements from the paper collection. I have enough paper left to decorate after I put pictures in it.
I used stickers throughout the album with fun words and phrases on them. It is a simple album, but I wanted it to be that way, I want the focus to be on the pictures.
The envelope flaps all have stuff in them. I put pieces of the collection in them, there's plenty of room for pictures and journaling.
The middle part, all closed up. The mini tags came with the mini album, so I added them to the bigger tags. I think it came out cute.
The waterfall piece was re-configured…but I like it and it turned out great. I have an idea about a different way to do it…I will work on it and get back to you all.
I had black photo corners that I used to add a bit of contrast to the photo mats. A variety of stickers and such also made the file folder pages pop.
The page with the pocket pages…this turned out cute. I used the polaroid type cutouts on the other side.
This bottom blue photo mat is shiny…that's because I used packaging from the stuff that I used for this album. I love that I can repurpose packaging!
The back page of the folio…I put a notebook into the pocket. It has several pages in it for pictures and journaling.
The back of the folio...
…the back of the folio opened. I put file folders in the pocket and there's room for more pictures. I really love how this album turned out.
Here is a pile of the products I used for the album. On the left, all of the leftovers from the binding mechanisms, folders, cards and envelopes. I did pretty good using all of the things I pulled for this project. Now I have to get the perfect pictures to put into this album. It turned out amazing. I hope that I have inspired you to create your version of this album. Have FUN!
Stay crafty, my friends!
Wednesday, August 19, 2015
Everyday Captured, Another Piece of the Puzzle
Today I am working on a piece that I am adding to the inside left flap of the album. I revised one of the binding pieces that I had…then I used pieces of the mini album you see in the next picture.
I had this mini album in my stash, and I decided to repurpose it for this album. It is also by Teresa Collins, and the colors will work very well for this project. It also comes with cut outs and stickers that I can use, so BONUS! I took off the binding and had the pages.
I attached the pages to the binding that I altered then covered the binding holes with pieces of papers and pieces of the border strips I had.
Once the whole piece was done, I put twine behind the piece, and adhered it to the inside left flap of the album, and used the twine to provide a closure.
These are more pictures of the pages.
I created a pocket when I attached it to the album, because you can never have too many pockets.
Here is a bigger picture of how it looks in the folio. I also used some of the pages for tags for the envelope flaps on this page.
I was left with a couple of plastic pocket pages…I decided to add them to the file folder section of the folio.
The paper collection had cards for these pockets…PERFECT! I adhered them to the page by the binding, then covered the binding holes with more border strips.
It looks awesome!!!!!
That's what I have for you today. I think the next post will be the album all finished, unless I come up with more goodies.
Stay crafty, my friends!
Labels:
mini album tutorial,
Portfolio album
Saturday, August 15, 2015
Everyday Captured Folio, More Construction
Today I am going to work on the middle part of the folio album. I decided to use the tags as a closure to the top and bottom flaps of the inner part of the folio. I attached the tags so that they created a sort of belly band for another tag to be placed. I think it turned out to be a clever way to add another piece of interactivity to the piece.
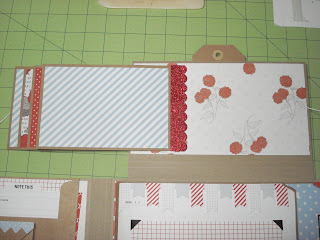
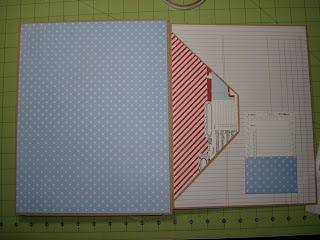
On the inner part of the bottom flap, I attached an envelope that I had sliced the side off of, creating a pocket. I put some cut outs from the paper collection into the pocket. I don't know if they will stay here…I'm thinking about it.Here is the other flap with it's closure-tag attached. This is turning out cool!
On the inner side of the upper flap I created a waterfall piece with some of the kraft cards that I pulled for this project. Yes, more places for pictures!!!
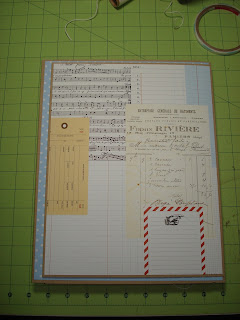
Now, the next thing I did was think about the back of the folio. You didn't think I would leave this alone did you? That gigantic envelope I pulled fit perfectly here, so I attached it by the flap to the back of the folio. Then I added magnets to the folio and to the envelope for closure, and covered it with papers.
I put some file folders from the paper collection in the envelope. I then made a pocket out of patterned papers and put some tags in from the paper collection. (I will show a picture of the products used on the last blog post.)
Then I covered the back of the envelope. Done.
I used one of my binding mechanisms to attach the file folders together. I first cut them down a little width wise, so that they would fit into the folio.
The last piece of the binding was leftover…Hummmm…I see a pocket in my future.
I made some templates and then covered the file folders with papers.
I used pieces of the kraft cards to create flaps to attach the pocket to the inside back of the folio.
Here is the file folder assembly all finished and ready to put into the folio.
The pocket covered. This is getting exciting. This album is coming together nicely.
A wide view of the album.
A close up of the inside of the folio. I used twine to create a closure with the tags. I attached the twine to the bottom tag, then threaded one of the tails through the top tag, then tied with a bow. Simply untie and open the flaps.
The file folder assembly fits under these flaps.
The back pocket attachment to the back page of the folio.
In the middle of the right "spine" piece I punched a hole, and threaded through a Tim Holtz loop elastic.
This is the closure for the whole album.
Stay crafty, my friends!
Labels:
mini album tutorial,
Portfolio album
Subscribe to:
Comments (Atom)


