WELCOME!!

We are so glad you are here! We love making and sharing our projects, and we are excited to have you visiting our site. Please leave us a comment and let us know what you think!

Jackie and Michelle

Followers

Showing posts with label Birthday Card. Show all posts

Monday, August 26, 2024

Birthday Cards and MORE! Using the last bits of my Country Craft Creations "Birthday" Collection


Good morning!  

After I did my folio and my birthday cake I still had a few leftovers so I decided to see what I could do with them.  

I raided my stash of Country Craft Creations goodies and made some fun birthday cards, and more. I even used the cover sheet to make a simple folio.  

I have a full walk through/talk through share video for you. Please come to check out what I did!

Thank you so much for your support and remember to stay crafty, my friends!

Tuesday, May 12, 2020

A New Tutorial...Banner Album with a Box!!

 Good morning!  I hope you all are having a great day!  Today, it's TIME TO PARTY!!

I got my design team package from COUNTRY CRAFT CREATIONS and it is WONDERFUL!
 I received Authentique's "Hooray" paper collection and it is wonderful! It is beautiful, the colors are amazing, it has the vintage vibe, AND it can be used for kids and adults!

I chose to go with the adult themed project for my first one, and I have created this 

It is a decorative banner to hang for a party for folks "over a certain age"...
It is an album, in TWO WAYS!  First, there are photo mats on the back of the banner, AND there are booklets IN THE BANNER!!!
It also folds up into a nice box for storage on your bookshelf when the party is over, but you can take it out the following year and decorate with it again!!!
Please check out my tutorial on YouTube and see how EASY this is to put together!!  Below I have a list of the supplies you will need.  

Also please go to COUNTRY CRAFT CREATIONS to get your supplies!  You can find the Artisan Cardstock that I used, the patterned paper by Authentique ("Hooray") , the seam binding and the Art Glitter Glue!  

Gather up your supplies and let's have some fun!  

Thanks for stopping by.  BE SAFE AND STAY CRAFTY!!

Michelle

Cardstock: Color #1: Black, 3 sheets, Cut 6 at 6 x 12 Black, 1 sheet, cut 1 at 6 x 12 and 2 at 4 x 5 Color #2: Red, photo booklets, cut 6 at 4 1/2 x 9 Out of the 3" wide scraps you will cut photo mats, 6 that are 3 x 4 Color #3: White, 3 sheets, cut 12 at 4 1/4 x 4 1/4. Out of the 3" wide scraps you will cut photo mats, 6 that are 3 x 4 Patterned papers: 3 sheets for banners, each cut into 4 pieces that measure 5 3/4 tall by 5 1/2 wide, you will need 12 pieces all together. 1/2 sheet of 3 x 4 cut aparts. Each cut apart will need to be trimmed to 2 7/8 x 3 7/8 2 sheets for the box, one for the inside, one for the outside: 2 of each patterned paper at 5 7/8 x 3 7/8 (4 total, front and back) 2 of each patterned paper at 2 7/8 x 3 7/8 (4 total, sides) 1 of each patterned paper at 2 7/8 x 5 7/8 (2 total, bottom)


Saturday, March 18, 2017

A Birthday Card for my Daughter

Here is the third project using the 4 Panel Twist Card style I found on YouTube by Sincerely Rita.
I love this!!!  They are so much fun to make!
 This size card is actually an 8x8" card.  Sincerely Rita gave instructions for three sizes, but my brain went on and decided that I needed to figure out a different size, so I did.  I figured out the dimensions for this 8x8" card, and for a 10x10" card.  I haven't fully tested the 10x10" size yet, but when I do, I will give you all those dimensions as I figured them.  I used this cool paper line by Glitz, called "Birthday Wishes."  I fell in love with it!
 One thing I did this time was that I covered the entire inside of the card base before attaching the mechanism and the panel to the inside of the card.  I think it made the card sturdier, and it worked out nicely!
 So, I oopsied again, this picture is sideways, but you get the idea.  I cut out pieces to make the panel be part of the "message of the card".  The bottom "post card" is where we wrote our personal message.
Here is the card standing up.  It worked out great, and she loved it, and I loved making it!  I need to see what else I can so with this card style!

Have a creative day!
Michelleđź’–

Sunday, September 11, 2016

Cards for the Grandkids

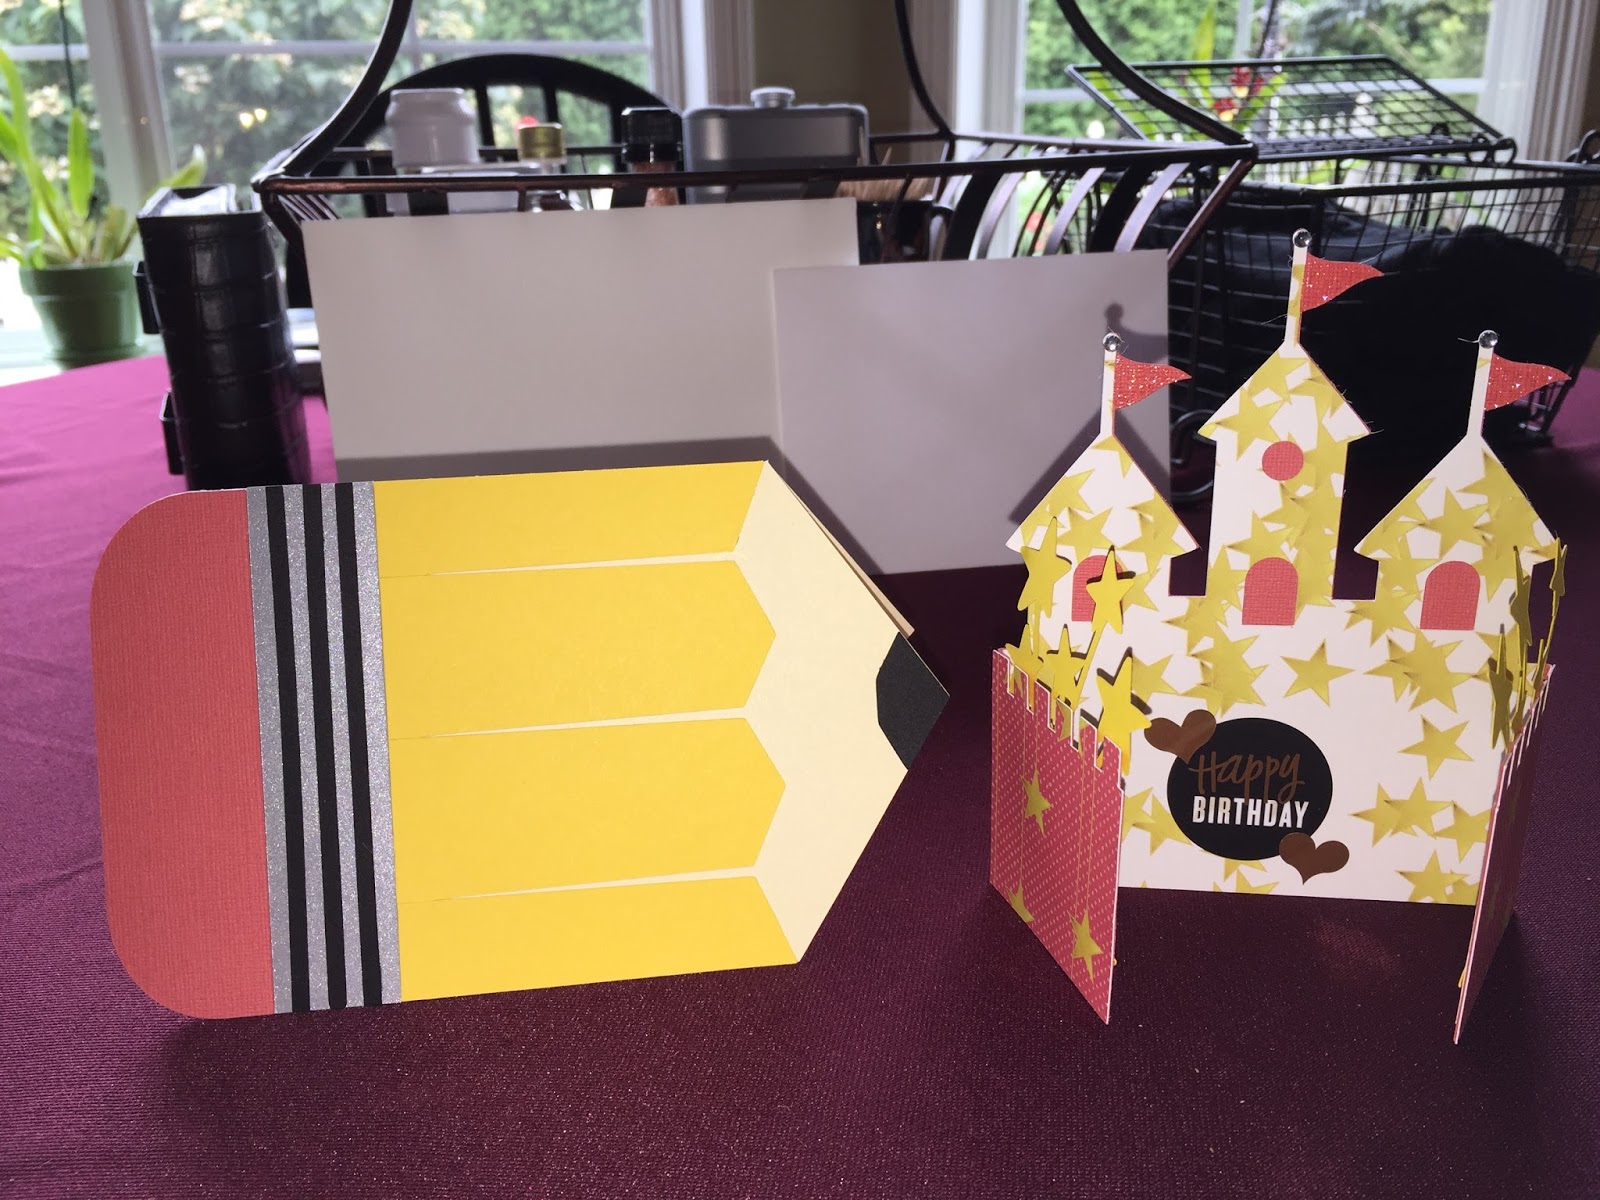
 I just wanted to share the cards I have recently made for my grandkids.  All three girls had their birthdays, and turned two years old!  I made princess cards (for my "Princess Posse").  They are all files I bought from Silhouette.  I love that machine!!!  Casey loves Minnie Mouse, so I tried to incorporate her into the card.  It is a variation of a box card, and the castle is 3D!
 Folded up, it looks like this.
 On the back I put a large picture of Minnie.  I think it turned out great!
 The twins are also turning two years old, and I wanted to make them another castle card, but theirs is different.  I made the pencil card for their brother.  They all live in Colorado, and when I send one a present, they all get presents, so since he had just started first grade I made this pencil card for him.
 These are also Silhouette files.
Thanks for looking, and have a wonderful day, and don't forget to stay crafty!

Wednesday, September 23, 2015

A Birthday Card for My Nephew, Max

 Ok, so it's a box really, but it is for my nephew's birthday.  I made it using a file I got from Silhouette, and it worked out beautifully!
 It opens up and has a slot for a gift card to be put in.  I made a little banner in the lid to write a little message.
In the slot I put a coin envelope that I decorated, and later wrote another message on it.  I tucked in his birthday money, and put it in the box.  I tied it shut with a ribbon in a dark green that looked wonderful with this papers color scheme.

If you have a Silhouette this cut file was great.  I highly recommend it.

Stay crafty, my friends.

Saturday, November 1, 2014

Happy Birthday, Cooper!!

My grandson turned 6 a little bit ago, and I decided to make him this special card for his special day.

I found it on the Silhouette site, and it was so fun and easy to put together!!  I has a lot of parts, and did take a little bit of time, but the time was well worth it, because it turned out soooooo cute!!


This firetruck is awesome!!  It says "Sound the Alarm" on it.  On the back of the card, I put a piece of white card stock so that Grandpa and I could sign it.


I love these 3D box cards that fold up so you can mail them.  I needed to create an envelope for it, however, because it is HUGE!


Here is the envelope I made to match it.

Thanks for looking…Stay crafty, my friends!

Sunday, September 14, 2014

Happy Birthday, Max!

My Awesome and Wonderful Nephew recently turned 16, and this is the card I made him.
 I was trying for a manly type of card.  I decided to go with this Polaroid theme for it when I saw this awesome cut file on my Silhouette shopping site.
 I changed the actual "picture" that came out of the camera.  I found another cut file that said "Happy Birthday" on it, so I resized it and used it.  I cut a little piece off of it, and adhered it into the slot so that it wouldn't fall out.  Behind the camera is a slot that I hid his birthday money in.
I hope he likes it.  He loves my cards (he saves them all) so it's very stressful for me trying to come up with another cool card for him.  I'm keeping my fingers crossed.

Stay Crafty, My Friends!

Wednesday, January 23, 2013

Happy Birthday, Susan!

Hi everyone!  I have been sooooo busy!  I have a couple  of announcements to make, and then I want to share a card that I made.

You all know that I am involved in a great group of crafty folks, we are called "Just a Few Friends."  We all are in the process of preparing "Fan pages" on Facebook.  Mine is located here.  Please stop by and "Like" my page!  When all of our our Fan pages done, I will have their page links here as well so you can visit their pages too!  We are going to have our projects as well as information on our blog hops and other activities.

The next blog hop we are doing is THIS SATURDAY!!!  Please come on by and check it out!  It is going to be AWESOME!!!

 I am working on the tutorials for the pages in my "Tall Skinny Mini" and am planning on getting them to you soon.

Now for todays project...


A friend of our had her 50th birthday, and this is the card that I made for her.
 I used Graphic 45's "Ladies Diary" collection for this card.  I didn't want to do the "over the hill" kind of 50th birthday, I wanted it to be classy and elegant.
I printed this sentiment in my word processing program.

Stay Crafty, My Friends!

Saturday, January 12, 2013

A card for Max!

I was surfing all over Pinterest the other day and came across this cool tutorial on how to make a "Zipper Card" by PapertreyInk.  This link will take you to her video.  In it, she used dies specially made to make this card.  But, unfortunately, I didn't have the die, and I needed the card that day...so I had to figure out how to make it on my own.
 I got out my supplies, and went to work.  The paper cutter I have above has a perforated blade attachment, so I thought maybe I could use that instead of the die.
 The front of the card ended up looking like this...I stamped "Pull" on the tab that I created using the perforating blade.
 Underneath ( and this is my practice piece, so I didn't ruin the card!!!) I stamped the sentiment.
On the inside I hand cut the spot where I wrote the message, then I punched the border paper, creating a pocket to put Max's birthday cash in.

He loved the card!!  It turned out great, and worked perfectly.  Obviously it would have been soooooo much easier if I had the die, but this turned out pretty good.  Go check out her video, and see what you think!

Stay Crafty, My friends!

Monday, September 10, 2012

Some Greeting Cards

I had an assignment of sorts.  I wanted to make a birthday card for my beautiful Daughter-in-Law Sarah, and my hubbin needed a "Thank You" card.  It was a card making day.  Here is what I came up with.
 He needed it music themed, and of course manly, for his band members to sign.  I used papers and stickers by Creative Imaginations.

 I had these letter stickers that I thought worked perfect for the inside of the card.  Plenty of room for the guys to write in it.
 I used the papers from the Basic Grey collection "What's Up".  I made it using to card blanks.  I adhered them in the middle, making a pocket for her gift, and creating a try-fold at the same time.

 This is the middle of the card, with the envelope/tag in it.

Here is the back of the envelope/tag, where her present is going to go.  I am really hoping that she likes it!

Stay Crafty, My Friends!!

Wednesday, March 7, 2012

60th Birthday Card

We have a coworker that recently had  her 60th birthday.  I could NOT let that go without a little ribbing about it.


This card was 50 inches long!!!  I hand cut the "candles" and punched the "flames."  The pages were attached with strips of cardstock to create the long accordion needed.  I had to create an envelope to put it in because it was soooo thick.  She loved it!

Monday, August 15, 2011

Sarah's Birthday Card!

 I used papers from House of Three to make this card for my beautiful daughter-in-law.  She called this her "First 29th" birthday!  I told her that she will love it so much that she will keep having them!!

 I used bling from Recollections, crochet lace from the Lost and Found collection.  The yellow polka dot paper is actually packaging from the dimensional stickers.
I made the butterfly using the new EK Success triple punch butterfly punch.  It is super cool, it punches three different images so you can layer them.
 The inside of the card, with more bling, more dimensional stickers and die cuts from that line.
For the envelope, I used another sticker from the line, and flowers from Recollections and Prima.

Have a crafty day!

Friday, May 27, 2011

A Birthday Card for Mom

Just a reminder...tomorrow is the Counterfeit Kit Challenge May Blog Hop!!!  Be sure to check it out!  I am participating and I hope you like what I created!  See you then!


Today I am sharing a card that I created for my Mother-In-Law for her birthday.


Papers: Reflections
Rhinestones and Pearls: Kaiser Kraft and Reflections
Punches: Mini Butterflies, Lattice Border:  EK Success
Nestabilities:  Renaissance Hearts
Sizzix: big butterfly
Stamp:  Studio G

Stay Crafty, My Friends!!!
Michelle