WELCOME!!

We are so glad you are here! We love making and sharing our projects, and we are excited to have you visiting our site. Please leave us a comment and let us know what you think!

Jackie and Michelle

Followers

Showing posts with label box and mini album. Show all posts

Thursday, February 15, 2024

Photo Cube Tutorial, a Country Craft Creations Design Team Project


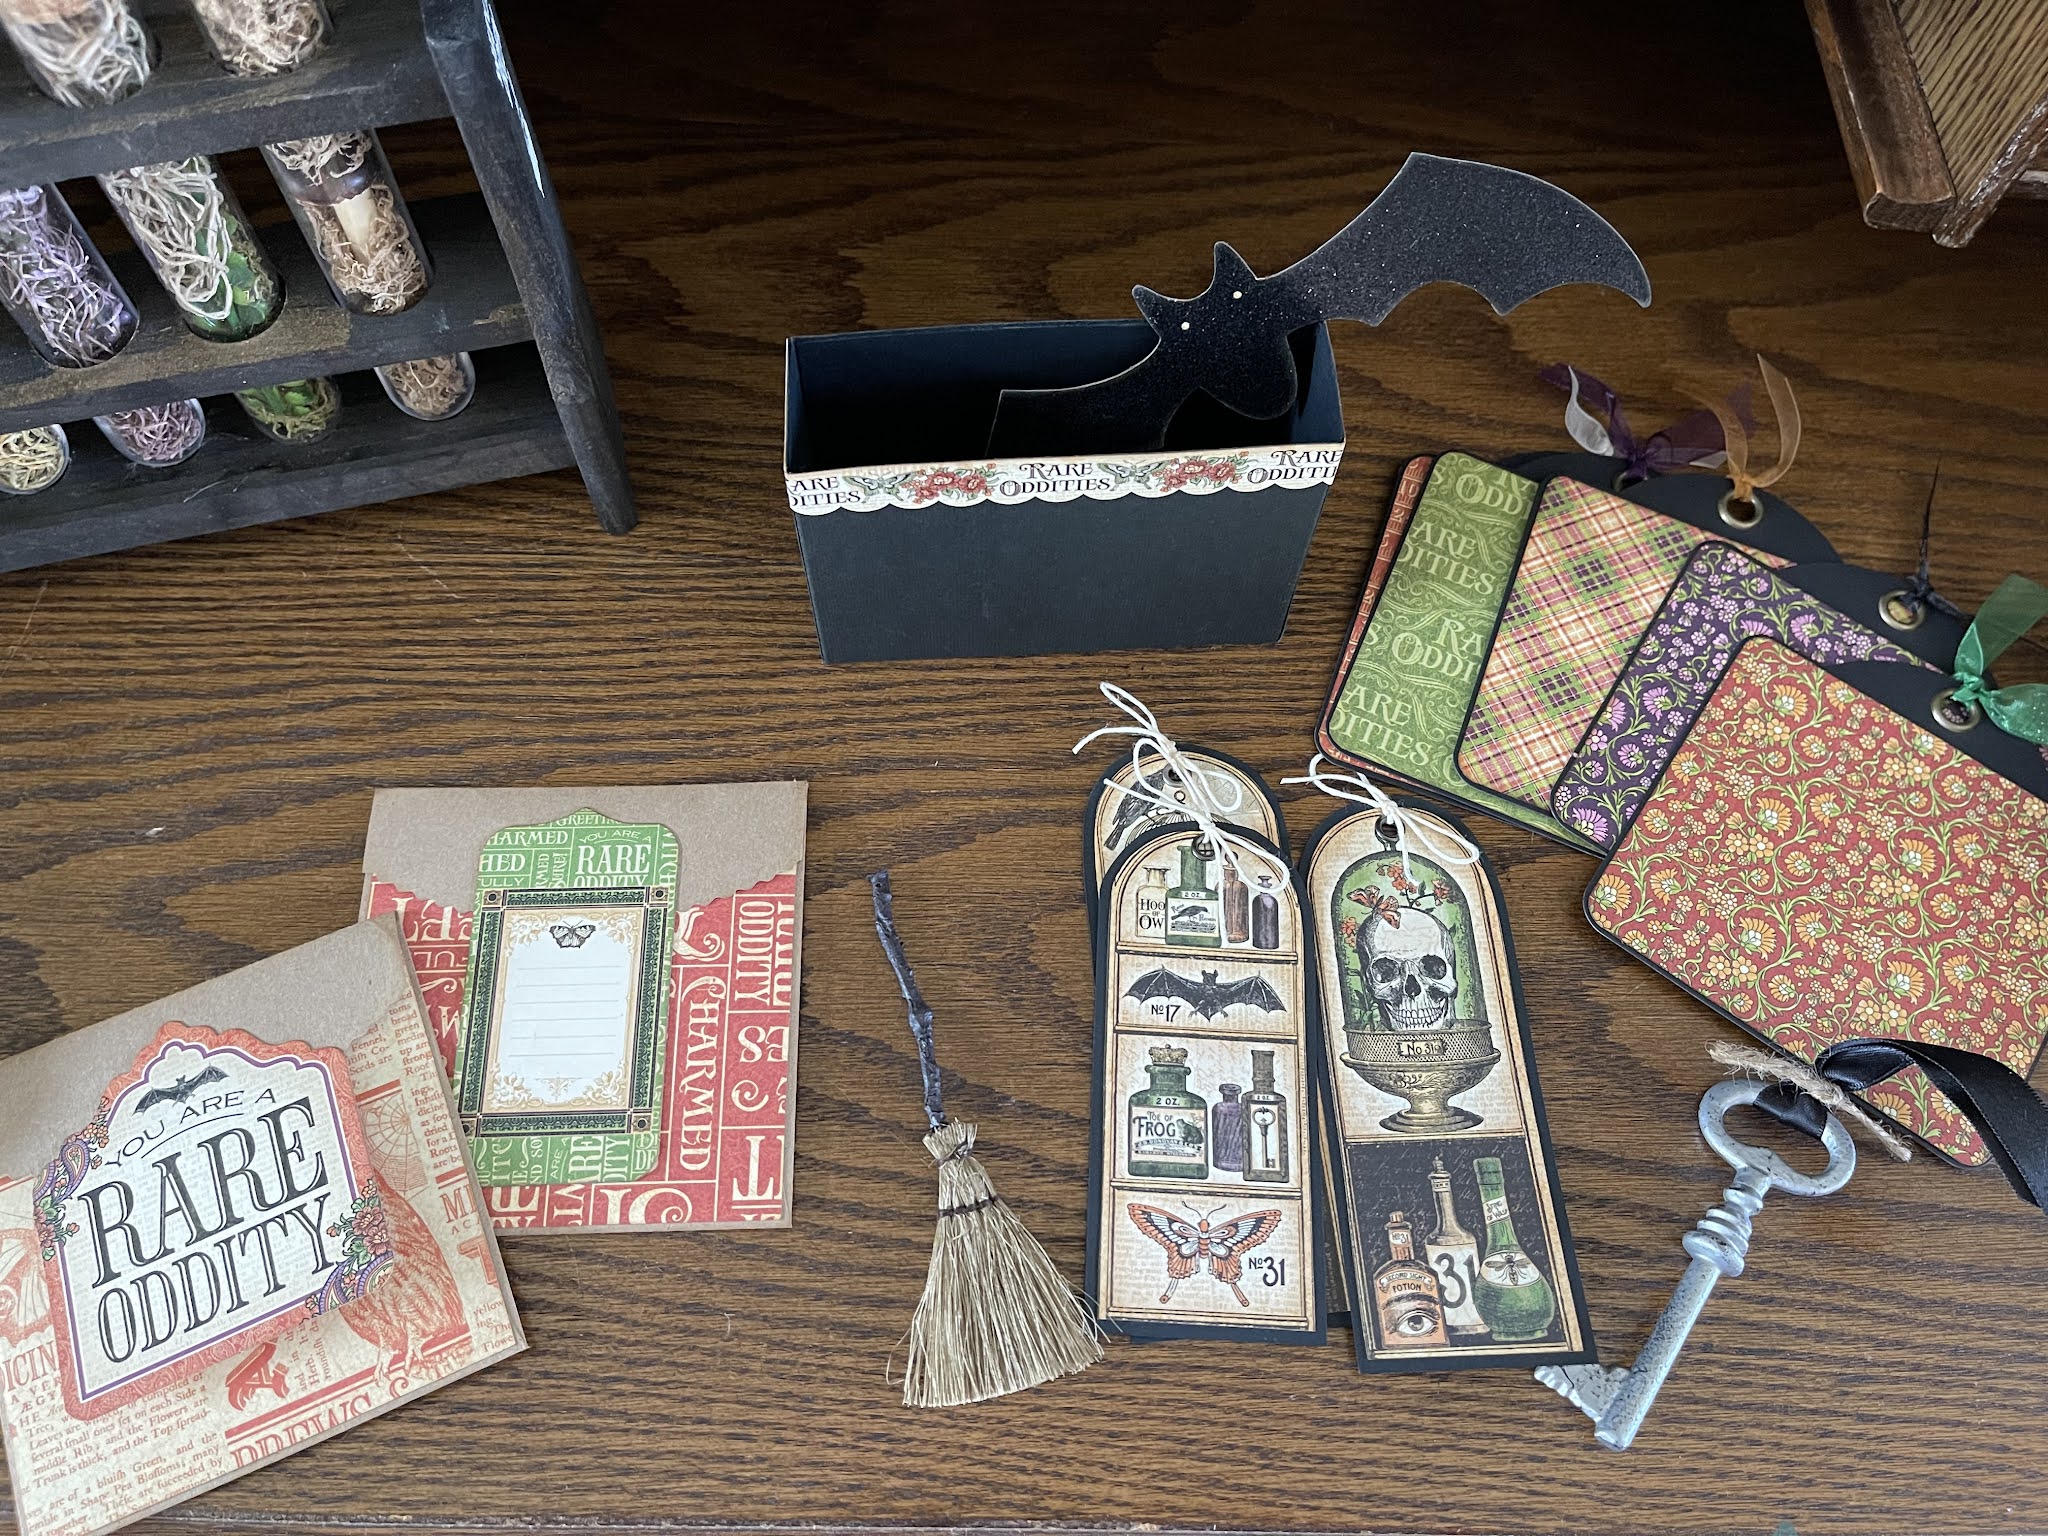
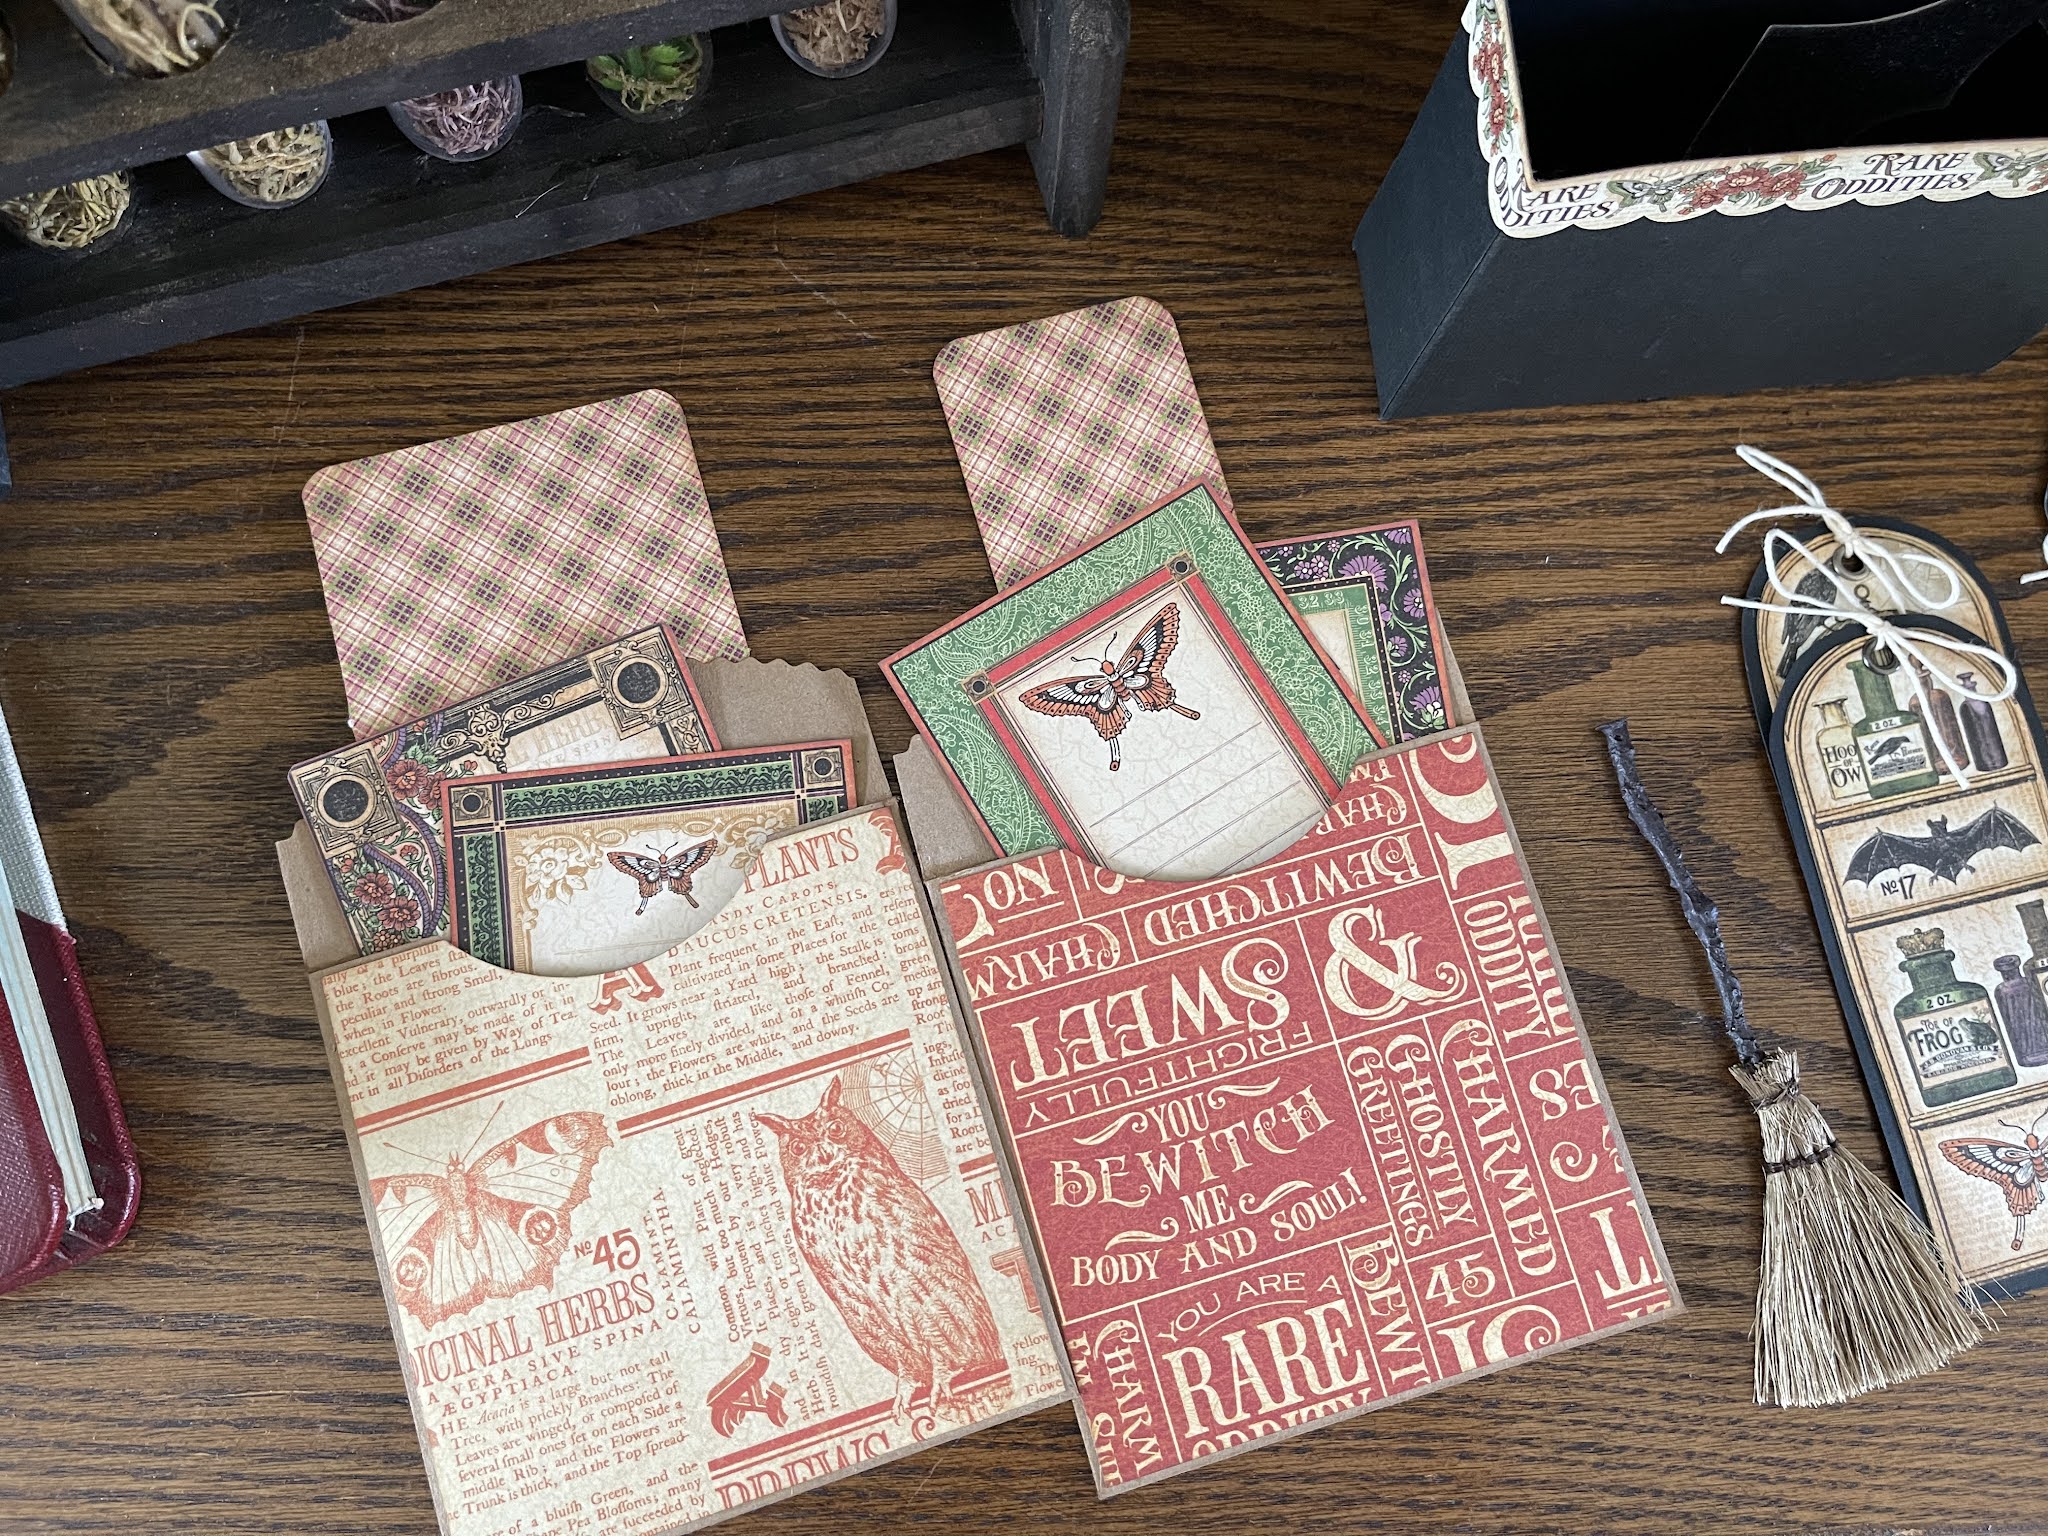
I'm back...YAY! I have finally been able to get this tutorial done. Ruth, from Scrapbookers of Country Craft Creations (find this amazing Facebook page through this link) had asked me if I could figure this out, and I think I did. This is a fun project and it looks great in many different papers, and would be amazing with photos one it intermingled with the fantastic patterned papers I used. For the tutorial I used, from Country Craft Creations, "By the Seaside" and "Love You Forever" I also used scraps from a previous design team package, Echo Park's "Boho Baby" and a collection I purchased from Country Craft Creations, Prima's "Luna". The cardstock is artisan. I used Kraft in two of photo cubes, and White 100 lb for two of the photo cubes. I also used Art Glitter Glue. I hope you enjoy the tutorial...it is really fun to make and easy to do. 
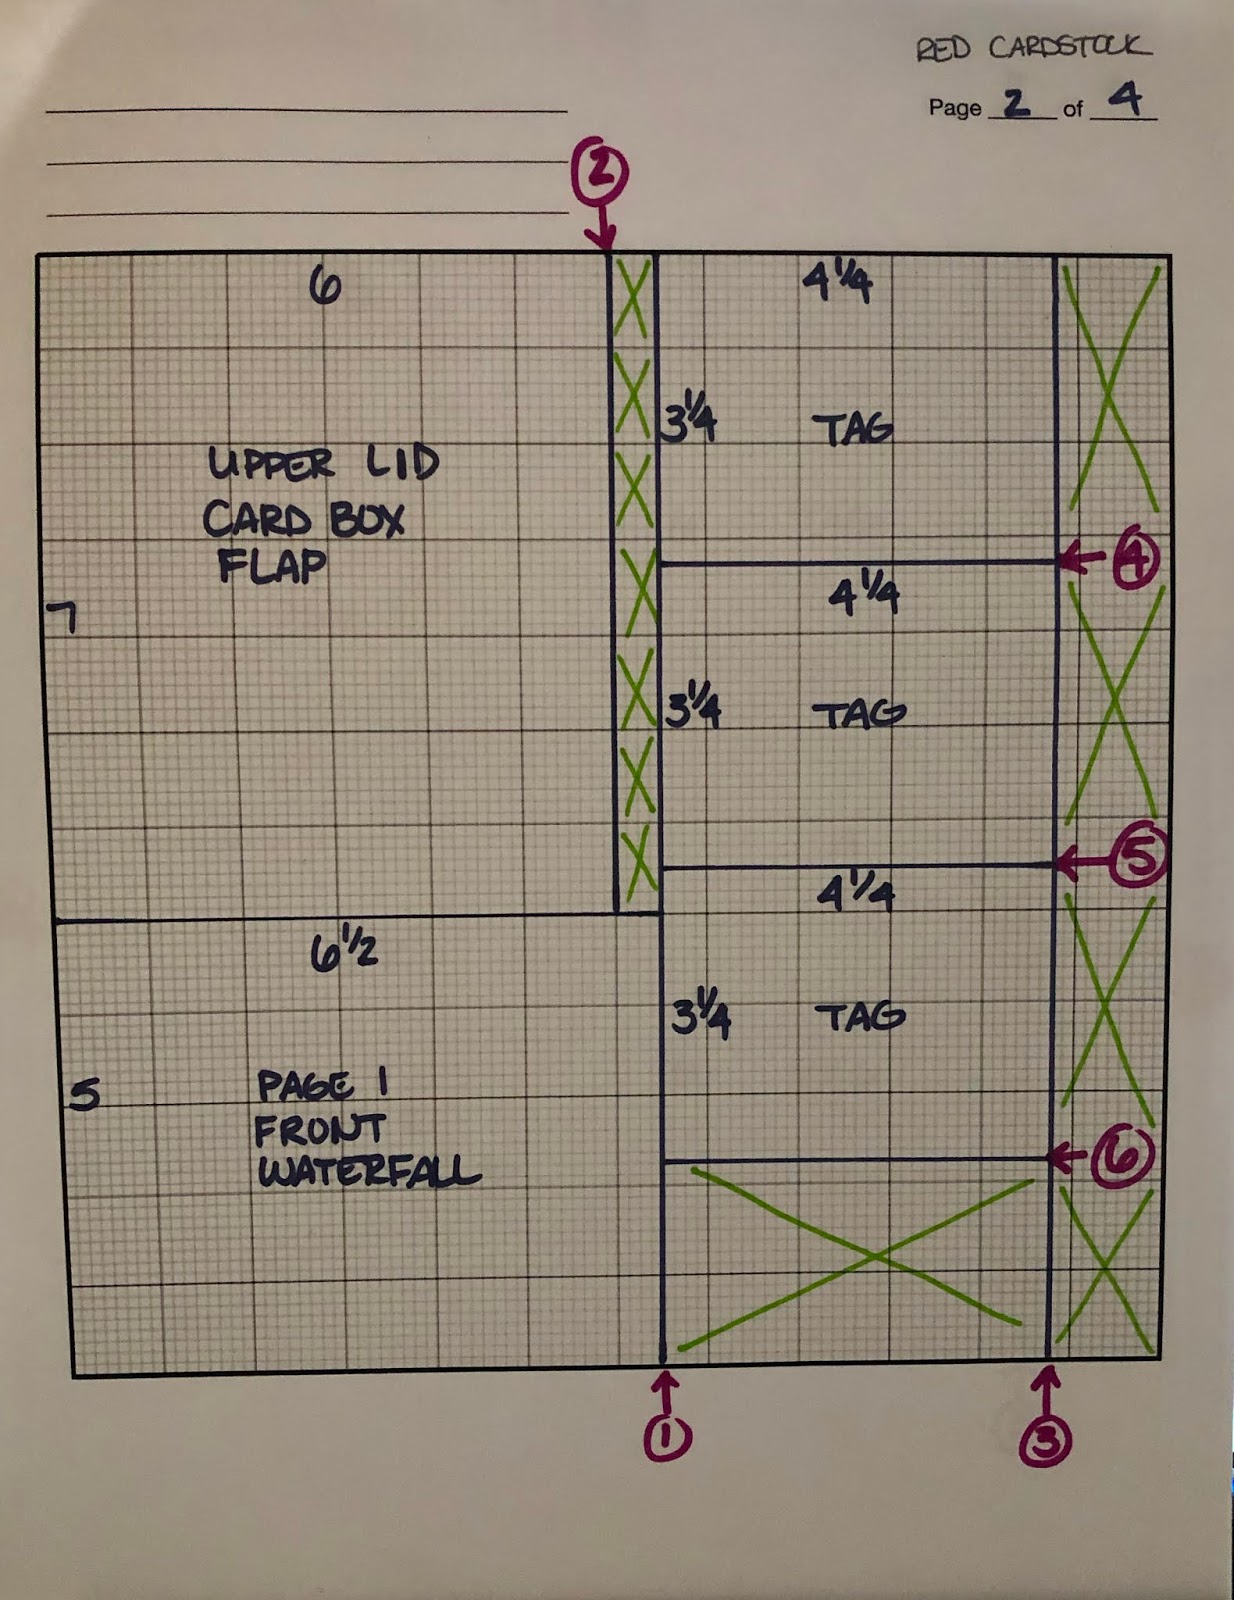
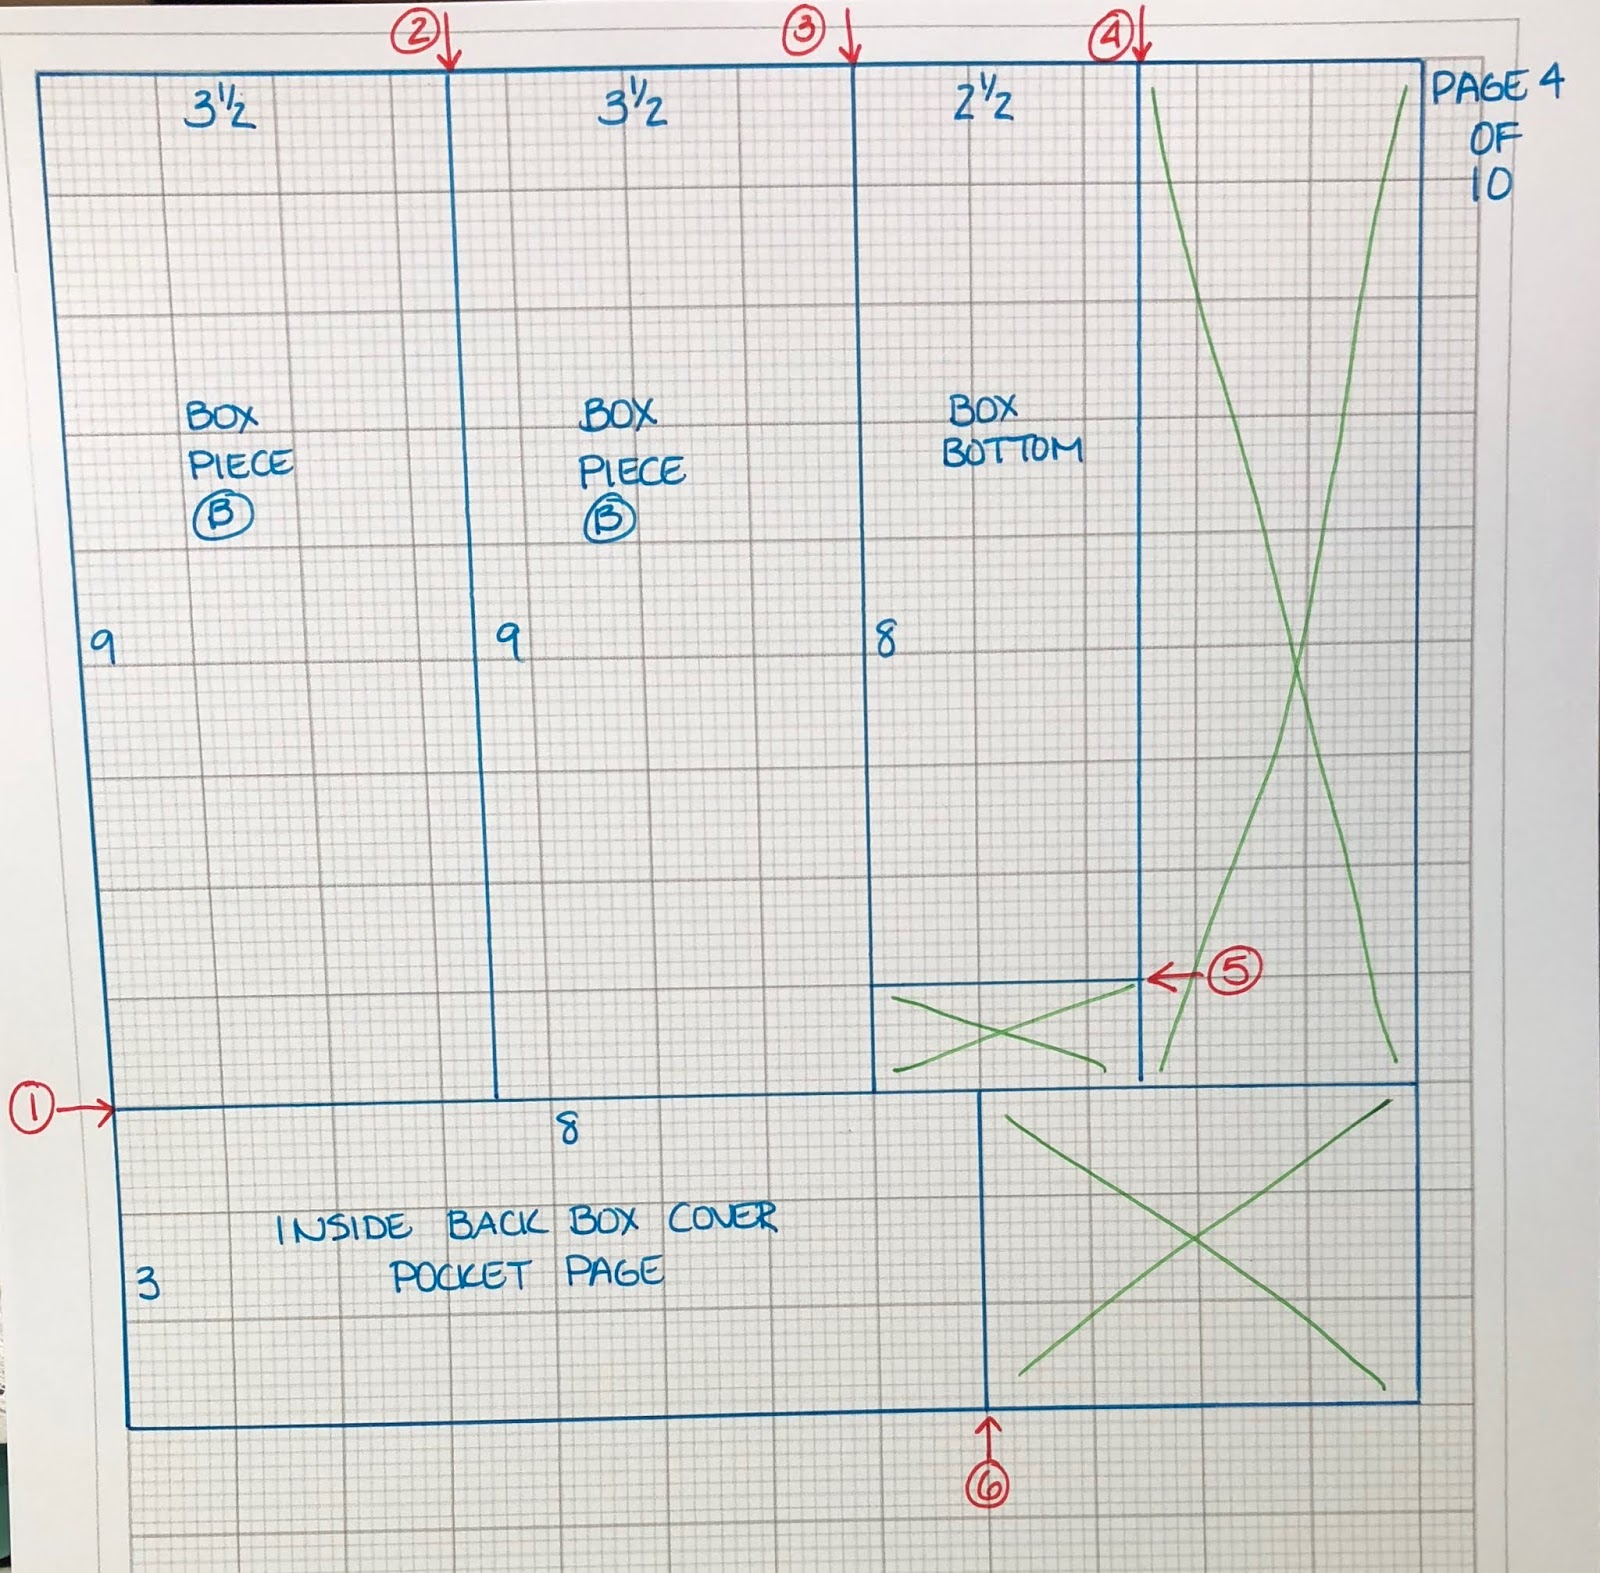
The cut guide for the cardstock is simple, and I go through all of the patterned papers and their cutting in the tutorial. Thanks for watching, and stay crafty!! Triangles: 2 - 6 x 6 8 - 10 3/4 x 2 1/2 Box: 1 - 10 3/8 x 10 3/8 Belly Band 2 - 3 x 10

Wednesday, January 31, 2024

Simple Stories, Simple Vintage Love Story Photo File...You have to see this!


 I have a tutorial you are going to LOVE!!!!

This is an extra design team project for Country Craft Creations using this amazing paper collection.  I make this photo file that will hold a ton of pictures and journaling.  It is a great album to show your love for someone, and it is different and interactive. 

I hope you love it, I know I do!

Stay crafty, my friends!

Wednesday, November 29, 2023

12 DAYS OF CHRISTMAS TAG BOOK AND BOX TUTORIAL

 OMGEEEEE!!!  I'm so excited about this one!  

I made this fun tag book that will hold small photos and journaling for the 12 days of Christmas.  It's a nice alternative to a December Daily and FUN TO MAKE!

I used a lot of scraps and Simple Stories collection bits and leftovers...as well as some Dollar Store tags.  Please come check this out!

Stay crafty and Christmasy, my friends!!!


Monday, January 16, 2023

Friendship Rose Stacked Book Decor/Gift Box, a Country Craft Creations Design Team Project


Welcome back to my site. This is a fun project that looks like a decorative book piece but is also a gift box. In these boxes you can put goodies for your Valentine, and I've also created a small tag album to go inside. I'm using Heartfelt Creations "Friendship Roses" by Country Craft Creations, which can be found here.

The Heartfelt Creations Dies that I used for the album can be found here: Tag Die Pocket Die, this is currently sold out, I'm sorry, but please keep checking back. Each outer box used 1 (12 x 12) sheet of heavyweight chipboard, 2 sheets of main color of cardstock. Each inner box used about 1/2 sheet of lightweight chipboard and 3 sheets of main color cardstock. Patterned paper for the entire project totals about 8-10 sheets of 12 x 12, depending on how you want to decorate the boxes. I used 2 sheets of Summer Ivory, a coordinating color of cardstock for the outer boxes. Cutting Guide: FOR EACH BOX YOU WISH TO MAKE: OUTER BOX: Heavy Weight Chipboard 2 - 5 1/4 x 7 1/4 1 - 1 1/2 x 7 1/4 Cardstock 2 - 7 1/4 x 9 1/4 1 - 4 1/2 x 9 1/4 1 - 4 1/2 x 7 1/8 Coordinating Cardstock 2 - 7 1/8 x 5 1/8 INNER BOX: Light Weight Chipboard 2 - 1 3/8 x 4 7/8 2 - 1 3/8 x 6 7/8 Cardstock 1 - 7 x 11 2 - 3 1/2 x 6 Patterned Paper: OUTER BOX: 1 - 6 7/8 x 4 7/8 (FOR THE INSIDE OF THE LID ONLY) INNER BOX: For the outside of the Inner Box 2 - 1 3/8 x 4 7/8 1 - 1 3/8 x 6 7/8 For the inside of the Inner Box 2 - 1 3/8 x 4 7/8 2 - 1 3/8 x 6 7/8 1 - 6 7/8 x 4 7/8 For the Tag Album: I used the dies to create 5 tags. Cut patterned papers and cutaparts to fit the tags. Please see the video for the explanation of how I created pockets with the pocket die during the tutorial. Other items used from the Country Craft Creations store, https://countrycraftcreations.com Artisan Cardstock in White and Summer Ivory, https://www.countrycraftcreations.com/collections/artisan-cardstock Polka Dot Ribbon, https://www.countrycraftcreations.com/products/sheer-polka-dot-ribbon-light-pink-sold-by-the-yard Light weight chipboard , https://www.countrycraftcreations.com/collections/chipboard/products/chipboard-light-weight-12x12-sheet heavy weight chipboard, https://www.countrycraftcreations.com/collections/chipboard/products/chipboard-medium-weight-12x12-sheet As always, if you have any questions please let me know. Also please let me know what you think about the project. Have a crafty day!

Monday, March 7, 2022

Hi and welcome back to the blog. Today I have a fun project that includes repurposing some Dollar Store boxes and a mini album. I have a video tutorial showing the whole process.


I'm using the exclusive paper collection "The Music Box" from Country Craft Creations. Its a very beautiful paper collection and I loved making this project with it. I will have a full list of supplies and links to them so you can check them out and/or purchase them from Country Craft Creations.

During the video I will go step by step to tell you how I made the project. Because I am using a premade box, and because your box may differ in size, I am not going to give a cutting list for the cardstock or patterned paper for it. I will, however, list the papers used for the mini album that I put inside the album. Thank you so much for watching, and I hope you enjoy the project! SUPPLIES USED: Dollar Store Boxes. Mine had outer dimensions of 6 3/4 x 4 3/4 with sides 1 3/4" tall Chipboard, 1 - 12 x 12 Measurements to cut will depend on the size of your box Brown Artisan Cardstock, approximately 8 sheets of 12 x 12 total Silver Mirror Cardstock Patterned Paper: The Music Box, I used an 8x8 pack, and used approximately 18 sheets. I did use scraps to create my own flowers. I large magnet Art Glitter Glue Score Tape, 1 sheet of 8 1/2 x 11 and 1/4" Black foam tape Seambinding, approximately 1 1/2 - 2 yards of Chocolate Dies/Molds used: Heartfelt Creations 3D Floral Basics Shaping Mold Leafy Accents Small Wild Rose Decorative Pocket Accents From my stash: I keyhole 2 brads string beads paint and distress ink CUTTING LIST FOR THE ALBUM: Cover: 2 - 7 5/8 x 4 1/8 Waterfalls: 2 - 9 3/4 x 4 1/8 2 - 8 3/4 x 4 1/8 Inner Assembly page: 1 - 12 x 10

Monday, February 14, 2022

Love Letters Gift Box/Album, a project for Country Craft Creations


Hi, and Happy Valentine's Day! As promised to my fellow Scrapbookers of Country Craft Creations Facebook group, here is the walk through-talk through of my "Love Letters" Gift Box/Album. The papers are exclusive to Country Craft Creations. They are GORGEOUS! I used them to create this fun project. I hope you love it as much as I do. For this project I used: 2 wood boxes with drawers from the Dollar Store Chipboard: 2 - 3 3/4 x 6 3/4 1 - 4 x 6 3/4 (the spine) Cardstock to cover chipboard: I used the lay flat method to cover the chipboard just like an album. Here is a tutorial if you wish to view it...https://youtu.be/VDrBoasyqtc 2 - 5 3/4 x 8 3/4 1 - 7 x 8 3/4 1 - 7 x 6 5/8 The inside accordion is 6 x 11, score on the 11 at 1/2, 4 and 7 1/2 The pocket on the inside of the spine is 5 x 3 1/2, score on the 5 at 1/2 each end and on the 3 1/2 at 1/2 I used about about 4 sheets of patterned paper and some scraps. I also used seam binding, about 1 1/2 yards. I used two Tim Holtz knobs that I had in my stash, along with the flowers, which were in my stash. I inked my edges and painted the boxes. When I painted the boxes, I painted the entire inside of the shells of the drawers. Everything else I just painted the edges since I covered them with patterned paper. Thanks for watching and I hope you enjoy the project.

Thursday, September 9, 2021

A Halloween Box Decor Piece using Graphic 45's Rare Oddities

I finally finished it!!!  I'm so happy!!!
I made this amazing box full of goodies with a Graphic 45 collection from 2015!!!  
This is the Rare Oddities collection!
I started this project in 2015 when this collection came out.  I worked on it for a while, then for some reason I can't remember, I put it away unfinished.  I dug it out and finally finished it.
This piece is amazing and fun and full of great things.  I love how it turned out.
This is going to be a great addition to my Halloween decor.  
I made this little album, that was made with envelopes.  Please don't ask where I got it...I really don't remember...remember I put this away for a long time.
It is decorated with the patterned papers and the embellishments that came with the collection.  
Each envelope has a tag.
I made file folders and filled them with journaling cards.

I created a box to go in the box and filled it with all sorts of goodies.
I took some paper bags and decorated them.  I added a witches broom, made bookmarks, and added a skeleton key.  I also covered some tags with the patterned papers.  In the box you will see a bat, I backed him with some of the papers as well.
In the paper bags I added more cards.
I have test tubes full of fun, and made my fairy skeleton.
I have a bottle of Raven feathers and a box...
In the box a secret letter, skull, flower and another bottle.  
The feathers were made with a die that I have.
I found this cute notebook that I added to the mix, and used some stickers in it.  I also found this cute cutting board that I turned into a clipboard and added more journaling cards.

I am very pleased with this project.  Even though it took so long to complete, it will be a treasured Halloween decor piece for years to come.

Stay crafty and scary, my friends!

Michelle

Sunday, January 24, 2021

Squash Album Explosion Box Tutorial

 I did another tutorial on an idea I had using the explosion board. (There are more to come also!!). I'll show you how to put together this album and box in this tutorial, I hope you enjoy!!


I am using Echo Park's "Remember the Magic" papers along with Artisan cardstock from Country Craft Creations. It uses the We Are Memory Keepers Explosion Box Scoreboard, also available through Country Craft Creations. This is a super fun and easy project and will be such a cute gift for someone!

Thanks for watching,

Michelle


Tuesday, July 7, 2020

America Box Album Folio Tutorial


The tutorial is LIVE!!!  Please visit my YouTube Channel for the tutorial.

This is my 3rd design team project for Country Craft Creations using the "America" paper collection by Echo Park.  I love this paper collection and I know you will too!  

Country Craft Creations has all of the patterned paper, stickers, ephemera, Artisan Cardstock, seam binding, magnets and Art Glitter Glue you need to make this project. Visit them today and get your supplies!  

Below is a list of the supplies you will need for this project and the cutting guides for this project.  I hope you like it and have fun with it.  Thanks for stopping by!  


Stay safe and stay crafty, 
Michelle

Supplies: Artisan Cardstock: Dark blue x 8, white x 3, red x 1, light blue x 1 Patterned paper: 12-13 sheets Stickers and ephemera, flowers for decorations Large magnets: 4 Seam binding: At least 2 yards, more if desired 5-10 sheets of copy paper Cutting List: Back of box: 1 - 6 x 8 Top and bottom flaps of box : 2 - 6 x 6 Side flaps of box: 2 - 8 x 7 1/2 Gusset pocket: 1 - 4 1/2 x 9 Small pocket on gusset pocket: 1 - 2 1/2 x 7 Stacked pages: 4 - 4 1/2 x 8 Pocket on stacked pages: 2 - 2 1/2 x 9 Left page: 1 - 8 x 7 1/2 Right page: 1 - 8 x 7 Angled swing pockets: 2 - 6 x 6 1/2 Waterfalls: 2 - 4 x 10 2 - 4 x 9 2 - 4 x 4 1/2 Journal cover: 1 - 7 x 10


Saturday, May 23, 2020

Hooray Gift Box Album Tutorial


Hello, Everyone!  Today I bring to you my Country Craft Creations design team project tutorial for my Gift Box Album using Authentiques “Hooray” paper collection!  I hope you enjoy this project!  I had a great time making this album (the tutorial gave me fits, but I persevered!) and I think you will too.  It really doesn’t take a ton of paper to make and will make a great gift.  Please visit Country Craft Creations for your supplies.  I used Authentique’s “Hooray” collection, Carta Bella “Dots” papers, seam binding, magnets and Art Glitter Glue from the store.  


Below you will find the cutting list and a cutting guide, which will help you cut the cardstock so that you maximize it’s use.  You will need 6 pieces of red cardstock, 4 of Ivory, about 8 pieces of 12 x 12 patterned paper, 4 large magnets, and seam binding.  


Thanks for stopping by, and have a wonderfully crafty day!

Red Artisan Cardstock:

Box Lid:

1 - 12 x 12, lid
1 - 6 x 7, card box flap
1 - 4 1/2 x 9, box pocket

Box Bottom:

1 - 2 3/4 x 7 1/2, pocket
1 - 11 7/8 x 11 7 /8

Page 1:  

1 - 6 1/2 x 7, page
2 - 6 1/2 x 5, waterfalls
1 - 5 1/2 x 4 1/2, closure for waterfall pages

Page 2:

1 - 2 3/4 x  7 1/2, pocket
1 - 6 1/2 x 7, page
2 - 6 1/2 x 5, gatefold pages

Page 3:

1 - 1 1/2 x 7 1/2, belly band
2 - 1 1/2 x 4 1/2, belly band closures
1 - 6 1/2 x 7, page

Tags (from left over cardstock pieces)

3 - 3 1/4 x 4 1/4
2 - 4 x 6

Ivory Cardstock:

1 - 6 7/8 x 6 7/8, box lid
2 - 5 3/8 x 6 7/8, card box flap

Page 1:

2 - 4 3/8 x 6 3/8, back of waterfall pages
1 - 4 7/8 x 4 3/8, back of closure
1 - 6 3/8, 6 3/8, back of page

Page 2:

2 - 6 3/8 x 4 3/8, back of gatefold pages

Page 3:

1 - 6 7/8 x 6 7/8, back of page

If you follow my cutting guides you will have strips of leftover Ivory cardstock to make tags.  You will have 3 - 5 1/8 x 12, and 1 5 3/4 x 12.   


Saturday, November 16, 2019

Christmas Album in a Box Tutorial

 Hello!  I created this album in a box and I have done a tutorial for it on YouTube.  I wanted to share a few pictures and give the link to the video.  Below you will find the cutting guide pictures for the card stock and the cutting list.
 This album is fun...The box folds open, almost "explosion" style to reveal an inner box that holds the album in place.  The inside covers also have a pocket and a waterfall feature.
 This would be a fun album to do for lots of different themes, birthdays, babies, etc.

I used Graphic 45's "Christmas Magic" collection.  I had used some of it for my "Perpetual Accordion Album" project I did for Country Craft Creations Christmas in July design team project.  If you are interested in visiting that tutorial you can find it here.    I had purchased all of the paper, including the Artisan Cardstock at Country Craft Creations.  Visit the store and see what wonderful supplies she has in stock for you!
So the link to the tutorial video on YouTube can be found here.

You will be using 10 sheets of cardstock, and one magnet. I used about 2/3rds of a pack of patterned papers. Cutting List: Box Piece A: 2 at 9 x 10 Box Piece B: 2 at 3 1/2 x 9 Box Bottom: 1 at 8 x 2 1/2 Inner Box: 1 at 7 1/2 x 12 Lid Piece A: 1 at 10 5/8 x 11 1/4 Lid Piece B: 1 at 4 1/2 6 5/8 Inner Back Box Cover Pocket 1 at 3 x 8 Inner Front Box Cover Waterfall: Pages: 6 at 4 3/4 x 6 1/4 Closure: 1 at 4 1/4 x 6 3/4 Mini Album Cover: 1 at 7 1/2 x 12 Mini Album Pages: 3 at 7 1/4 x 5 5/8 Mini Album Page 3 pockets: 2 at 3 x 6 1/4 Mini Album Page 4 Photo Mat: 1 at 4 1/4 x 6 1/4 Mini Album Page 4 Booklet: 1 at 4 1/2 x 4 1 at 4 1/2 x 3 1/2 Mini Album Page 5: Pocket Flap A, 1 at 4 x 7 1/2 Pocket Flap B, 1 at 4 x 6 1/2

Below you will find the cutting guides to show you how to cut your card stock.


Thanks for stopping by, and thanks your support.

Stay crafty, my friends!
Michelle