WELCOME!!

We are so glad you are here! We love making and sharing our projects, and we are excited to have you visiting our site. Please leave us a comment and let us know what you think!

Jackie and Michelle

Followers

Showing posts with label Triple Fold Never Ending Envelope Book Mini Album. Show all posts

Tuesday, October 29, 2013

Halloween Mini Album

Hello, everyone!  I made a quick mini album that I wanted to share, with a mini tutorial to go along with it.  It is based off of my "Never Ending Mini Album" but I used bigger papers and created pockets as well. Click on that link for the tutorial of the little mini with the basic design of the album, and the other variations that I have done with it!  This is one more variation.  Don't you love that you can take all of these album designs and redo them into something totally different?

This album measures 8" high, and 7 1/2" wide.  I used some papers I found from Office Depot that are 11"x17".  The brand is "Neenah Creative Collection".  It is 32lb paper so it is heavier duty, not quite cardstock but better than standard paper, and it comes in black, kraft, and white.
I scored the first piece on the left at 1", then at 8 1/2", then I cut off 1" on the right side.  I saved that piece to make the two hinges you see right by my fingers.  I scored the bottom at 3" for the pocket.  I made the hinges by cutting the 1" scrap into two pieces at 3" and beveling the edges.  I adhered them one to each side of the bottom score line.  When you put the fold up and adhere the bottom tabs, taa daa, pockets.  The right side is adhered only by one strip of 1/4" score tape on the 3" side.  This cut edge is going to be bound into the binding of this book, so that's why we don't need a hinge here.  The 1" side on the page is just adhered down to help create stability to the page since this isn't cardstock.  If it was cardstock, I wouldn't have done it.  The left side is the side you will be touching to turn the pages.  ADHERE THE RIGHT SIDE 1" FLAP DOWN FIRST BEFORE FOLDING UP AND ADHERING THE POCKETS!!
I scored and cut the second  piece exactly the opposite of the above piece.  (Please ignore the length of the hinges.  I goofed!)
The third piece is scored at 1", 8", 8 1/2", 9" and 16".  Then at 3" on the bottom.  Cut as shown.   The pockets will be formed with the 1" tabs on the side and the 1/2" tabs in the middle.  

When everything is scored, cut folded and adhered, take the two cut edges of the pages and stand them up.  Put two strips of score tape on the inside of the 1/2" scores on the third piece, and adhere them down.  You do NOT want to adhere anything between the first two pieces.  Just adhere the cut edge into the 1/2" score.  Line up the pockets as shown. 
 Top view.  Sorry the picture is a little dark, but this will give you the visual also.  The two strips of the Scoretape in the 1/2" score space is the binding.
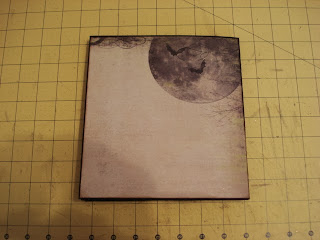
 This is the cover.
 Opened to see the pockets...I added tags made from the scraps left over.  Since the base paper isn't card stock, I put full pieces of patterned paper into the pockets to add some stability.  The folded 1" edge also helped with stability of the edges.
 Then the album opens again to the right.  You will have 4 pages with no pockets.
 This is the back of the book.
 It opens to see pockets...
 And opens again for another full page.
 This is the middle of the book.  I created pockets for this page with the papers, otherwise this would be a full page.
 Heres a "front view" of the book.
Here is a top view.  The left side in the back  is the inside front cover, the right side in the back is the inside of the back cover.  The two pieces in the front are the third piece we scored, the binding of the book.  The "V" in the center opens to reveal the black and white harlequin paper in the middle of the book.

I used My Minds Eye papers for most of the book, with one page of Recollections.  This book is not good for a lot of embellishments, so decorations with paper, stickers and tags is a must since it folds pretty flat.

I hope you liked this book! Let me know if you have any questions.  

Stay Scary, My Friends!

Wednesday, January 25, 2012

Fotographia Mini Album

Hello all!  I am here today to show you a mini album I made out of these...
 I had seen a video here by ILuvVintageScrap where she had made a mini out of one of them.  I decided to use three...I used the "Never Ending Mini Album" design for it...it turned out COOL!
 As you all know, these envelopes have two pockets, one making a flap.
For this design, I pulled the flap pocket down a little more to make a little more room for pulling out tags.
 I inked all of my envelopes.  This is Zeke, and he is helping me with the process...such a good supervisor!  And please, don't look at my mess...I am getting my OWN CRAFT ROOM really soon, and it will be much nicer in just a bit!
 Then I put the envelopes together in the configuration that creates the album.
 Here are a couple of views of the album after I covered it with paper.  I used DCWV's Timeless Time Stack.  I LOVE IT!  The poloroid images made me buy it!
 Another view...
I wanted to challenge myself to not buying anything for this album, just using what I have.  And, because of the nature of this album, I wanted to keep the embellishments to papers from the pack.  So, I utilized the paper in cutouts and through the use of punches.  I only added some string that I inked for some of the tags, and some hole reinforcements that I had leftover from another project.

 I cut out another image of the "Fotographia" piece of paper and adhered it to the front cover over the same image, creating a pocket.  I put this paper slip in to show the pocket.
 Then I put things in the pocket, and layered images over the bottom of it to cover the "seam".  I titled it 2012, because I am going to use it to showcase 1-3 pictures a month through the whole year.  A sort of "highlight" photo album.
 The tags in the front cover. This paper stack has two pages of the poloroids and postcards!
 Front cover open...The tag behind the left poloroid comes out for journaling.
 ...then the right flap opened, showing the pockets of the envelopes.
 Then that flap pocket opened.  There is a TON of space for photos.
Here are the tags in the first set of pockets.
So then you turn the page after remembering which flap closes first (HAHA) and you get this.  This is the second set of flap pockets.  
 The tags in the flap pocket...
 Then opening the left side to reveal flap pocket number 3!
 These are the tags in this flap pocket.
 Then you open the flap pocket to the right, and you get this lovely "Dream" page.
 This is the flap pocket on the right opened to reveal the "Butterfly" page.  I embellished these butterflies with punches from some of the typewriter key paper.
 This is the middle section.  I added a flap with two of the postcard pieces to create another "page".
 The other side...

...and the back of the album.  

I hope you enjoyed this!  Pleasse check out her video and give this idea a try!  My album using the three envelopes holds  a lot of stuff, and measures 6" across by 8 1/4" tall!  Lots of room!  There are 20 photo mats and 13 double sided tags.  

Stay crafty!

Monday, January 16, 2012

A Valentine Never Ending Mini Album and Tutorial

I have made a couple of mini albums that I call "Triple Fold Never Ending".  There are links here. They are all over the internet, using envelopes to create multiple pages with different folds to them.  I came up with another configuration to put one together.
 I wanted to use envelopes in their full size.  So I got a bunch of Bazzill 7 1/4" x 5 1/4" envelopes and went to work.  First, take three of them, seal them, slice a wee bit off of the LONG side of them, and then score, leaving a 1/4" gusset in the middle as shown.  Set aside.
 Take two envelopes, leave one open, seal the one on the left.
 Use score tape to the back of one of your folded envelopes already prepared...
 Adhere the envelopes to them, so that the openings are on the "inside" as shown above.  These will create more pockets.  I made two of these, the one with the open envelope on the left is the "front" of the book, then I turned the other over so that the open envelope was on the right for the back of the book.
 I took two envelopes, sealed them, and then sliced the top of them open to create pockets.  (You can better see them in the photo below).  I took the last of the scored pieces we made at the beginning, added another score line 1/2" to either side of the scores already made, then attached the sealed and opened envelopes to the scored one, leaving the pockets of the scored envelopes on the outside, as shown above.
 This is what it looks like so far.  the cover pieces we did are in the back, and the last piece we made is in the front of the photo.
 This is the flap of the front cover, I added ATG to it like I was going to seal it, but instead...
 I put another envelope on it, effectively sealing both and creating another page.  I did it to the back cover also.
 This is what I ended up with...I also decided to slice open the pages just added at the top, to create another space for a tag.
 I used some papers, bling, tags and flowers and this cool metal watch I got today at Michael's to decorate it..
 See the pockets created with the envelopes we used to attach the envelopes together with? I made large tags for these pockets.
 The back cover.
 The middle of the book.  The tags on the left are adhered on the side and bottom, so I can slip pictures under them.
 This is the front cover opened...
 ...then opened again.
 This is the back cover opened...
...Then opened again.  I have 16 pages and 10 tags in all! It used 11 envelopes in all.

I sure hope this tutorial made sense!  I love how the 1/4" gussets made for more room for embellishments and made the book lie more flat when all decorated.

I did add ribbon from my stash, used punches from McGills and Martha, and some extra bling from Prima.

Bring on the Valentine's Day date with my Husband!

Stay Crafty, My Friends!