WELCOME!!

We are so glad you are here! We love making and sharing our projects, and we are excited to have you visiting our site. Please leave us a comment and let us know what you think!

Jackie and Michelle

Followers

Showing posts with label Christmas Blog Hop. Show all posts

Monday, August 9, 2021

Country Craft Creations Homemade for Christmas YouTube Hop


We are having a Christmas YouTube Hop in August, and the designers are cooking up some wonderful projects for you to get your holiday crafting started.

More information will be coming up soon.  Stay Tuned!!

Here’s the lineup for the 2021 Country Craft Creations Homemade for Christmas Hop!
August 27-30, 2021

Subscribe to each designers’ YouTube channel, if you haven’t already and click on the bell so you’ll receive notifications of new videos. PLUS share with your crafting friends & family! We’re going to have a great time getting ready for the holidays!!


Shop for your crafting supplies at Country Craft Creations online store

Saturday, December 8, 2012

ROAR WITH CHRISTMAS PRIDE!

Welcome, welcome, welcome!  You have pounced right into our December Just a Few Friends Blog Hop!!!

We have been busy since November working in our Den's, coming up with the purrrrr-fect Christmas decoration to share with all of you.  I am so glad that you continued your hunt to my blog!  If you just found me while stalking the internet for goodies, please start with Elsa, our Den Mom, and continue on through the hop.  You should have come to my den from RJ's den.  There are so many things to see, I don't want you to miss any of them!  There is a list at the end of the post with the full line up of awesome and talented Pride members that are just waiting for you to arrive!

 The first project I worked on is this Rosette Christmas Tree.  I found the tutorial, and just had to make it!  I used papers from October Afternoon for the tree and DCWV to wrap the little wooden blocks turned presents.  I did the trunk a little different, making it wider and taller, to sit higher over the presents.  I also created a large rosette covered with a doily and another card stock doily to act as a sort of tree skirt/base.
 Here is the cool part...
 I added battery operated LED lights!!!  The switch is in the back, and the lights twinkle and change colors!!!

I had left over papers from the scoring I did, so I made these rosette ornaments.


I adhered snowflakes from Michael's to the front and back, along with rhinestone centers, and used Tim Holtz baubles as little dangles.

But, then as I was sitting with my leftover papers, I spied a bit of "prey" in my paper bin, I pounced, and created a mini album as well!
 This mini album is made out of a large paper bag, that measured 16 1/4" x 9 3/4".  As I was figuring out a way to turn it into a sort of "day album" I took pictures, and will write up a tutorial shortly.  This is the front, using a simple ribbon closure.
 The back of the album.
 As you open the front flap, the sticker greets you.
 Opening the side page you get this.  The pink photo mat is a pocket, with a tag behind for journaling.  The red flap page has a sticker for journaling mounted so that photos can be tucked behind it.
 When you turn the page with the pink mat, you get a blue mat, again with a pocket and tag.  The right of the book has two other pockets housing a red and brown tag.
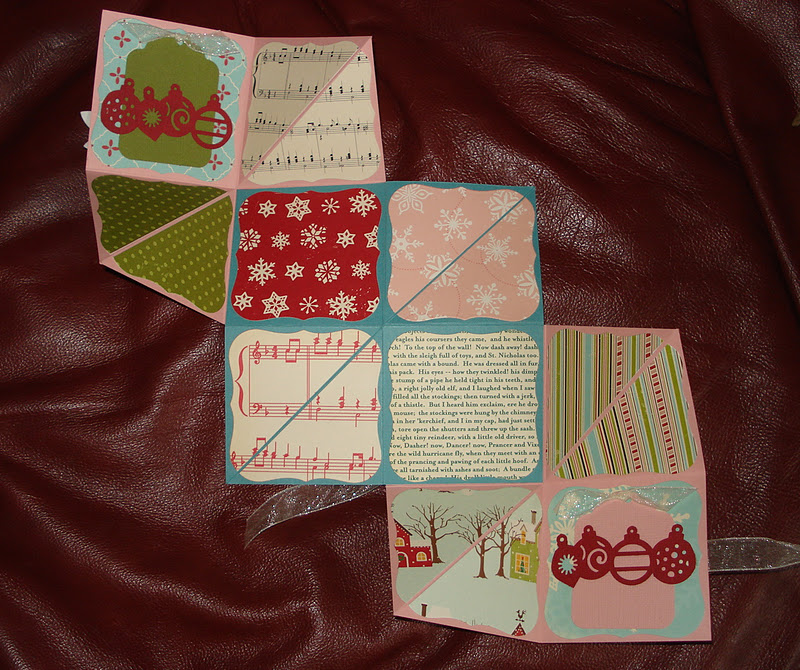
When you flip the red flap up, you get more space with tags and pockets...
 ...When you flip the lower "Gingerbread Man" flap down you get this.  The red page opens...
...and this is the back of the inside of the book!

I got all of this from one bag,  a little bit of card stock, and my leftover patterned papers.   I did use October Afternoon, Bella Blvd, and a bit of SEI.

That's it for my den...I hope you enjoyed your visit!  I will be writing up a tutorial for how I made this book soon, so keep a watchful eye out!  Now please hop on over to the next Den and check out what Sherain has made for you!!!  Leave some love for us, and let us know what you think!!

ROAR WITH PRIDE!!


Jules         http://thejulebox.com


Saturday, December 3, 2011

The Third and Final Day of the BLOG HOP!!!


I have to say a couple of things before I get to my project.  This has been a ton of fun for me and I am soooo honored that Elsa had invited me to participate.  I am overwhelmed with all of the wonderful comments left for me, and I want to say a huge WELCOME to all of our new followers.  This has been such a great experience and I hope to do this again sometime!  Thank you, Elsa!

 I found this plain kraft colored box at my local Craft Warehouse.  I picked it up, actually a couple of months ago, not knowing what I was going to do with it, but when this blog hop came along I knew what it would become.
 I covered it up to look like a present, and added bling to the side ribbons.  I tied a bow for the top, and added two dangling snowflakes.
 The box is closed by magnets.  I covered the insides, and added ornament punched shapes with Stickles to look like the hangers.
 Here is the box fully opened, revealing 4 smaller boxes.
 I decided to put mini albums in each box!
 Here are all of the lids, opened.
 The first album, entitled Winter Wonderland, is a maze book, or also called a meander book.
 I made tags with snowflake punches for the pulls.
 The second book is a take on the "Never Ending Mini Album" that I have done in the past, except this time I used just a piece of cardstock instead of envelopes.
 Some views of the book.  I used a belly band to close it.
 For some of the pages I made library card type pockets and put tags in them.


 The third book bound up with ribbon...
 ...Titled Happy Holidays...
 ...is an exploding album!  This is the front...
 ...here's the back.  I added punches of ornaments and glued them on the sides only so that tags could be placed behind them.
 The last book is an envelope book, the envelopes made from cardstock.  I closed it with bakers twine that I wrapped around the album and then around the poinsettia, much like you would do those envelope closures.
 The envelopes are adhered alternately by the "flaps".  I added die cuts from a Spellbinders die to them for added picture space.
 Each of the 6 envelopes has a tag inside for more pictures or journaling.  This is the front of the book...
...and the back of the book.

I hope you enjoyed this project!  I had a wonderful time making it!!!  The papers used are from October Afternoon, and I used a variety of punches from EK Success, Fiskars, and Martha Stewart.  The bling is Recollections.

OK, time to go see what Tmika has done for her third project!

Just in case, here is the lineup, one more time...


 Michelle- http://creativeoperation.blogspot.com  <--- you are here

Friday, December 2, 2011

Tis the Season Blog Hop DAY TWO!!

I decided for my second project to move away from an album and do some decorations for my tree.

I made a set of 6 rossette ornaments using a variety of things.  The papers are DCWV, the charms and the showflakes are from Michael's in their "ornament making section", and then I added ribbon for hanging and rhinestones.
I made them so that they are double sided, incase they wiggle around on the tree.
 For each of them I used a strip of medium blue, and used an edge punch on it.  This punch also gave me the holes that I used to attach the ribbon and the dangle.  I made two rosettes out of light blue, one for each side.  I used the 1" white circles to finish the rosettes.  The dark blue punched shapes provided the background for attaching the showflakes.  Then, I added the rhinestones to the middle of the snowflakes.  I used hot glue to adhere everything.
They turned out soooooo cute!

I think I need to make some more of these, I love how they turned out!

Now please head over to Tmika's  site and see what she's cooked up for today!

Remember, this all starts with Elsa...Here's the lineup if you got here by chance or got a little lost!


Thursday, December 1, 2011

WOO HOO! IT'S A CHRISTMAS BLOG HOP!!!

Welcome to the TIS THE SEASON TO HOP!!  I have been invited to join a bunch of talented ladies to share with you some awesome Christmas themed projects. 

Here's the plan...We will be hopping for three days from the 2nd through the 4th of Dec.  Some of the ladies in the hop will offering Candy so look out for those neat gifts...also make sure you become my follower and comment all 3 days of the hop on all the participating blogs in order to win the Candy Elsa will be giving away on her blog.

We hope to inspire you to create and give homemade gifts and cards this year. 

If you arrived here by chance please go back to the beginning at Elsa's blog, Just a Few Designs.

For the first day of our hop, I made a Christmas themed Junque Journal...Yes, I made another one, but this one ROCKS!!   I was able to make something new out of my old supplies....A STASH BUSTER!  That will help make room for all of the new goodies Santa is going to leave under the tree, right?!
I went through my stash of old Christmas papers and goodies and created this junk journal.  I called it "Christmas Junque".  It could be used for a December Daily type of journal.  All of the supplies were in my stash.  I bought nothing to make it!  I cut the ornaments with the Sizzix die, and elevated them with foam tape.
 I used old charms, made a charm (Santa), and even attached a "button" (the tree) as dangles.
 I made four "sections", each starting with a pocket page.
 I kept to a green/red/brown color theme throughout.
 This tree is flocked!

 Some of these papers are so old I don't know who made them.
 I used stickers to embellish some of the papers, others needed nothing.

 I used some papers to make envelopes, and created closures with a circle punch, a brad and some twine.

 Aren't these papers delicious?

 I didn't do a lot of embellishing in the book, because I wanted to add my "junque" to it.

The big pocket pages also house two HUGE tags in the middle!  

So, what are you waiting for...Go and get your stash out and make yourself a Christmas Junque Journal!

Thank you so much for stopping by!  Come back tomorrow and see what I have in store for you!  

Next, please hop on over to Tmika and see what crafty goodness awaits!

Stay Crafty My Friends!