WELCOME!!

We are so glad you are here! We love making and sharing our projects, and we are excited to have you visiting our site. Please leave us a comment and let us know what you think!

Jackie and Michelle

Followers

Showing posts with label upcycle. Show all posts

Saturday, May 28, 2022

Altered Mini Brag Book, a Design Team Project Share for Country Craft Creations


Hi, and welcome back. This is a design team project I want to share that I think is a great way to use beautiful papers to upcycle found mini albums. I'm using the papers "Our Graduate" (and exclusive paper collection from Country Craft Creations) and "Timeless" (a paper collection from Authentique). I have used a variety of products, and I'll list their links below. Thanks for watching, and stay crafty! 

Please visit Country Craft Creations, you will love this store! 

Our Graduate paper collection Artisan Cardstock, I used Black, Pearl Sheen Natural and Pearl Sheen Gold Gold Mirrored Paper Seam Binding, I used Black

Art Glitter Glue Scor Tape Foam Tape Flowers and eyelets came from my stash.

Saturday, October 8, 2016

My Vintage Halloween Crow

 Oh yes, I am into the vintage thing this year.  I love how this turned out!  I loosely followed a tutorial by Tangie Baxter.  You can find the whole tutorial here.  There are printables available, but I didn't use them.  I didn't even look at them.  I did, however, use the instructions to make the collar.
 The crow is from Michaels.  The box is a cigar box that my friend gave me several years ago.  I was saving it for the perfect project.  Taa Daa!!!  I made the collar with papers from Echo Park, "The Apothecary Emporium" and used some paper tags from the leftovers from the Collections Box that I shared with you a couple days ago.
 The flowers are from Recollections, the ribbons are also Recollections.  I added moss to the bottom to help cover the wire that keeps the crow upright.  The pumpkins, the bottle inside the box, and the skull pendant are all by Tim Holtz.  I also used some distress ink by him as well.

I am not sure where the skull came from, but it is a bead that I just love and use them a lot in my Halloween stuff!

Thanks for stopping by.  Stay scary, my friends!!

Saturday, September 24, 2016

My Mini Desk Caddy Project

 I Got a little bored one day and I decided to make a project.  I decided to do a little recycling and some stash busting and create a mini desk caddy to organize things while I am doing a project.  I also decided to show you all how I did it.  I had these Crystal light boxes and the leftover papers and stickers from a class I took at a Creating Keepsakes Convention by Farm House, and thought that this would work great.
 I first glued the boxes together and then used Washi to cover the edges.
 I cut the papers so that all of the corners would be covered.  I measured and then added extra for tabs to wrap around the boxes.  This added more structure and support to the boxes.

 I also made a chipboard base to put on the bottom of the box.

 Then I decorate with the leftover stickers and chipboard die cuts that I had.  
 It turned out super cute, and as you can see, it holds a lot of big and heavy stuff!
 Very cool, huh?
 It just took me a little time, but was fun and easy.  I am going to use it during projects.  I tend to have a mess on my desk when I am actively working on a project, this will help contain the mess a little more!

Stay crafty, and organized, my friends!


Wednesday, April 15, 2015

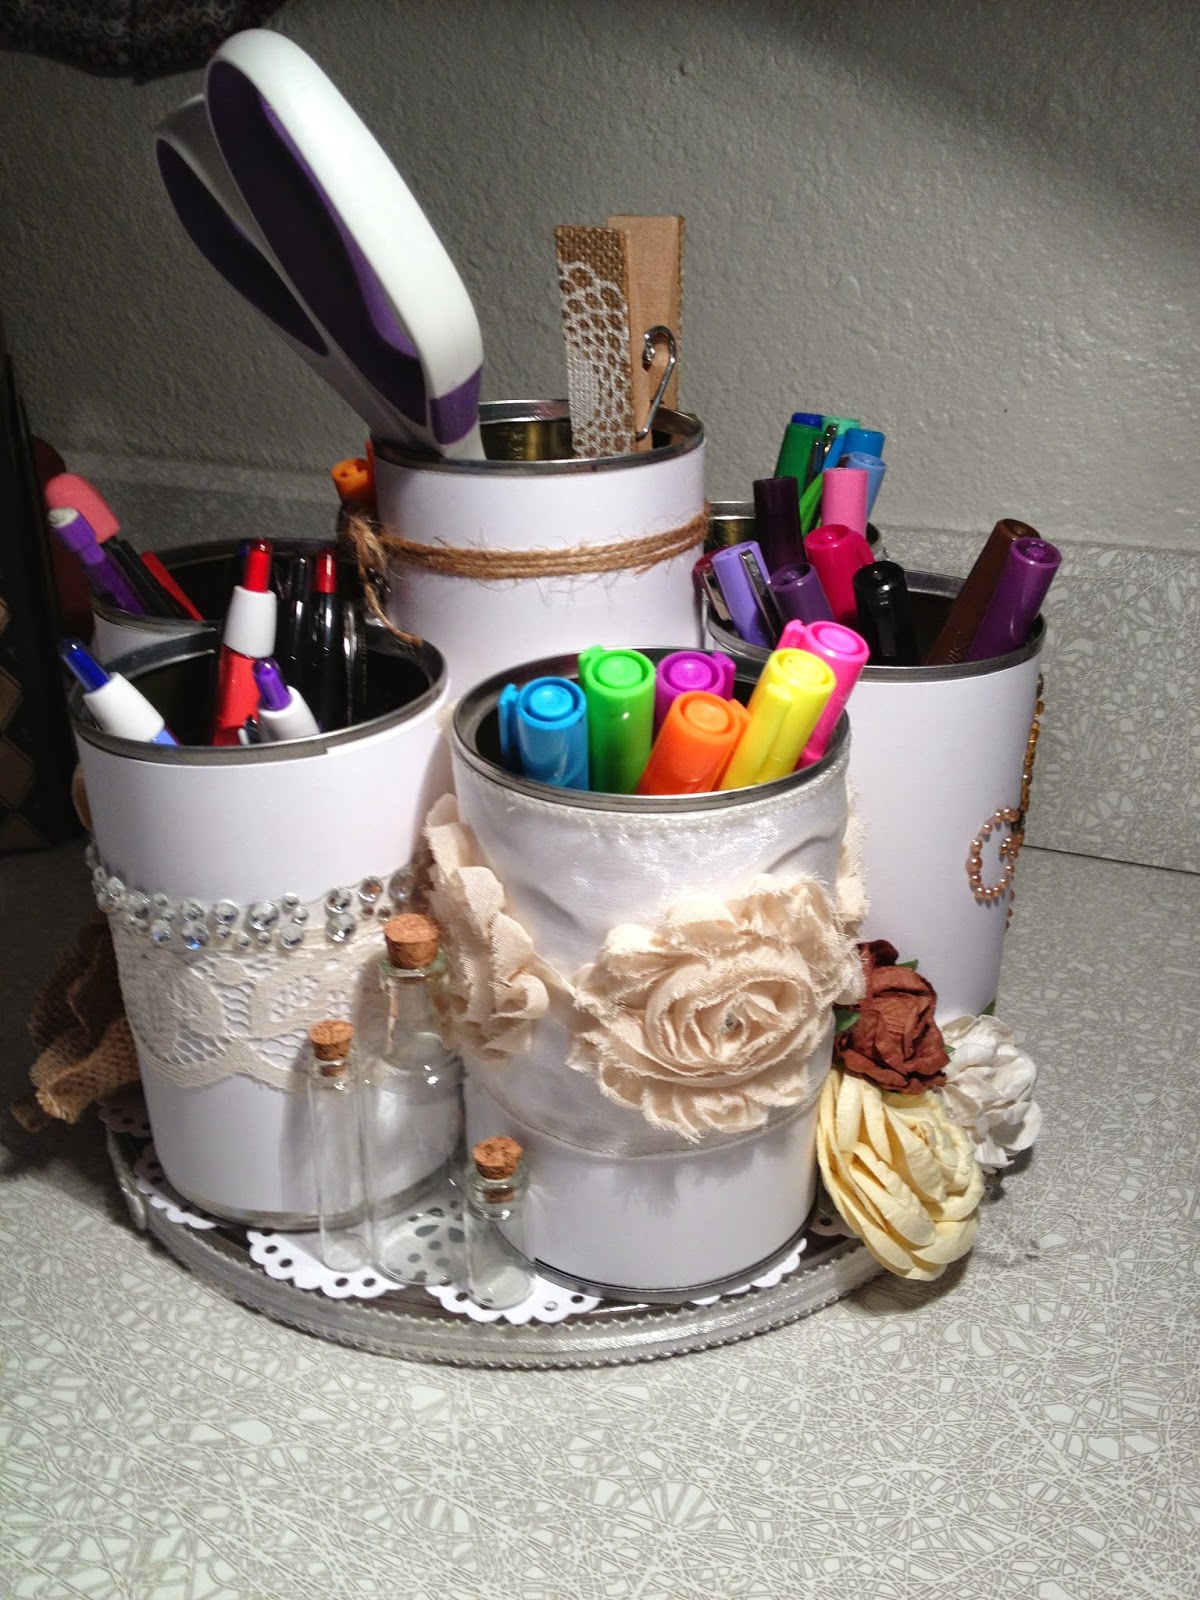
My Upcycled Can Lazy Susan

 Here is my version of a tin can organizer.  Because of a recent illness, I have been restricted on what I can eat, so I have, unfortunately been eating a lot of soups.  I had an abundance of cans, and decided to make an organizer for my recipe area in my office.
 It has 7 cans total.  The middle can is elevated on a ribbon spool to make it taller than the rest.  I covered them all in plain white card stock, then I went stash shopping and just decorated the heck out of it.  I had a plastic lazy susan in my stash, and used that as the base.  I punched a paper doily to put on the top of it, and wrapped ribbon around the bottom edge.
The stuff I used to decorate this ranges from Prima flowers to Tim Holtz bottles, to various ribbons from my stash.  I used Recollections bling as well.  I LOVE how it turned out, and it will be really helpful when I sit down to cut out coupons or recipes, or to make labels for the mixes that I make on a regular basis for my cooking.  I have all of my most commonly used tools right there at my fingertips.

Stay crafty, and organized, my friends!

Friday, December 16, 2011

An Upcycled Recipe Index System

 I love to cook, and I have collected a ton of recipe books, as well as the clippings and printouts from the internet.  I recently decided that I needed a system of indexing my collection.  When I find a recipe I like, I flag it in the book.  That seems like a great idea, until you can't remember which book that particular book was in.  So, I need one place where I can write down the recipe name, and where it is, so that I can find them easier.  I found this huge book at the Goodwill for 3 bucks!  This is perfect.
 Just wanted to show you the pictures in the book...these come into play later.  I found the binder mechanisms at a scrapbook show for 50 CENTS EACH!  I grabbed up several of them, and this project is a perfect opportunity to use them.  I wanted to be able to add and remove pages from my index as needed.
 I didn't have the screws and acorn caps to attach the binder mechanism to the book.  So, after removing the pages of the book, and figuring out where the holes needed to be, I punched the holes, and used these brads that look like screws...
 I used hot glue under the mechanism where the brad would come through, then glued it down, and then set the brad.
 Then I had these little baubles that are perfect to glue over the tines of the brad to cover them and give a finished look.
 After I took out the pages of the book, I covered the spine with another piece of chipboard to strengthen it, then covered that with one of the books index pages.  I added a mechanism to the left and to the right sides of the book...
 The rings are not very big, and I wanted to be able to have as much space as I could, so I made a double-three-ring-binder!  I did have to cut the pages a bit to make them fit, but the filler paper is still 10" tall by 6 1/2" wide.  I got the paper with the reinforced hole edge, because I wanted the pages to be able to take some wear-and-tear.
 It closes perfectly!
 I tore out all of the pictures of the book, and used them for divider pages.
I punched out tabs from the index pages, then used scraps of manilla folders to punch out labels, and wrote all of the categories I wanted for my index.
I then rummaged through my stash and came up with this little bit of dangle for the spine.  I looped them though an eyelet that I set in it.

Well, what do you think?  Now I have to just sit and add my recipe names to my index, and remember to keep it up, and I will never spend an hour trying to find that perfect cocktail sauce recipe ever again!

Stay Crafty My Friends!